background image

41

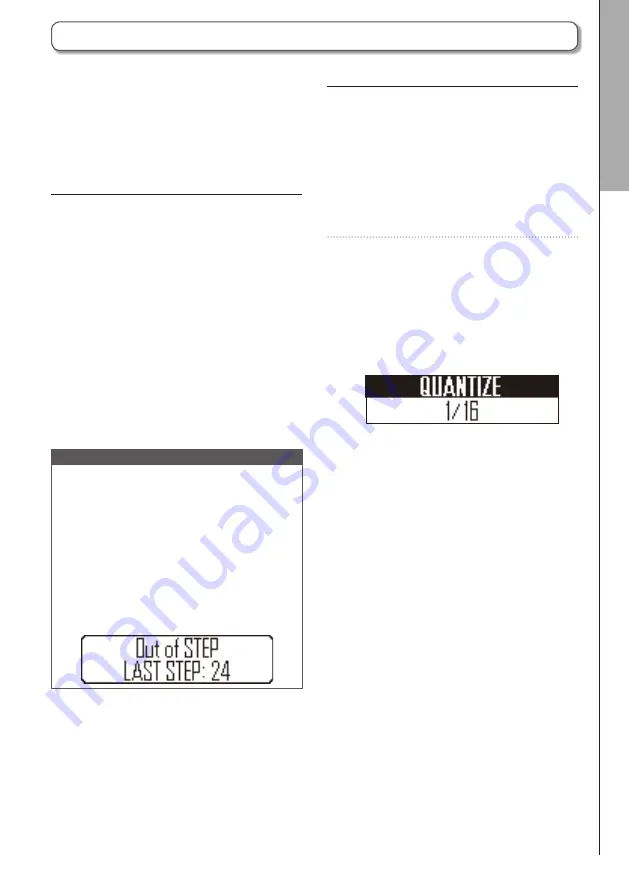
Quantization setting

This sets the shortest note length that can be 
input into the sequence.
This sets timing correction during real-time input 
and when input can occur during step input.

1. 

Press 

F

2. 

Press 

0

-1 to 

0

-8 to set the 

quantization value.

This can be set to OFF, 1/32, 1/16T (16th 
note triplet), 1/16, 1/8T (8th note triplet), 
1/8, 1/4 or 1 BAR.

Pattern settings include Auto Save, Quantize, 
Bar length, and Swing, as well as Ring Controller 
Accelerometer parameters.
These settings are saved separately for each 
pattern.

Changing the last step position

You can change the last step in the STEP key 
cycle on the Base Station.
For example, you can create patterns in triple 
time by setting the cycle to 24 steps.

1. 

While pressing 

L

, press the 

0

 that corresponds to the 

number you want to set as the final 
step.

This can be set between 1 and 32.

NOTE

• 

If the Last Step is less than 32, sequence 
data up to that step will not be cleared.

• 

If the QUANTIZE setting is 1/32 or 1/16T, one 
step will be 1/32nd of a bar. If the Step set-
ting is 1/16 or 1/8T, one step will be 1/32nd 
of 2 bars. So, the timing change when setting 
the Last Step will be different.

• 

When inputting steps, instruments and notes 
can not be input after the last step.

PA

TTERN mode

Making patter

n settings

Making pattern settings

Summary of Contents for ARQ AR-48

Page 1: ...Aero RhythmTrak A Operation Manual 2017 ZOOM CORPORATION Copying or reprinting this manual in part or in whole without permission is prohibited...

Page 2: ...overview 48 Editing instruments 50 SONG mode SONG mode overview 57 Operation overview 60 Creating songs 61 Song settings 65 Managing songs 67 REC PLAY area REC PLAY area overview 70 Motion sequences...

Page 3: ...d batteries Do not use new and old batteries together Do not use batteries of different brands or types together Remove the batteries when the unit will not be used for a long time If a leak occurs th...

Page 4: ...ical Electronics Industry AMEI Ableton and Ableton Live are trademarks of Ableton AG Other product names registered trademarks and company names in this document are the property of their respective c...

Page 5: ...l not occur in a particular in stallation If this equipment does cause harmful interference to radio or television reception which can be determined by turning the equipment off and on the user is enc...

Page 6: ...ller and the Base Station can be connected wirelessly with Bluetooth LE Power consumption is low so use for long periods of time is possible Use as a MIDI controller possible The Ring Controller can b...

Page 7: ...You can perform while listening to the input from a connected device and capture input sounds to use as sound sources Loading of audio files possible You can use a computer to save WAV files on an SD...

Page 8: ...unds to occur in 16th note intervals This length can be changed in the settings Sequence A sequence is performance data that records the timing when various sounds are played With the A you can input...

Page 9: ...C button AUDIO CAPTURE button MOTION SEQUENCE button AUTO SAVE button Selection encoder Sound parameter knob 1 Sound parameter knob 2 Display Effect type knob Effect ON button COPY button NEW button E...

Page 10: ...ack Power connector MIDI OUT jack OUTPUT jacks AUDIO INPUT jack Front BTA 1 connector SD card slot Ring Controller connection port USB port Headphone jack Overview Names of parts Names of parts contin...

Page 11: ...FECT button SPLIT button SOLO button ARPEGGIATOR button POWER LED BATT LED GRIP button PAD SCALE button MUTE button PLAY PAUSE button Side Power button Touchpads Side USB port Side BTA 1 connector Ove...

Page 12: ...nd play it like an instrument You can also connect it by USB or Bluetooth LE to a Mac computer or iOS device and use it as a MIDI controller P 96 NOTE BTA 1 units sold separately are necessary to conn...

Page 13: ...assigned to pads Parameters related to the instrument are shown on the display SEQUENCE area Use to set the tempo and other sequence parameters The display shows pattern and song names REC PLAY area...

Page 14: ...input instruments one step at a time to create patterns 1 2 3 30 31 32 1 Sequence steps 2 3 30 31 32 Playback position During playback of a pattern or song for example the STEP key LEDs light green a...

Page 15: ...fferent patterns can be assigned to each pad allowing you to tap the pads to change and play back patterns Pattern HINT Since input procedures differ for each mode see the explanation pages for each o...

Page 16: ...ng Con troller for details P 82 Grip area You can set a grip area that does not respond to touch in order to prevent pads from being pressed unintentionally when using the Ring Controller separately f...

Page 17: ...T Audio source for capture Sound module synthesizer or other MIDI device Computer USB connection Headphones AC adapter DC IN Mixer audio system or other playback device A Overview Connecting other dev...

Page 18: ...input Real time input Record a performance as a pattern by playing the pads in real time Step input Record instrument sounds one step at a time to create patterns Use SONG mode to create songs In SONG...

Page 19: ...s instruments can be assigned to the 16 pads and used to perform This layout is especially useful for playing drum sets but other instruments can also be assigned in the same way The note pitch that s...

Page 20: ...e Station or a computer by USB it will automatically turn on and operate on USB bus power When operating on USB bus power the Ring Controller POWER LED will light red and W will be disabled When using...

Page 21: ...charge is less than 10 Changing the Ring Controller batteries The Ring Controller can be powered by two AA batteries 1 Turn the Ring Controller off 2 Unlock and remove the battery compartment covers T...

Page 22: ...f no SD card is loaded in the A cap tured data cannot be saved and patterns and songs that are created cannot be backed up When inserting an SD card be sure to insert the correct end with the top side...

Page 23: ...is cannot be used if there are already 16 characters Select DEL to delete that character and move all those following one to the left 4 To end editing turn H to select OK and press h HINT The followin...

Page 24: ...real time to create patterns With this input method each pad on the Ring Controller corresponds to a single instrument PAD layout or note SCALE layout P 19 PAD layout SCALE layout 1 2 3 4 5 6 7 8 9 10...

Page 25: ...truments Realtime input loop playback Instrument 16 Creating patterns in SCALE layout After selecting an instrument start real time input and tap pads to input their notes The pattern will start loop...

Page 26: ...ars at a time when the smallest step is a 16th note Bar 1 Bar 2 Instrument Bar 1 Bar 2 If the pattern is longer than two bars the Base Station display will switch every two bars when the smallest step...

Page 27: ...rument use the Base Station 0 keys to input the sequence for that instrument This method allows you to quickly switch between and input multiple instruments 1 15 2 16 3 While pressing a pad for an ins...

Page 28: ...ly selected instrument Number of currently selected instrument SOUND display SEQUENCE display Currently playing bar Pattern number Parameter 1 Parameter 2 Pattern name PATTERN mode PATTERN mode overvi...

Page 29: ...put End real time input Press R to enter standby and press P to start real time input In PAD layout tap the pads of instruments to input them in time with the pattern that is playing back in a loop In...

Page 30: ...nd parameter that you want to edit 3 Use and to adjust sound parameters HINT Editing sounds P 48 One pattern can use up to 16 instruments Set the tempo 1 Turn T The tempo can be set from 40 0 250 0 BP...

Page 31: ...sounds without recording the performance Input a pattern 1 Press R R lights showing that recording standby has started 2 Press P This starts the precount After the precount completes you can input ins...

Page 32: ...select the bars to input 2 CONTROLLER Press the pad for the instrument to be input The SEQUENCE display will appear as shown below The velocity that the pad is tapped will be recorded in the step 3 To...

Page 33: ...step 2 tap the pad to input The tapped pad will light brightly The tapping velocity is also recorded in the step 1 15 2 16 3 5 To clear an input instrument tap the pad again The tapped pad will light...

Page 34: ...and P blinks 3 Press S to stop playback P becomes unlit when playback stops HINT When a pattern has 3 or more bars B and b will automatically switch during playback Press a 0 to start playback of the...

Page 35: ...ress and hold the pad for the instrument you want to clear In SCALE layout press and hold the pad for the note you want to delete The sequence performance data will be deleted while the pad is being p...

Page 36: ...multiple pads will trigger multiple instruments in order By pressing chord tones in SCALE layout the notes in the chord can be played back one at a time Operation procedures 1 CONTROLLER Press A The...

Page 37: ...d just once without repeating If multiple pads are pressed at the same time they will sound at the same time repeat edly Up If multiple pads are pressed at the same time they will sound in order from...

Page 38: ...ess S to stop sequence playback 2 Press C This opens the CLEAR SEQUENCE screen on the SEQUENCE display Press C again to cancel HINT Press z if you want to erase all pattern data including instruments...

Page 39: ...e count to 1 8 or SPECIAL HINT When Special is selected the count will sound as follows Metronome settings Make settings related to the metronome that plays back as a guide during recording Turning ME...

Page 40: ...truments assigned to the Ring Con troller decreases While pressing L use H in the SEQUENCE area to set the number of assigned instruments to 8 4 2 or 1 2 To cancel this split setting press L again Whe...

Page 41: ...p position You can change the last step in the STEP key cycle on the Base Station For example you can create patterns in triple time by setting the cycle to 24 steps 1 While pressing L press the 0 tha...

Page 42: ...when QUANTIZE is set to 1 16 When QUANTIZE is set to 1 16T or 1 8T instruments and notes cannot be input at steps 4 8 12 16 20 24 28 or 32 Quantize set to 1 32 8 steps 1 beat 1 cycle 1 bar Quantize se...

Page 43: ...te function is activated NOTE The solo and mute functions can only be used in PATTERN mode with PAD layout Soloing You can solo the playback of just the selected instrument 1 CONTROLLER While pressing...

Page 44: ...w to cancel and return to the Home Screen Copying and swapping instruments 1 CONTROLLER Tap the pad for the instrument to be copied or swapped 2 Press w The destination for copying swapping the instr...

Page 45: ...g sequences and pattern names Erasing instruments 1 CONTROLLER Tap the pad for the instrument to erase 2 Press z The instrument to erase appears on the SOUND display HINT You can tap a different pad t...

Page 46: ...se H in the SEQUENCE area to select OK and press h to confirm the name change Changing instrument names 1 CONTROLLER Tap the pad for the instrument with the name to change 2 Press x The instrument wit...

Page 47: ...area to select the character to change and press h Press y to cancel and return to the Home Screen 3 Use H in the SEQUENCE area to change the character and press h 4 Use H in the SEQUENCE area to sel...

Page 48: ...s loaded from the SD card For information about these sound parameters see the Oscillator list P 106 Oscillator pitch modulation The oscillator pitch can be altered with an envelope or LFO Noise can b...

Page 49: ...The panning can be altered with an envelope or LFO These set the amounts sent to the master effect Volume modulation The volume can be altered with an envelope or LFO This sets the pad color and light...

Page 50: ...per Locrian MajBLUES Major Blues MinBLUES Minor Blues DIMINISH Diminished COM DIM MajPENTA Major Pen tatonic MinPENTA Minor Pentatonic RAGA 1 Bhairav RAGA 2 RAGA 3 ARABIC SPANISH GYPSY MinGYPSY Minor...

Page 51: ...and press h NOTE When an audio file is selected as an oscillator the filter and other parameters will be reset to default values Setting the glide Glide When a different note is triggered the pitch ca...

Page 52: ...ded as instruments on the A is 6 minutes or 12 minutes if mono For exam ple if a one minute stereo audio file has been added the total length of additional audio files that can be added as instruments...

Page 53: ...s emphasizes low frequencies Talk Filter TALK This effect creates a sound like a human voice 3Band Equalizer 3BAND EQ This is a three band equalizer Ring Modulator RING MOD This effect creates a metal...

Page 54: ...This can be set from 0 to 100 Filter The frequency and other parameters can be set for the filter Type TYPE You can change the filter type Peaking Filter Peaking This filter emphasizes a specific rang...

Page 55: ...can be set from 0 to 100 When set to 0 the master effect will not be used Output mixer OUTPUT This sets the panning stereo position and level Panning Pan The left and right output level balance can be...

Page 56: ...he set MIDI channel during pattern playback This can be set to OFF or from 1 to 16 The A can output sounds for note numbers 0 108 NOTE The A cannot record MIDI messages received by USB as a sequence L...

Page 57: ...t Real time input The pads on the Ring Controller are assigned 16 patterns You can change the patterns assigned to each pad Tapping a pad starts playback of its assigned pattern After completing prepa...

Page 58: ...ck Pattern 1 will play for 4 bars STEP key Pattern 1 Song sequence Add the next pattern for playback Pattern 2 will play for 4 bars STEP key Pattern 1 Pattern 2 HINT During playback of a completed son...

Page 59: ...ently selected instrument Number of next pattern Number of currently playing pattern Parameter 2 Parameter 1 HINT Tempo appears on the SEQUENCE display only when SONG TEMPO is ON P 65 When song playin...

Page 60: ...assign to the pad P 65 1 Start real time input Creating songs End real time input Press R to start real time input Tap pads for patterns to play them and add them to the song in real time Press S to...

Page 61: ...corded Pattern changes over this amount will not be recorded 4 Press S when done playing all patterns This ends song creation Preparations Enter the mode 1 Press Z Selecting songs Select a song to inp...

Page 62: ...handled in step intervals For example if patterns 1 4 are added in order the song sequence will have four steps and the pat terns will be assigned to 0 1 2 3 and 4 Pattern 1 4 bars playback Pattern 1...

Page 63: ...dded at the current step will be deleted and patterns after it will be moved forward Pattern 1 Pattern 2 Pattern 3 DELETE STEP Selected step Page 2 Set the playback length in beats BEAT Page 2 Set the...

Page 64: ...will cause the song to play back from that position The song will stop after patterns have played to the end As in PATTERN mode 16 instruments are assigned to the pads During song playback you can us...

Page 65: ...hether each pattern uses its own tempo setting or all patterns use the same tempo when playing a song 1 Press F 2 Press 0 13 LED lit SONG TEMPO ON Patterns in the song will play back at the same tempo...

Page 66: ...en the quantize selection screen 3 Turn in the SOUND area to change the timing Select OFF 1 32 1 16T 1 16 1 8T 1 8 1 4 1 2 1 BAR or 2 BAR If OFF is selected the pattern will switch as soon as the pad...

Page 67: ...Press w to cancel and return to the Home Screen Copying swapping patterns assigned to pads 1 CONTROLLER Tap the pad with the pattern to be copied swapped 2 Press w The destination for copying swappin...

Page 68: ...eturn to the Home Screen 4 Use H in the SEQUENCE area to change the character and press h 5 Use H in the SEQUENCE area to select OK and press h to confirm the name change Erasing songs 1 Turn H in the...

Page 69: ...rea to select the character to change and press h 3 Use H in the SEQUENCE area to change the character and press h Press y to cancel and return to the Home Screen 4 Use H in the SEQUENCE area to selec...

Page 70: ...depends on the selected mode and the statuses of other but tons For details see the explanation pages for each operation Motion sequences You can adjust the parameters of instruments and effects whil...

Page 71: ...d as an instrument For details about this function see Capturing audio P 74 Automatic saving Use v to change the automatic saving setting When AUTO SAVE is ON changes to patterns are automatically sav...

Page 72: ...that a parameter is operated If a parameter that has already been recorded is operated again the new data will overwrite the old 5 Press s or S when done recording You can adjust the parameters of ins...

Page 73: ...clear and press h This opens a confirmation screen 4 Use H in the SEQUENCE area to select YES and press h This clears the sequence Recording motion sequences step by step 1 Stop or pause pattern playb...

Page 74: ...ed on the SD card Be aware that you will not be able to use the captured recordings if you remove the SD card or replace it with a different SD card The maximum length of captured record ings and audi...

Page 75: ...o can be captured When capturing press C when you want to stop capturing If the input level is too high c will flash rapidly Lower the volume of the connected device or the input level P 84 Turning ef...

Page 76: ...ured recording and save it on the Capture Setting screen that opens P 76 If automatic stopping is on capturing will stop automatically and the capture set ting screen will open Adjusting and saving ca...

Page 77: ...o make more time available remove already assigned captured recordings and other audio files or shorten intervals between start and end points At this time it is still possible to just save to the SD...

Page 78: ...Press v v lights and AUTO SAVE is turned ON 2 Press v again to turn automatic saving off v becomes unlit and AUTO SAVE is turned OFF NOTE The automatic saving function cannot be changed when in SONG...

Page 79: ...79 In the EFFECT area a master effect can be applied to the overall output during the playback of pat terns and songs EFFECT area EFFECT area EFFECT area overview EFFECT area EFFECT area overview...

Page 80: ...effect OFF A variety of types of master effects are available Changing the effect type 1 Use t to change the effect type The LED for the selected effect will light NOTE The effect type cannot be reco...

Page 81: ...pendix for details about effect parameters P 117 1 Turn 1 and 2 to adjust the desired parameters The current setting values are shown on the SOUND display If the the knob position does not match the p...

Page 82: ...set based on the grip area position Do not hit the Ring Controller with excessive force Assigning parameters 1 While pressing F press 0 24 This opens a screen where X and Y axis parameters can be assi...

Page 83: ...02 SOUND Knob1 Parameter 1 shown on the SOUND display for instrument 02 02 SOUND Knob2 Parameter 2 shown on the SOUND display for instrument 02 16 SOUND Knob1 Parameter 1 shown on the SOUND display f...

Page 84: ...d to other MIDI devices by USB 1 While pressing F press 0 30 External clock is selected when 0 30 is lit NOTE When external clock is selected songs cannot be recorded When the CLOCK MODE is set to INT...

Page 85: ...ing Controller update screen P 102 Setting the display contrast The display contrast can be adjusted 1 While pressing F press 0 32 The SOUND and SEQUENCE displays show their own contrast settings 2 Tu...

Page 86: ...roller can be restored to their factory default settings Base Station NOTE Restoring settings to their defaults will erase everything you have created including pat terns and songs Save them to an SD...

Page 87: ...velocity 0 or a note off message When Message Type is set to CC pressing a button will send the CC number set by Number at a value of 127 Releasing the button will send it at a value of 0 If the Ring...

Page 88: ...differences could occur with the values sent by the A if the controlled parameters are changed in the DAW When Type is set to Relative the value set by Dec Number is sent when the knob is turned coun...

Page 89: ...r choose only some data Backing up data 1 While pressing F press 0 25 The backup type selection appears on the SOUND display and a confirmation message appears on the SEQUENCE display SOUND display SE...

Page 90: ...song sequences will not be loaded If the current pattern data is different from the data at the time of backup also load the pattern data used by the sequence In order to load song data later you mus...

Page 91: ...NOTE Before using SD cards that have just been purchased or that have been formatted on a computer they must be formatted by the A Be aware that all data previously saved on the SD card will be delete...

Page 92: ...d performance You can test whether an SD card can be used with the A A basic test can be done quickly while a full test examines the entire SD card 1 While pressing F press 0 28 A test method selectio...

Page 93: ...press F Exchanging data with computers By connecting the A with a computer you can check and copy data on the SD card loaded in it Connecting 1 While pressing F press 0 29 This puts the A into card r...

Page 94: ...PCM_002 WAV DATA0001 ARD DATA0002 ARD pattern name 2 PAT pattern name 1 PAT Backup files all data for patterns and songs Backup files data for single patterns Captured audio files and files used as in...

Page 95: ...by USB will automatically pair them Ring Controller and Base Station connection and disconnection Connection methods The Base Station and a Ring Controller use a USB connection to communicate If BTA...

Page 96: ...e P 87 When the Ring Controller is connected to a computer the pads will light white When pressed they will light blue You can changed the colors that the pads light by sending MIDI messages from the...

Page 97: ...OS device by Bluetooth LE using a BTA 1 sold separately and use it as a MIDI controller HINT When waiting to be connected the Ring Con troller pad LEDs show an animation and the BTA 1 BLE LED blinks N...

Page 98: ...2 AA batteries in the Ring Controller P 21 2 Turn the Ring Controller on This puts the Ring Controller into con nection standby 3 Launch an app that supports MIDI over Bluetooth LE on the iOS device 4...

Page 99: ...l not respond to use HINT If a grip is detected and 1 second passes it will be set automatically When the grip area is set the G LED will light Disabling the grip area setting 1 CONTROLLER Press G All...

Page 100: ...ecording or playback Automatic powering off AUTO OFF You can set the Ring Controller to turn off automatically Setting Function 2min When using batteries automatically turn off when not operated for 2...

Page 101: ...there is a master compressor that can be used to increase sound pressure 1 While pressing F press 0 15 When 0 15 is lit the master compres sor is enabled NOTE The master compressor setting is saved se...

Page 102: ...by Bluetooth LE but connection using a USB cable is necessary to update 2 Press h in the SEQUENCE area This will start the update The product firmware can be updated to the latest versions Update fil...

Page 103: ...mpletes press h in the SEQUENCE area The Ring Controller will automati cally restart and operate with the new firmware Updating the Ring Controller manually Manually updating is possible if an update...

Page 104: ...lot of noise Confirm that nothing is wrong with the audio cables Use a genuine ZOOM AC adapter Effects are not working Confirm that the effect send levels of instru ments are set correctly The Ring Co...

Page 105: ...X 10 8 or later Minimum specifications Chipset that includes USB 2 0 as standard Intel Core i3 or faster CPU Type A USB 2 0 MIDI class operation For Ring Controller connection Ring Controller Sensors...

Page 106: ...hno Kick O TechHouse Kick O Kit707 Kick X Kit808 Kick O Kit909 Kick O Trap Kick O TrapMe Kick O TribalHouse Kick O Category Instrument name LOOP SNARE Instrument color 31 2Step RS X 2Step Snare BigBea...

Page 107: ...ick Hat HardHouse Hat Standard OpenHH HipHop CloseHH HipHop OpenHH House CloseHH House OpenHH Minimal CloseHH Category Instrument name LOOP HI HAT Instrument color 30 Minimal OpenHH X HR HM CloseHH HR...

Page 108: ...ca X OpenSurdo X OpenTriangle X OrganicPrec X Lo Pop O PlasticLid X Hi Pop X Quijada X Quijada Hit X RimPercussion X Riq Doum X Category Instrument name LOOP PERCUSSION Instrument color 2 Riq Pa X Riq...

Page 109: ...Rave X LeadDirt X LeadDrop X LegacyChord X Category Instrument name LOOP PCM SYNTH Instrument color 14 LowTech O MetalicPad O PartyChord X PlasticTube O PumpChord X RaggaTone O RaveLead O RaveStabLead...

Page 110: ...are marked O for LOOP Audio File Page Parameter 1 Parameter 2 2 PITCH REVERSE 24 00 24 00 ON OFF 3 LAUNCH ONE SHOT GATE TOGGLE Synth Page Parameter 1 Parameter 2 2 OSC1 TYPE OSC1 PITCH SAW SQUARE PULS...

Page 111: ...lock Page Parameter 1 Parameter 2 1 TYPE LEVEL OFF WHITE PINK 0 100 This is not shown in some parameter combinations Noise level modulation NOISE LEVEL MOD block This is shown when the NOISE block TYP...

Page 112: ...50 0 100 Note See Tempo sync parameters for details about setting values P 117 These parameters can be controlled by the EFFECT MOD block Effect parameter modulation EFFECT MOD block This is shown wh...

Page 113: ...EPTH OFF LFO1 LFO2 ADSR PRESS 100 100 This is not shown in some parameter combinations LFO Page Parameter 1 Parameter 2 2 TYPE RATE SAW SQUARE PULSE SINE TRI RANDOM 1 100 Type 1 3 PULSE WIDTH 1 99 Not...

Page 114: ...N RELEASE 0 100 0 100 Output mixer OUTPUT block Page Parameter 1 Parameter 2 1 PAN LEVEL L100 R100 0 100 Pan modulation PAN MOD block Page Parameter 1 Parameter 2 1 SOURCE DEPTH OFF LFO1 LFO2 ADSR PRE...

Page 115: ...1 Parameter 2 1 AMOUNT 0 100 LED setting block Page Parameter 1 Parameter 2 1 COLOR ANIMATION OFF 1 32 OFF MOIRE FIREWORK CROSS CIRCUIT RAINBOW MIDI setting block Page Parameter 1 Parameter 2 1 CHANN...

Page 116: ...AN Hawaiian MIXOLYDN Mixolydian PELOG Pelog AEOLIAN Aeolian HIROJOSI Hirojoshi LOCRIAN Locrian IN SEN In Sen S LOCRN Super Locrian IWATO Iwato MajBLUES Major Blues KUMOI Kumoi MinBLUES Minor Blues MIY...

Page 117: ...ERB DELAY MIX 0 100 REVERB MIX 0 100 Note See Tempo sync parameters for details about setting values Tempo sync parameters When appears for a parameter or effect it is a value that can be synchronized...

Page 118: ...5th 1 2 Up 2 Down 2 UpDown 2 Random 3 Up 3 Down 3 UpDown 3 Random 4 Up 4 Down 4 UpDown 4 Random 5 Up 5 Down 5 UpDown 5 Random 6 Up 6 Down 6 UpDown 6 Random 7 Up 7 Down 7 UpDown 7 Random 8 Up 8 Down 8...

Page 119: ...q 5 Seq 6 Seq 7 Seq 8 Seq 9 Seq 10 Seq 11 Seq 12 Seq 13 Seq 14 Seq 15 Seq 16 Seq 17 Seq 18 Seq 19 Seq 20 Seq 21 Seq 22 Seq 23 Seq 24 Seq 25 Seq 26 Seq 27 Seq 28 Seq 29 Seq 30 Seq 31 Seq 32 Beat 1 Beat...

Page 120: ...cify PAD 15 50 To specify PAD 16 51 Color tables 0 8 7 56 63 64 71 127 For example if 9Fh note on MIDI CH16 24h note number 36 specifying PAD 1 and 7Fh velocity 127 specifying red are sent to the Ring...

Page 121: ...127 Change o 2 x Prog Change True o 2 0 127 x System Exclusive x x System Song pos Common Song Sel Tune x x x x x x System Clock Realtime Command o 3 o 3 o 4 o 4 Aux Local ON OFF Messages All Notes O...

Page 122: ...fter Key s Touch Ch s o 1 o 1 x x Pitch Bend x x Control 0 127 Change o 1 o Prog Change True o 1 0 127 x System Exclusive x x System Song pos Common Song Sel Tune x x x x x x System Clock Realtime Com...

Page 123: ...123 Appendix MIDI implementation charts...

Page 124: ...Z2I 3031 01 ZOOM CORPORATION 4 4 3 Kandasurugadai Chiyoda ku Tokyo 101 0062 Japan www zoom co jp...

Reviews: