background image


Volume 2 


MEDLINE 7.5 


612 529  A


CAREFULLY READ THIS MANUAL BEFORE PUTTING YOUR ZODIAC INTO SERVICE. 


Summary of Contents for MEDLINE 7.5

Page 1: ...Volume 2 MEDLINE 7 5 612 529 A CAREFULLY READ THIS MANUAL BEFORE PUTTING YOUR ZODIAC INTO SERVICE ...

Page 2: ...E HULL 15 II 3 SECURING THE PROTECTIVE FLAP 16 II 4 INFLATING THE BUOYANCY TUBE 17 II 5 PRESSURE 19 III Propulsion system 20 IV How to drive your boat 21 V 1 FUEL CIRCUIT 22 V 1 1 Location of items 22 V 1 2 Tank 23 V 1 3 Fuel water separator filter 24 V 1 4 Using the fuel circuit cut off valves 25 V 1 5 Recommendations 26 V 2 ELECTRICAL CIRCUIT 27 V 2 1 General wiring diagram 27 V 2 2 General wiri...

Page 3: ...ng of water from the deck 39 V 3 3 Bilge pump 40 V 3 4 Hull drain hole 41 V 4 STEERING 42 V 5 FIRE 42 V 6 SHEATHS 42 V 7 ANCHORING MOORING 43 V 8 BOARDING 45 VI 1 POSITION OF LABELS 46 VI 2 DESCRIPTION OF LABELS 47 VII 1 Installing elements that come non mounted 48 VII 1 1 WINGS 48 VII 1 2 JUMP SEATS 51 VII 2 Installing optional elements 53 VII 2 1 POLYESTER ROLL BAR 53 ...

Page 4: ... 1310 2000 Maximum load i a w ISO 14946 1 2 3 4 data figuring on the ICNN certificate Maximum load i a w ISO 14945 1 2 3 5 data figuring on the manufacturer plate 1 Weight of people 2 Personal property 3 List of all options proposed 4 Content of consumable liquid tanks fuel drinking water 5 Weight of the engine or engines lb 2888 4409 Maximum ISO 14945 kg 1330 2020 lb 3241 4497 kg 1090 The weights...

Page 5: ...essary parameters are missing or incorrect WARNING Do not exceed the maximum number of people recommended No matter how many people are on board the total weight of passengers and equipment must never exceed the maximum recommended load Always use the designated seats or seating areas Engine MEDLINE 7 5 CAT C MEDLINE 7 5 CAT B ...

Page 6: ...nimum recommended power HP 175 The recommended power corresponds to optimal use of the boat s capacities for an average load kW 130 Maximum recommended power HP 250 kW 185 Maximum allowed power HP 300 kW 225 Maximum Maximum engine weight kg 300 lb 661 ...

Page 7: ...anual WARNING WHEN LOADING THE BOAT NEVER EXCEED THE MAXIMUM RECOMMENDED LOAD Always load the boat carefully and distribute the load appropriately to maintain the theoretical trim approximately horizontal Avoid placing heavy loads high up WARNING THE MAXIMUM LOAD ON THE MANUFACTURER S PLATE SHOULD NOT BE EXCEEDED We recommend when the boat is at maximum capacity Navigate cautiously Distribute the ...

Page 8: ...Page 8 55 Issue 2 DESCRIPTION INVENTORY and Location I 2 INVENTORY AND LOCATION 1 2 3 4 5 6 8 11 12 13 14 15 16 25 26 17 18 17 10 9 12 21 23 21 20 24 24 30 7 28 33 32 29 31 29 19 30 27 22 34 ...

Page 9: ...sole 16 Forward locker 17 Forward anchoring cleats 18 Removable sheave 19 Anchor locker 20 Handhold 21 Deck drain 22 Inflation deflation valves X5 23 Bow chain plate water tank filling 24 Aft anchoring cleats 25 Bilge pump outlet 26 Tank vent 27 Hydraulic steering system and engine wiring harness cable deck seal 28 Engine recess drain 29 High flow rate self bailer 30 Towing chain plates 31 Hull sc...

Page 10: ...avigation light 2 Handrail 3 Front seat 4 Handrail 5 12V socket and USB plug switch 6 Cup holder 7 Ventilation 8 Foot braces 9 Toggle fasteners 10 Steering wheel hydraulic steering 11 Bilge pump navigation light switch 2 1 3 4 5 7 7 6 8 9 10 19 20 21 17 21 22 23 18 13 14 15 16 1 11 12 ...

Page 11: ... seats with fold up system 22 Glove compartment 23 Cup holder I 3 LOCATION OF ACCESSORIES An installation manual is supplied with each accessory REF DESCRIPTION 1 Fore windlass 2 Forward pulpit 3 Forward sun lounger extension 4 Refrigerator 5 Polyester roll bar Bimini with frame Bimini without frame 6 Aft sun lounger 8 Ski mast EVA deck Fusion audio system radio mp3 aerial 2 x 200 watt loudspeaker...

Page 12: ...r includes Unladen weight of the boat 1 090 kg Tolerance 5 Weight of the engine s 300 kg Weight of the engine battery Consumable quantity 280 kg Fuel tank and freshwater tank Options 190 kg Model including all options Safety equipment 95 kg Equipment anchoring 1 955 kg STOWING ON A TRAILER OR CRADLE Use the bow ring and the rear chain plates on the outside of the transom RECOMMENDATION IF TRANSPOR...

Page 13: ...E N G L I S H DESCRIPTION Handling I 4 2 Storage The console can be tilted the backs removed to optimise the height of the boat for storage WARNING The boat must rest on the bow line See diagram below DESCRIPTION Handling ...

Page 14: ...options excluded WARNING Lifting must be carried out by professionals DANGER No passengers on board while hoisting WARNING All equipment must be unloaded from the boat for lifting or davit handling Before launching the boat open the aft drain hole to drain any rainwater from the bottom of the bilge close the drain hole before launching BUOYANCY TUBE Installing the buoyancy tube on the hull 1900 mm...

Page 15: ...nfolding it You can inflate the non installed buoyancy tube pressure 240 mb and let it stabilize for around one hour Then deflate it NOTE the buoyancy tube is fitted to the hull with the buoyancy tube deflated 1 In order to facilitate the fitting of the buoyancy tube apply liquid soap to the hull s rails A 2 Place the buoyancy tube bolt rope a in the hull rail b starting with the front of the hull...

Page 16: ...l bars and the screws supplied in the buoyancy tube kit To ensure that the assembly is mechanically secure apply medium strength threadlocker to the screws Fastening with bolts 4 After inflating the buoyancy tube see the chapters below secure the outer flap using the stainless steel bars and screws provided in the buoyancy tube kit Apply sealing compound on all the screws and in the hull holes to ...

Page 17: ...tube end b adaptor c tube base d inflation valve NOTE An electrical 12 V high output inflation pump is available as an option contact your dealer EASY PUSH VALVES To change position In inflating position In deflating position Push The membrane is closed the plunger is up The membrane is open the plunger is down a b c d ...

Page 18: ...operly the inflation pump should be correctly placed on the ground The tube inflates rapidly if the inflation pump is used smoothly and without haste 4 Inflate the buoyancy tube starting with the first compartment a at the bow to 200 mb pressure 5 Then inflate the amidships tubes b to 220 mb read on the pressure gauge on the first compartment 6 Then inflate the stern compartments c to 240 mb with ...

Page 19: ... by inflating or deflating depending on the temperature particularly when temperature variations are high between the morning and evening in particularly hot regions and check that the pressure does not exceed the recommended pressure zone from 220 to 270 mb RISK OF PRESSURE LOSS Example Your boat is exposed to direct sunlight on the beach temperature 50 C at the recommended pressure 240 mb 3 4 PS...

Page 20: ... 480 mb You will then need to deflate the boat to return to the recommended pressure WARNING If your boat is overinflated the pressure will abnormally wear the inflatable structure which may lead to a breach of the assembly IN THE EVENT OF OVERPRESSURE Release air by pressing the valve plunger PROPULSION SYSTEM III Propulsion system Comply with ZODIAC s recommendations and the engine manufacturer ...

Page 21: ...both ends of the stop switch lanyard correctly DANGER Immediately turn off the engine as soon as a swimmer comes close to the boat They risk being seriously injured by a rotating propeller WARNING WHEN UNDERWAY KEEP ALL LOCKERS DECK HATCHES AND THE TANK ACCESS HATCH CLOSED Breaking waves can be a significant danger for stability and cause flooding If a deck hatch seal is damaged please contact you...

Page 22: ...ARNING Do not use E10 E85 type biofuels etc V 1 1 Location of items Ref DESCRIPTION 1 Fuel tank 2 Fuel circuit valve 3 Tank filling connection access hatch and vent 4 Filling hole with cap 5 Fuel overflow drainage 6 Water fuel separator filter 7 Tank vent 1 2 3 4 5 6 7 ...

Page 23: ... DESCRIPTION 1 Tank given capacity 300 litres 2 Vent outlet 3 Tank filler inlet 4 Gauge transmitter 5 Intake pipe with fuel shut off valve It may not be possible to use the full nominal capacity of the tank depending on the trim and the load A 20 reserve is recommended 1 2 3 4 5 ...

Page 24: ...exceptions To connect it refer to the electrical diagram V 1 3 Fuel water separator filter In order to protect the engine a water fuel separating filter is placed on the engine s fuel supply system Make sure that there is no water in the metal bowl each time you use your boat Slightly unscrew the drain cap do not remove it completely Drain the water Screw the drain cap back on if only fuel remains...

Page 25: ...hose of the filter manufacturer Follow the manual or the engine manufacturer s instructions Place a draining funnel under the cartridge to be replaced Before replacing the filter the pressure in the fuel feed system must be released V 1 4 Using the fuel circuit cut off valves When not using your boat close the fuel circuit valve Fuel circuit valve on the tank WARNING In the event of a fire on boar...

Page 26: ...ower supply before removing the filter cartridge Carefully read the information provided in the filter s instruction manual Petrol is extremely flammable Make sure that the engines are turned off before working on the fuel system Do not smoke keep all flames or incandescent material well away from the work area Never drill the tank area with a drill bit protruding more than 50 mm from the drill he...

Page 27: ... 55 Issue 1 E N G L I S H INSTALLATION AND CIRCUIT ELECTRICAL V 2 ELECTRICAL CIRCUIT V 2 1 General wiring diagram 1 2 3 4 5 6 7 8 9 10 11 12 13 15 15 14 The document is available in PDF format from your dealer ...

Page 28: ...Page 28 55 Issue 2 INSTALLATION AND CIRCUIT ELECTRICAL 16 17 ...

Page 29: ...itch 4 Courtesy light switch option 5 Shower pump switch option 6 USB port 12 volts console 7 12V socket bolster 8 White light 9 Red green light 10 Refrigerator 11 Bilge fan not supplied 12 Bilge pump 13 Circuit breaker 14 Water pump connection 15 Courtesy light connection 16 Fuel gauge dial 17 Fuel gauge transmitter V 2 2 General wiring plan 1 5 8 2 3 4 6 7 ...

Page 30: ...Page 30 55 Issue 2 INSTALLATION AND CIRCUIT ELECTRICAL The necessary parameters are missing or incorrect INSTALLATION AND CIRCUIT ELECTRICAL 9 10 11 12 13 16 14 15 ...

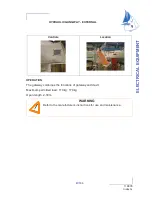
Page 31: ...Page 31 55 Issue 1 E N G L I S H INSTALLATION AND CIRCUIT ELECTRICAL 17 ...

Page 32: ...ection console 10 Fuel gauge dial connection 11 Courtesy light switch connection 12 Bilge pump switch connection 13 Navigation light switch connection 14 Shower kit switch connection 15 Shower kit connection 16 Red green light connection 17 Fuse box 10A fuse console USB port Red 10 AWG16 10A fuse bolster USB port Red 12 AWG16 10A fuse refrigerator Red 7 AWG16 10A fuse shower kit Red 11 AWG14 3A fu...

Page 33: ...ESCRIPTION 1 Circuit breaker access 2 Circuit breaker 3 Battery box 4 Fuse box access 5 Fuse box V 2 4 Circuit breaker When you are no longer using your boat set the circuit breaker to the OFF position O OFF ON 1 WARNING Cut the engine before setting the circuit breaker to the OFF position 1 3 4 2 5 ...

Page 34: ...the reach of children Always keep the battery upright never on its side When adding electrolyte or when recharging the battery always remove it from the engine compartment Battery electrolyte is a toxic and dangerous liquid It contains sulphuric acid which can cause serious burns Avoid contact with skin eyes and clothes Batteries can emit explosive gases Keep them away from sparks open flames ciga...

Page 35: ...g a 6 mm female tab type terminal 3 If you have to add cable for the connection use cable with a cross section of at least 1 5 mm that complies with marine standards UL1426 or SAE J378 or SAE J1127 or SAE J1128 or more generally meeting ABYC and or EC standards 4 Connect the earth cable of your accessory to the ground terminal strip using a Ø5 ring terminal same remark as previously for the cable ...

Page 36: ...r of an accessory in column B is 102 W 8 5 A or less The cross sections of the different cables in the wiring circuit were calculated using these figures not following this rule may lead to electrical faults and cause short circuits You may connect the options directly to the positive and negative console ground terminal within the max power limits using an approved fuse holder NOTE If you are get...

Page 37: ...PS 36 W Miscellaneous electronic equipment Searchlight Shower pump 48 W Alarm system Max power 58 W or 102 W Refrigerator VHF 72 W 288 W 336 W CONCLUSION Example 2 You want to add A 60 W VHF A 36 W GPS A 180 W radio A 120 W searchlight A an d B Windscreen wipers Cigarette lighter standard Radio 180 W Miscellaneous lighting Depth sounder Horn GPS 36 W Miscellaneous electronic equipment Searchlight ...

Page 38: ...Radio 180 W Miscellaneous lighting Depth sounder Horn GPS 60 W Miscellaneous electronic equipment 120 W Searchlight Shower pump Alarm system Max power 120 W 102 W Refrigerator VHF 240 W 336 W CONCLUSION NOTE Some manufacturers will indicate the amperage rather than the absorbed power With direct current from a 12 V battery as is the case here simply multiply by 12 to obtain the power ...

Page 39: ... drain 2 Hull scupper 3 Bilge pump outlet 4 Bilge pump 5 High flow rate self bailer with non return valve 6 Drain pipes 7 Scuppers V 3 2 Draining of water from the deck The boat is self draining with a rainwater drainage system 2 scuppers on the deck one forward of the console and a second forward of the bolster Both are connected to a scupper that passes through the hull 3 4 5 1 1 2 5 6 6 6 7 ...

Page 40: ...en the boat is out of the water and sheltered Forced operation the switch has to be held depressed to operate it As soon as you release the switch it returns to automatic position 1 ZODIAC recommends the use of a tarpaulin or mooring cover in order to prevent water ingress in the event of rain Ensure that the system is in working order unblocked pipes plugs out bilge pump switch on automatic mode ...

Page 41: ... intake strainers of any debris likely to cause a blockage The flow rate of your pump is about 45 litres per minute It may be accessed via the rear locker V 3 4 Hull drain hole Out of the water on trailer cradle etc Open position drain plug removed In the water Closed position drain plug fitted Make sure the drain plug is properly closed tightened ...

Page 42: ...th the national regulations of the country in which your boat is registered is your responsibility When in use the boat must be fitted with portable extinguishers The recommended position for the extinguisher is inside the stern locker or console Take care to keep the bilges clean and check at regular intervals that there are no fuel leaks or vapours Never leave the boat unattended when cooking an...

Page 43: ...and the engine wiring harness not supplied Sheath 4 Used to route the navigation light cable and the windlass wiring harness not supplied INSTALLATION AND CIRCUIT Anchoring mooring V 7 ANCHORING MOORING Ref DESCRIPTION 1 Aft bollards 2 Polyester bow roller with stainless steel bow roller 3 Anchor locker 1 1 2 6 5 3 6 4 Sheath 4 Ø50 Sheath 1 Ø80 Sheath 2 Ø50 Sheath 3 Ø80 ...

Page 44: ... 4 Bow chain plate 5 Sheave 6 Forward cleats WARNING For permanent mooring use the bow chain plate Choose your anchor chain according to the length and weight of your boat When underway pull back the sheave to lock it 5 ...

Page 45: ... Boarding V 8 BOARDING DANGER Check that the engine is switched off before anyone climbs back on board using the rear ladder WARNING When the boat is used solo if the ladder cannot be deployed from the water the ladder should be permanently deployed LABELLING ...

Page 46: ...Page 46 55 Issue 2 VI 1 POSITION OF LABELS 3 4 5 6 1 2 7 ...

Page 47: ...Page 47 55 Issue 1 E N G L I S H LABELLING VI 2 DESCRIPTION OF LABELS ...

Page 48: ...ot mounted on the boat To install them easily follow the instructions below Unpack the wings being careful not to scratch them or damage the EVA deck Locate the port and starboard sides The necessary parameters are missing or incorrect Clean the surfaces on port and starboard sides where the wings will be mounted INSTALLATION Apply SIKA to the deck ...

Page 49: ...Page 49 55 Issue 1 E N G L I S H ...

Page 50: ...ssue 2 INSTALLATION Place the wings on the deck and secure them with screws starting from the front WARNING Apply medium strength threadlocker in the stainless steel inserts Finish securing the wings with M8 bolts ...

Page 51: ...Page 51 55 Issue 1 E N G L I S H INSTALLATION VII 1 2 JUMP SEATS WARNING These places are intended for use by children Secure the jump seats to the wings M4 bolts ...

Page 52: ... 5 mm drill bit Inject SIKA sealant into the holes to ensure watertightness and bolt the jump seats through the rear locker Counter drill the bracket as far to the front as possible with a Ø4 2 mm drill bit Inject SIKA sealant into the hole to ensure watertightness and secure with a sheetmetal screw ...

Page 53: ... be secured in order to be able to install the roll bar Make sure you install it in the right direction Apply SIKA on the feet of the roll bar Leave 10 to 15 mm clearance around the edges of the feet so the SIKA doesn t squeeze out when you tighten it down Place the roll bar the wings and align the holes Bolt on with M10 bolts 10mm mini ...

Page 54: ... These elements should be installed in compliance with the relevant requirements of ISO 6185 3 to ensure that all such installations do not invalidate the initial assessment Also ensure that the subsequent installation of consoles and other structural elements not initially supplied with the boat is performed in accordance with the installation recommendations provided by the manufacturer and ZODI...

Page 55: ...Page 55 55 Issue 1 E N G L I S H 2 chemin de la Val Priout 31450 AYGUESVIVES FRANCE MEDLINE 7 5 Copyright Z NAUTIC Z NAUTIC S A S U with capital of 7 095 000 00 Euros Toulouse Trade Register 812 206 340 ...

Reviews: