4/8/16Channel DVR Quick Manual
7
【
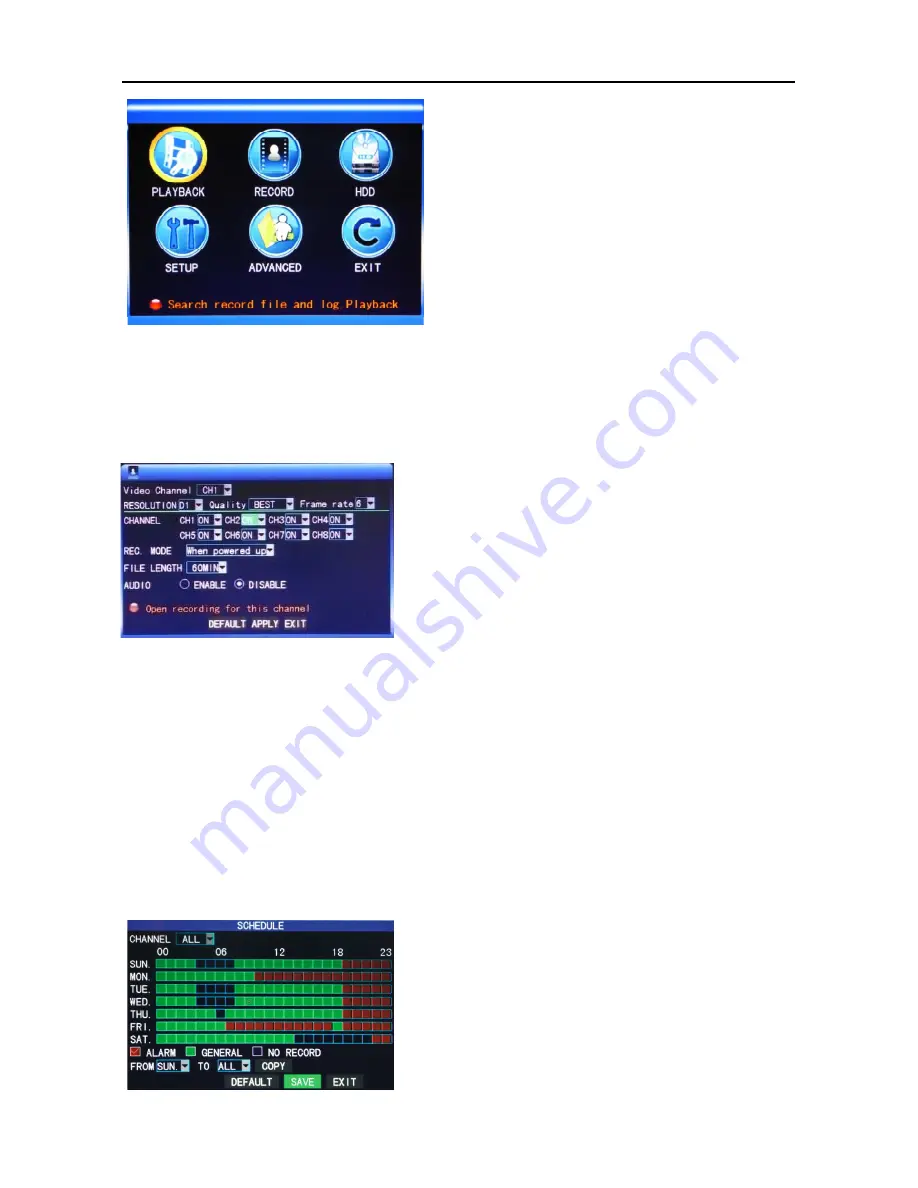
Playback
】
: Search detailed recording files
【
Record
】
: Set the recording mode including
channels, quality, frame rate, etc.
【
HDD
】
: Check HDD capacity and formatting
【
Setup
】
: Setup of system basic information
including language, time, user password, etc.
【
Advanced
】
: Setup of alarm, motion detection,
and mobile phone surveillance, etc.
【
Exit
】
: Exit menu
Note: For detailed operation, please refer to the detailed operation manual in the
CD.
2.3 Recording mode
The default recording mode used for the first time is the normally open and continuous
video. Enter the Recording mode from “Main menu”—“Recording Mode”, as shown below:
Channel:
Select the corresponding video channel on
or off (16ch DVR with 16 channels).
Resolution:
D1 (704x576), Half-D1 (704x288) and
CIF (352x288), among which D1 is of the highest
resolution.
Quality:
best,
fine,
and
normal
quality,
corresponding to 3 data stream standards of highest, high and medium bit rates
Frame rate:
Adjust video frame rate
Record:
Set the record switch.
Package Time:
There are four options -15 minutes, 30 minutes, 45 minutes and 60 minutes.
REC mode:
Startup recording and Timing recording
When powered on:
s
tarting recording when the DVR is energized (It works only if the
corresponding channel is enabled in the “Channel” option.)
Timing recording:
performing recording as scheduled. When “timing recording” is
selected, the “Record Time Configuration” button will appear on the right. Move the cursor
here and press “Enter” to enter the Record Time Configuration screen, as shown below:
Channel:
Select "All" or select a single channel
Time configuration:
Set the recording type in each
time interval of each day. Red, green, and
background color represent the alarm recording,
regular recording, and not recording.


