11
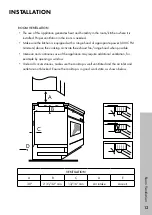
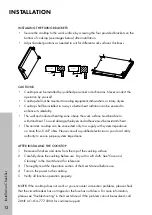
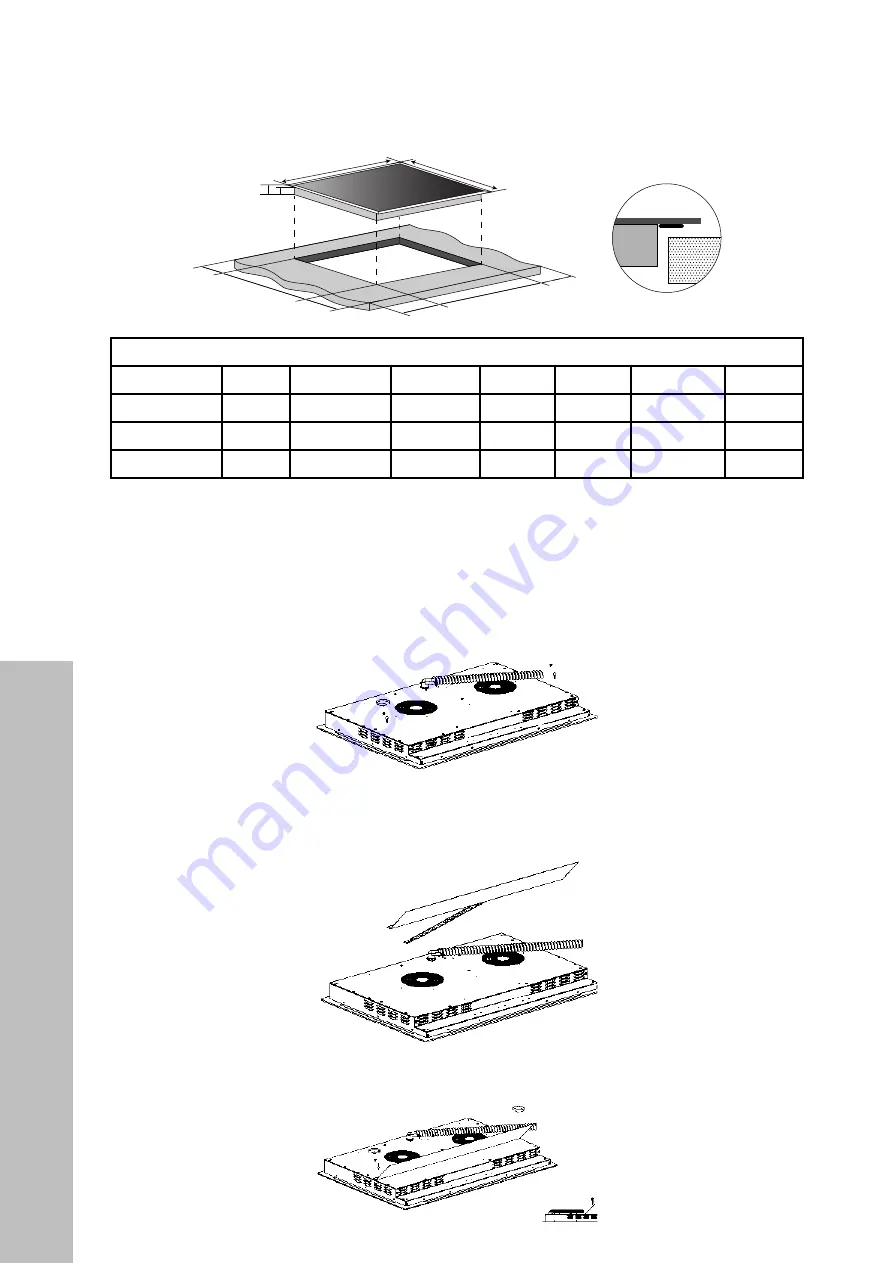
Cutout Dimensions
INSTALLATION
L
W
H
X
B
X
X
A
X
D
SEAL
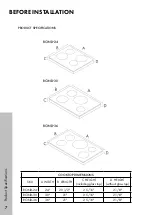
COOKTOP DIMENSIONS
MODEL
W
L
H
D
A
B
X MIN
RCIND-24
24"
20 1/2"
2 5/16"
2 1/8"
22 1/16"
19 5/16"
1 31/32"
RCIND-30
30"
21"
2 5/16"
2 1/8"
28 3/4"
19 5/16"
1 31/32"
RCIND-36
36"
21"
2 5/16"
2 1/8"
33 7/8"
19 5/16"
1 31/32"
INSTALLING THE HEAT DEFLECTOR
The heat deflector is only needed if the cooktop is installed less than 3” above an oven or
range, as it is designed to divert hot air between both units. To install:
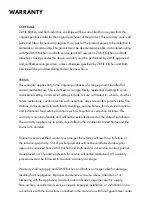
1. Use a screwdriver to loosen the 2 screws from the bottom of the cooktop (as shown below):
、
;
、
$
、
windshield
Instruction for windshield
deflector
8VHDVFUHZGULYHUWRORRVHQWKHOHIWDQGULJKWVFUHZVDWWKH
ERWWRPFDVLQJDVVKRZQDERYH
4
5HPRYHWKH0GRXEOHVLGHGWDSHIURPWKHZLQGVKLHOGDWWDFKWKH
ZLQGVKLHOGWRWKHERWWRPFDVLQJWKHKROHVDWZLQGVFUHHQVKRXOGEHDOLJQHG
ZLWKWKHKROHVRQWKHERWWRPVKHOO
5HLQVWDOOWKHVFUHZVWRWLJKWHQWKHZLQGVKLHOGWRWKHERWWRPFDVLQJ
ZLQGVKLHOG
,QVWUXFWLRQIRUZLQGVKLHOG
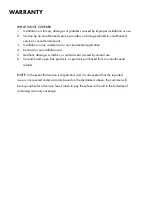
2. Remove the 3M double-sided tape from the deflector and attach it to the bottom of the
cooktop; the holes on the deflector should be aligned with the screw holes.
、
;
、
$
、
windshield
Instruction for windshield
deflector
8VHDVFUHZGULYHUWRORRVHQWKHOHIWDQGULJKWVFUHZVDWWKH
ERWWRPFDVLQJDVVKRZQDERYH
4
5HPRYHWKH0GRXEOHVLGHGWDSHIURPWKHZLQGVKLHOGDWWDFKWKH
ZLQGVKLHOGWRWKHERWWRPFDVLQJWKHKROHVDWZLQGVFUHHQVKRXOGEHDOLJQHG
ZLWKWKHKROHVRQWKHERWWRPVKHOO
5HLQVWDOOWKHVFUHZVWRWLJKWHQWKHZLQGVKLHOGWRWKHERWWRPFDVLQJ
ZLQGVKLHOG
,QVWUXFWLRQIRUZLQGVKLHOG
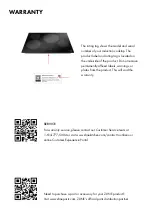
3. Re-install the 2 screws to secure the deflector to the bottom of the cooktop.
、
;
、
$
、
windshield
Instruction for windshield
deflector
8VHDVFUHZGULYHUWRORRVHQWKHOHIWDQGULJKWVFUHZVDWWKH
ERWWRPFDVLQJDVVKRZQDERYH
4
5HPRYHWKH0GRXEOHVLGHGWDSHIURPWKHZLQGVKLHOGDWWDFKWKH
ZLQGVKLHOGWRWKHERWWRPFDVLQJWKHKROHVDWZLQGVFUHHQVKRXOGEHDOLJQHG
ZLWKWKHKROHVRQWKHERWWRPVKHOO
5HLQVWDOOWKHVFUHZVWRWLJKWHQWKHZLQGVKLHOGWRWKHERWWRPFDVLQJ
ZLQGVKLHOG
,QVWUXFWLRQIRUZLQGVKLHOG

