VICTORY RF OWNER’S MANUAL - NORTH AMERICA |
7
6
| VICTORY RF OWNER’S MANUAL - NORTH AMERICA
For the latest updates and information regarding our products, visit zeiss.com/us/sportsoptics.
TECHNICAL DATA
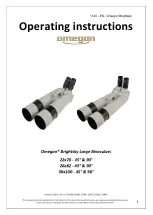
8 × 42
10 × 42
8 × 54
10 × 54
Magnification
8 ×
10 ×
8 ×
10 ×
Effective Lens Diameter
42 mm
54 mm
Exit Pupil Diameter
5.3 mm
4.2 mm
6.8 mm
5.4 mm
Twilight Factor
18.3
20.5
20.8
23.2
Field of View at 1,000 yds
405 ft
345 ft
360 ft
330 ft
Angular Field of View, Apparent
62° wide angle
66° wide angle
55° wide angle
63° wide angle
Close Focus
8.2 ft
11.5 ft
Diopter Range
+/− 3 dpt
+/− 3 dpt
Eye Relief
17 mm
14 mm
Interpupillary Distance
53.5 – 76 mm
58.5 – 76 mm
Lens Type
FL
Prism System
Abbe-Köenig
Coating
LotuTec
®
/ T*
Fogproof
Nitrogen Purged
Waterproof
100 mbar (submerged 3.28 ft for 2 hours)
Operating Temperature
1
− 13 / + 145.4° F
Length
6.54 in
7.68 in
Width
5.1 in
5.6 in
Weight
32 oz
33 oz
38 oz
39 oz
Range
2
11 – 2,500 yds
Measuring Accuracy
± 1 – 600 / ± 0.5 % > 600 yds
Measuring Time
< 0.3 Sec.
Laser Wavelength
905 nm
Laser Beam Divergence
1.6 × 0.5 nm
Battery
1 x 3V / CR2
Battery life at 68° F
> 2,500 ×
PREPARATION
INSERTING/REMOVING THE BATTERY
The laser rangefinder is powered by a type
CR2 lithium
battery.
To insert and replace the battery, turn the screw that
secures the battery cover counterclockwise
(Fig. 3/8)
using
a coin or a protected tip flat-head screwdriver that properly
fits the slot. Insert the battery with the positive end forward
(according to the symbol in the battery compartment).
To replace the battery cover, ensure that water, dirt, and
debris have not contaminated the battery compartment or
threads of the compartment and battery cover, align and
tighten the cover by turning it clockwise, taking care not to
cross the threads. Turn the cover until it stops in order to
ensure a snug fit and waterproofness.
NOTE:
At 68° F, a new battery will last for over 2,500
measurements. However, depending on the conditions of
use–such as low temperatures or frequent use of the Scan
Mode–the life of the battery may be considerably shorter.
Low battery is indicated by the appearance of the battery
symbol on the display. If the equipment will not be used
for a long period of time, remove the battery in order to
prevent damage caused by leakage from the battery. Use
only high-quality brand batteries to ensure proper function
of the rangefinder.
Subject to changes in design and
scope of supply due to technical
improvements.
1. Battery is subject to a lower
temperature limit. Product also
functions under – 10 °C /14 °F.
2. The range is influenced by the
size and the
degree of reflection
of the object, as well as by the
weather and
sunbeams.
3 | 7
EN
PREPARATION
Inserting/Removing the battery
The laser range finder is powered by a type CR 2 lithium battery.
To insert and replace the battery, unscrew the battery cover
(Fig. 3/8)
– using a coin
or similar – by turning anticlockwise. Insert the battery with the positive end forward
(according to the symbol in the battery compartment).
Then screw the battery cover back on by turning clockwise.
At 20 °C, a new battery will last for over 2,500 measurements.
Depending on the conditions of use, however, low temperatures or frequent use of
the scan mode for example may result in the battery life being considerably shorter.
Low battery is indicated by the appearance of the battery symbol on the display.
If the equipment will be unused for a long period, remove the battery in order to
prevent damage by leakage from the battery. Use only high quality brand batteries.
+
–
(8)
Fig. 3
Fig. 4
(16)
(15)
Fig. 5
(17)
Attaching the carrying strap and the protective caps
The carrying strap
(Fig. 4/15)
and the eyepiece cap
(Fig. 4/16)
are attached as
shown in the illustrations.
Note:
Feed the carrying strap only once through the eyelet on the eyepiece cap.
Depending on personal taste, use the carrying strap to connect the eyepiece cap
either on both sides or on one side only. The eyepiece cap is held onto the eye cups
by a catch.
Before using the binoculars, remove the eyepiece cap with the index finger.
After observation, replace the eyepiece cap in order to protect the eyepieces.
The protective lens covers
(Fig. 5/17)
are fitted on the binoculars as shown.
TECHNICAL DATA
8x42
10x42
8x54
10x54
Magnification
8
10
8
10
Effective lens diameter
mm
42
42
54
54
Exit pupil diameter
mm
5.3
4.2
6.8
5.4
Twilight factor
18.3
20.5
20.8
23.2
Field of view
m/1000m (ft/1000yds)
135 (405)
115 (345)
120 (360)
110 (330)
Subjective angle of view
°
62
66
55
63
Close-up setting limit
m (ft)
2.5 (8.2)
3.5 (11.5)
Diopter adjustment range
dpt
+/- 3
+/- 3
Eye relief
mm
17 (0.7)
14 (0.6)
Pupil Distance
mm
53.5 - 76
58.5 - 76
Lens type
FL
FL
Prism system
Abbe-König
Abbe-König
Coating
T*/LotuTec
®
T*/LotuTec
®
Nitrogen filling
Waterproof
mbar
400
400
Operating temperature
1
°C (°F)
-25 / +63 (-13 / +145)
-25 / +63 (-13 / +145)
Length
mm (in)
166 (6.5)
166 (6.5)
195 (7.7)
195 (7.7)
Width with an eye spacing of 65 mm
mm (in)
121 (4.8)
121 (4.8)
136 (5.4)
136 (5.4)
Weight
g (oz)
895 (31.6)
915 (32.3)
1,095 (38.6)
1,115 (39.3)
Measuring range
2
m (yds)
15 - 2,300 (16 - 2,500)
15 - 2,300 (16 - 2,500)
Measuring precision
mrad
± 1 – 600 / ± 0.5 % > 600
± 1 – 600 / ± 0.5 % > 600
Measuring time
Sek. (sec.)
< 0.3
< 0.3
Laser shaft length
nm
905
905
Laser beam divergence
mrad
1.6 x 0.5
1.6 x 0.5
Battery
1 x 3V / CR2
1 x 3V / CR2
Battery life at +20°C
> 2,500x
> 2,500x
Subject to changes in design and scope of supply due to technical improvements.
1
Battery is subject to a lower temperature limit.
Product also functions under – 10 °C /14 °F.
2
The range is influenced by the size and the degree of reflection of the object
as well as by the weather and sun beams.