Imaging and Flow Cytometry Core CPOS
LSM 800 SOP
L-19
ver. 2.1 (Updated: 11/13/2020)
L.
Tile / Position Advanced Setup
Advanced set up (Preview scan)
1.
Common steps = Establish a preview scan ->
determine region of interest (R.O.I.) either in
area or in points -> verify positions -> Start
Experiment.
2.
Select the most robust (bright, not
important enough to be bleached)
fluorescent channel in your settings.
3.
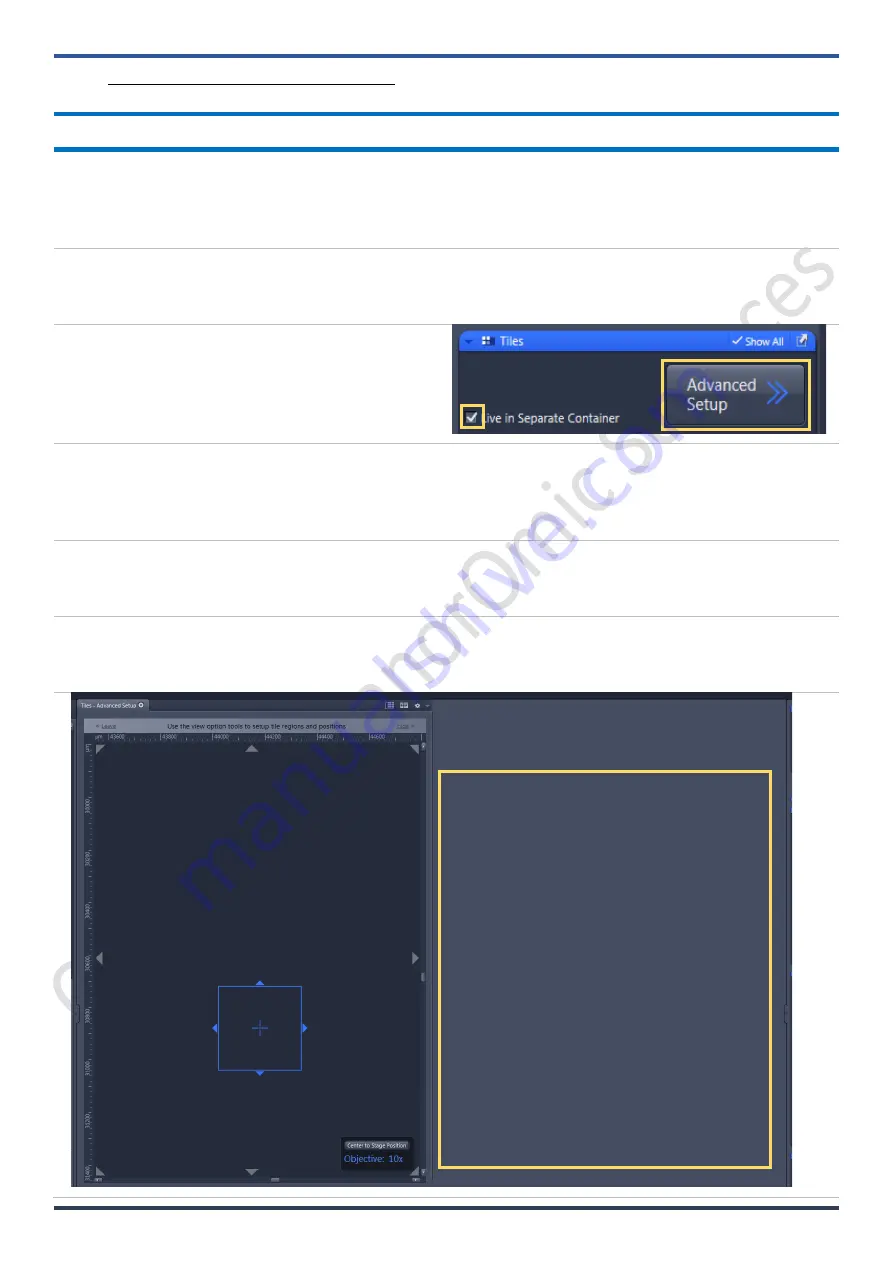
Go to tile window and click on 'Advanced
setup'.
4.
The software should 1) automatically turn on
'Live'; 2) replace half of the preview area
with a navigation map; and 3) added
controls for tile setups.
5.
[Optional]
In “Acquisitions
mode
” window.
Change to 5X objective lens; 0.5X zoom; bi-
directional scan; maximum scan speed.
6.
You may move the specimen around with x-y motorized stage controller to figure out general are of
your specimen. Or you may double click on the navigator area to see specific area. Focus onto the
specimen.
L3
L4
Live View Area
Sample Navigation Area


