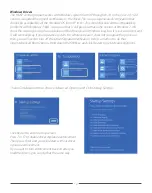
When you first open the GUI of your HDSP processor you will find that three of the function buttons
are yellow. These are the I/O page, then Delay page, and the Crossover (XO) page. They are yellow be-
cause by default the HDSP opens to a default system and you will need to check these items as they
may (and likely will) need modification to fit the needs of your particular system.
As you open each page and set all the function to match your system needs you can turn the yellow
lights to green by double clicking the lighted icon.
If you find something definitely wrong and want to be sure you change it before you are finished, you
can change that icon to red as a reminder to change it before exiting the program.
If you have finished all the set-up functions, you can turn all lights to green and proceed with equaliza-
tion and other tuning functions.
Setting Up the Sound System with the PC GUI
The GUI for the HDSP processors will lead you through a complete system setup in the shortest possible
time by simply putting everything in a logical order of flow. It also follows the Zapco philosophy that
the simplest is best. We don’t waste processing power on things that aren’t necessary for tuning. We
put it in an advanced phase control that lets you select the exact frequency of a needed phase shift
and precisely what the phase shift should be. We put it in a VSEQ that allows you to seamlessly correct
for volume dependent equalization car makers are using to hide the flaws in factory systems. So the
HDSP GUI provides tool for the most advanced tuning while at the same time, letting the first-timer set
a system up with ease.
Below we will go through a full system setup starting right at the beginning, by defining the system in
terms of speakers and functions.
21

