


Z-RF Encode 001 Manual V.1
Rev 5.4.21
8
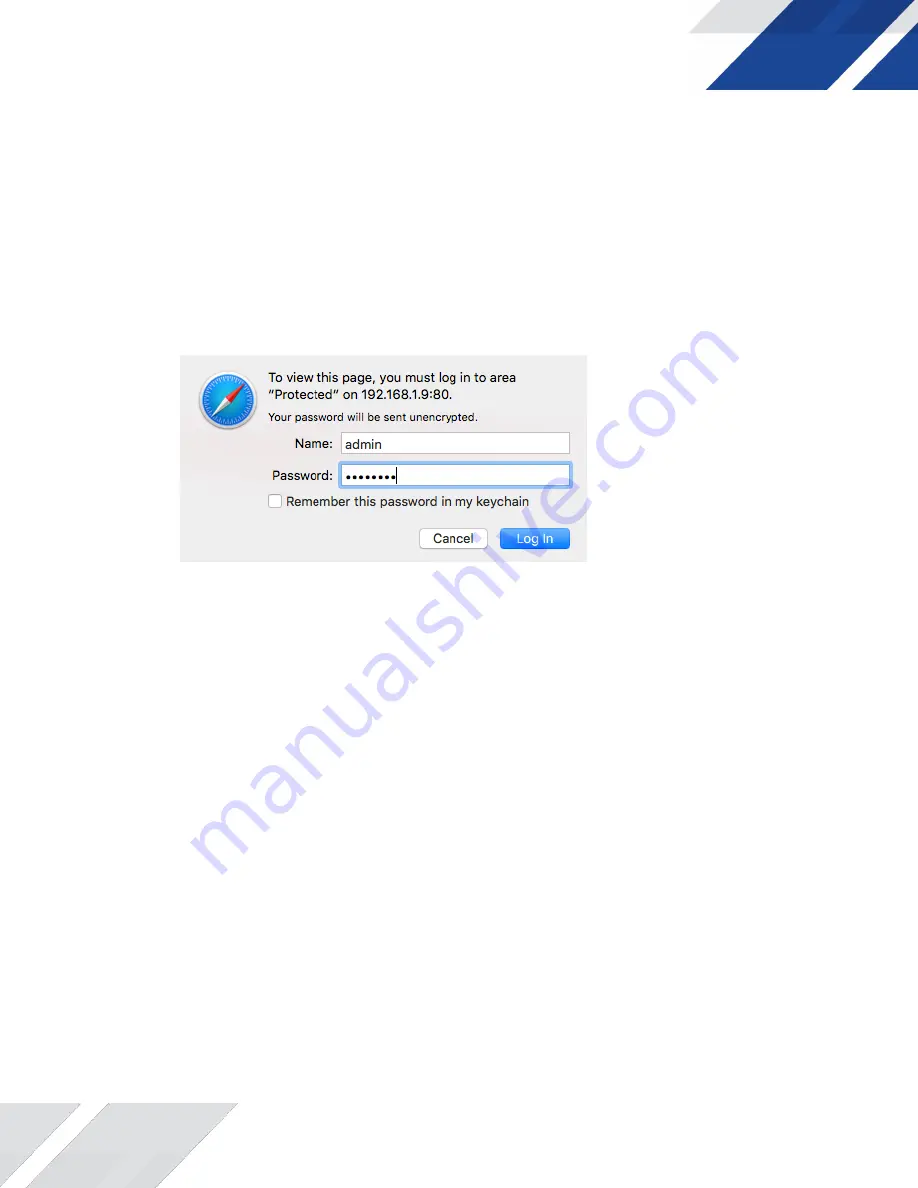
Step 2:
Enter User Name/Password
Select Encoder Setup
After selecting the Encoder Setup Tab, the user will be prompted to enter the user name and password for
device.
GUI Login Password:
Default User Name: admin
Default Password: Admin123
Note: To change the Password for the GUI, go to the Administration Tab.


