background image

TEAM MODE

GIMBAL CAMERA TILT CONTROL

There is a gimbal tilt mode switch on ST16---S1. When the switch is in up/middle posi-
tion, the CGOET gimbal camera is in Angle Mode. Use the slider (C) on the left side of 
the ST16 to set the tilt position of the gimbal camera. When the S1 is in bottom posi-
tion, the gimbal camera is in Velocity Mode. When the Elevator joystick is in the 
middle position, it means the velocity rate is 0 for the CGOET, and it will stop tilting 
up/down. When the Elevator joystick is above the middle position, the CGOET will 
start tilting up. When the Elevator joystick is below the middle position, the CGOET 
will start tilting down. The distance between the Elevator joystick and the middle posi-
tion decides the velocity rate, the further distance, the higher velocity it would be. 

NOTICE:

 Only in the velocity mode, the camera can tilt upwards 15°maximum.

GIMBAL CAMERA PAN CONTROL

There is a gimbal pan mode switch on ST16---S2. When the switch position is up, the 
gimbal camera is in Follow Mode. The pan control of the gimbal camera is now dis-
abled. The gimbal camera will adjust its pan direction according to the aircraft’ s 
movements. When the switch is in the middle position, the gimbal camera is in Follow 
Pan Controllable Mode, the gimbal camera will adjust its pan direction according to 
the aircraft’ s movements. Meanwhile, the pan control is activated, use the aileron 
joystick to set the pan position of the gimbal camera.
When the switch position is down, the gimbal camera is in Global Mode. The pan 
direction of the gimbal camera will be fixed regardless of the aircraft’ s movements. 
Use the aileron joystick to set the pan position of the gimbal camera.

Model: Typhoon H

Welcome,Pilot

1:39 AM 0

System  Settings

Pad

Channel Settings

Model Select

TASK    

CAMERA

GPS    

CALIBRATION

NOT

AVAILABLE

Disabled

OBS.

VOLTS

GPS

SAT

POS

ALT

G-SPD

DIS

15.6V

Ready

0

0.0000 E

0.0000 N

-0.0 m

0.0 KPH

N/A m

7%

SD 7.23G

N/A

43.9 C

41.3 C

TO RECORD VIDEO

Press the button located near the lower right corner of the ST16. You'll hear an 
audible indication from the ST16 each time the recording starts/stops. While video 
is recording, the LED indicator on the front of the CGOET will flash blue and 
green.
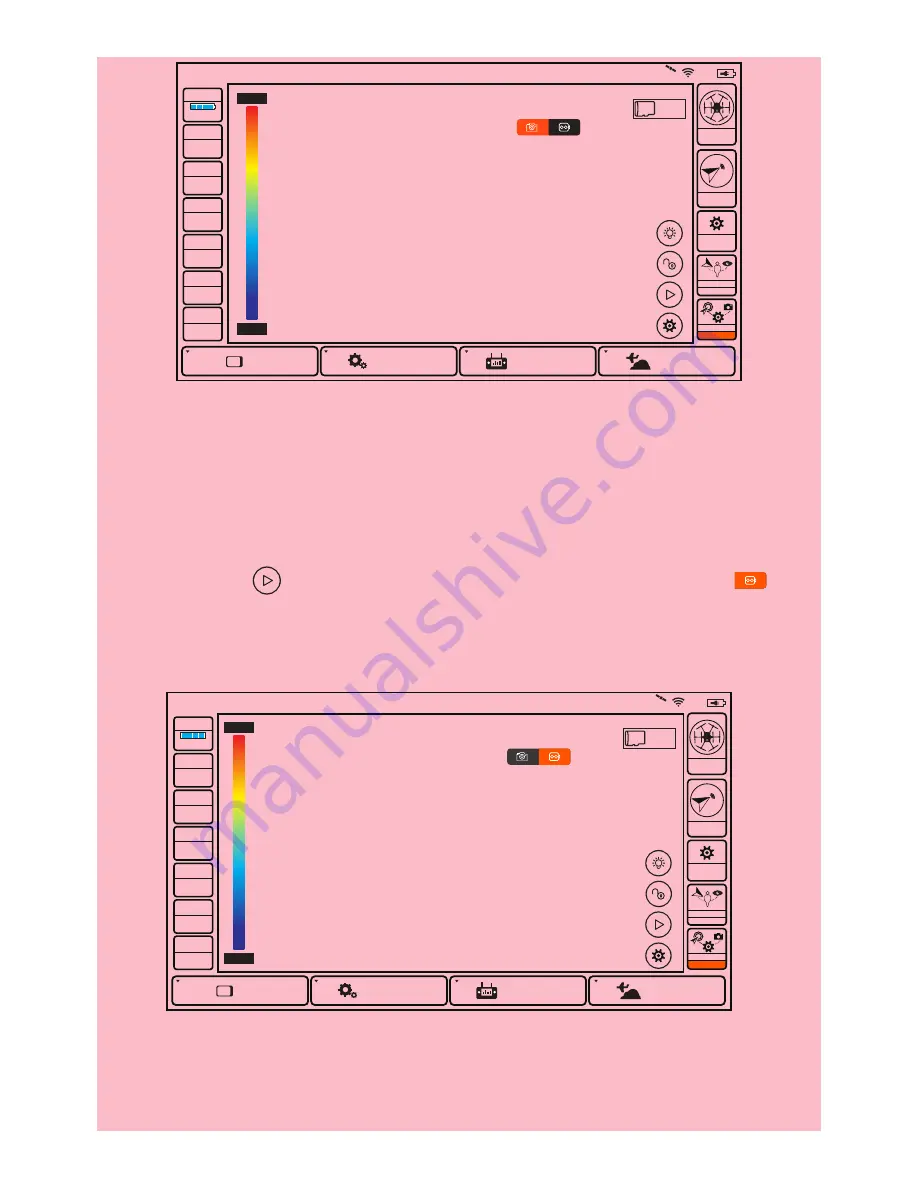
Touch the icon [           ] on the right side of the screen and press icon [          ], the 
screen will display the list of videos you have taken before. If you slide from right to 
left on one video icon and press the red “Delete” button, the video will be deleted.

15

NOTICE: 

The pictures and videos you have taken are saved in camera SD card 

and internal storage of ST16 Personal Ground Station. The ST16 can store up to 

22 pictures and 10 videos. When the number of picture exceeds 22 and the 
number of video exceeds 10, the oldest pictures and videos will be erased auto-
matically from the ST16.

CAUTION: 

Do not change settings when aircraft is farther than1000 feet from 

ST16 Ground Station. 

CAUTION: 

ALWAYS stop recording video before turning off the Typhoon H/C-

GOET to avoid data loss. If you accidentally turn off the Typhoon H/CGOET 
before you stop recording, re-insert micro SD card (if removed) and turn the 
system on again. Wait approximately 20 seconds until the camera LED starts to 
glow solid green indicating the last video file was recovered.

Summary of Contents for CGOET

Page 1: ...USER MANUAL V1 0 Any information above might be changed due to the software update For the latest documents please check the official website ...

Page 2: ...TABLE OF CONTENTS 12 12 12 13 13 13 13 14 14 15 16 20 20 20 21 05 05 05 06 06 07 09 09 10 10 02 01 01 ...

Page 3: ... images and fluid video under the most challenging conditions The integrated digital video downlink streams live video to the ST16 Ground Station included with the purchase of Typhoon H or to compatible iOS and Android based devices SPECIFICATIONS CAMERA Thermal section FOV diagonal 71 FOV horizontal 56 Sensitivity 50mK Thermal Imager Uncooled VOx Microbolometer Pixel size 12um LWIR wavelength 8 1...

Page 4: ...TE All safety precautions and warnings instructions warranties and other collateral information are subject to change at the sole discretion of Yuneec For the most up to date information please visit the corresponding product page at www Yuneec com or contact the nearest Yuneec office or authorized distributor The following special language terms are used throughout the product literature to indic...

Page 5: ...s provided by Yuneec The instruction manual contains instructions for safety operation and maintenance It is essential to read and follow all the instructions and warnings prior to assembly setup and or use in order to op erate the product correctly and avoid damage or serious injury WARNING Failure to use this product in the intended manner as described in instruction manual can result in damage ...

Page 6: ...in areas with potential mag netic and or radio interference including areas nearby broadcast towers power transmission stations high voltage power lines etc Do not operate the Gimbal in the rain Do not expose the Gimbal to fire sources Do not touch or move the Gimbal until the initialization process has been completed In need of repair send the CGOET gimbal camera to an authorized service center 0...

Page 7: ...gh to be removed CAUTION Keep the memory card out of the reach of children to prevent swal lowing ATTACHING CGOET GIMBAL CAMERA TO TYPHOON H Step 1 Place the nose of Typhoon H towards the user Step 2 According to the direction indicated by the arrow on the top of the gimbal slide the damping plate of the gimbal to the backboard of Typhoon H NOTICE The CGOET gimbal camera should be installed in the...

Page 8: ... Model Select TASK CAMERA GPS CALIBRATION NOT AVAILABLE Disabled OBS 7 SD 7 23G N A VOLTS GPS SAT POS ALT G SPD DIS N AV N A N A N AE N AN N A m N A KPH N A m Welcome Pilot 1 39 AM Model Select Typhoon H New Model Step 3 Tap the New Model and select the Create Model then choose Type select the Typhoon H Step 4 Tap the icon and select the Typhoon H photo Step 5 Input the model name and tap Save Ste...

Page 9: ...ss any pop up warn ings alerts Welcome Pilot 1 39AM 7 About Controller Choose a camera C CG3 C CG3 Pro C GOET Select Name C CGET Step 3 Tap the Bind button and lean the Typhoon H in the forward direction twice 45 until the Main LED indicator blinks orange rapidly Step 4 Tap the Refresh button on the screen Step 5 Select the SR24_XXXXX receiver listed in the column under Model and CGOET_XXXXX you w...

Page 10: ...GO3P_B20048 CGO3 _320739 Welcome Pilot 1 39AM 7 1 39AM 7 User Login CGOET_42000B Password Show password Cancel OK q 1 a z x 123 c v b n m s d f g h j k l w 2 e 3 r 4 t 5 y 6 u 7 i 8 o 9 p 0 Done 08 Step 7 When the Connection Status window pops up the user can tap the OK button to confirm the successful connection Step 6 Input the password 1234567890 as requested and tap OK ...

Page 11: ...6 anymore but the CGOET gimbal camera can still be con trolled by the ST16 NOTICE When the system is switched from single mode to team mode the Typhoon H Main Status Indicator will start to flash orange rapidly which means the copter enters binding mode Step 3 Press and hold the Power Button of the Wizard until the Aircraft Mode LED glows solid blue Do not release the Power Button until hearing tw...

Page 12: ...ll start to flash orange rap idly which means the copter enters binding mode 10 tion comes bound to the copter and the CGOET from the factory and controls both the copter and the CGOET Gimbal Camera NOTICE After switching from single mode to team mode Wizard and ST16 on the ST16 the Wizard must be bound to the copter and the ST16 Ground Station must be bound to the camera The Wizard controls the c...

Page 13: ...al Camera NOTICE After switching from single mode to team mode Two ST16 Ground Station on the original ST16 the original ST16 only controls the CGOET gimbal camera and the new ST16 controls the copter NOTICE Under the team mode the new ST16 can t control the gimbal pan and tilt directions If you need to switch back to single mode the operation steps are as follows Step 1 Tap the settings icon on t...

Page 14: ...distance between the slider C and the middle position de cides the velocity rate the further distance the higher velocity it would be CAUTION You MUST stop recording video in order to take still photos It will take approximately 1 2 seconds to capture a still photo and before you can take another CAUTION ALWAYS stop recording video before turning off Typhoon H to avoid data loss Slider C 12 01 02 ...

Page 15: ...vator joystick is in the middle position it means the velocity rate is 0 for the CGOET and it will stop tilting up down When the Elevator joystick is above the middle position the CGOET will start tilting up When the Elevator joystick is below the middle position the CGOET will start tilting down The distance between the Elevator joystick and the middle posi tion decides the velocity rate the furt...

Page 16: ...an set the automatic shooting interval by sliding the Auto Take Photo switch from right to left The shooting interval can be set from 1 60 seconds For example if the shooting interval is set at 20 seconds the camera will take a photo every 20 seconds VOLTS GPS SAT POS ALT G SPD DIS 15 6V Ready 0 0 0000 E 0 0000 N 0 0 m 0 0 KPH N A m Model Typhoon H Welcome Pilot 1 39 AM 0 System Settings Pad Chann...

Page 17: ... A m 7 SD 7 23G N A 43 9 C 41 3 C TO RECORD VIDEO Press the button located near the lower right corner of the ST16 You ll hear an audible indication from the ST16 each time the recording starts stops While video is recording the LED indicator on the front of the CGOET will flash blue and green Touch the icon on the right side of the screen and press icon the screen will display the list of videos ...

Page 18: ...infrared images shown in the upper left corner of the screen you can switch the position between the infrared images and the visible images The center point temperature detected by the infrared camera will be shown at the center of the infrared images 22 pictures and 10 videos When the number of picture exceeds 22 and the number of video exceeds 10 the oldest pictures and videos will be erased aut...

Page 19: ...0 0000 N 0 0 m 0 0 KPH N A m 41 8 C 43 9 C 41 3 C 2 Blend Choose the Blend option the visible images and infrared images will be overlapped on the screen The center point temperature detected by the infrared camera will be shown at the center of the infrared images 3 Infrared Press the Infrared option and the screen will only display the infrared images The center point temperature detected by the...

Page 20: ... System Settings Pad Channel Settings Model Select TASK CAMERA GPS CALIBRATION NOT AVAILABLE Disabled OBS 7 SD 7 23G N A Photo ROl Spot Center Area Palette Single Team Auto Calibrate Reset Format Sdcard Measurement Corrections 43 9 C 41 3 C VOLTS GPS SAT POS ALT G SPD DIS 15 6V Ready 0 0 0000 E 0 0000 N 0 0 m 0 0 KPH N A m Model Typhoon H Welcome Pilot 1 39 AM 0 System Settings Pad Channel Setting...

Page 21: ...l Settings Model Select TASK CAMERA GPS CALIBRATION NOT AVAILABLE Disabled OBS 7 SD 7 23G N A Photo Palette ROl Fusinon Ironblack Rainbow Globow Icefire Single Team Auto Calibrate Reset Format Sdcard Measurement Corrections 43 9 C 41 3 C VOLTS GPS SAT POS ALT G SPD DIS 15 6V Ready 0 0 0000 E 0 0000 N 0 0 m 0 0 KPH N A m 4 Single Team Switch between Single Mode and Team Mode 5 Auto Calibrate Automa...

Page 22: ...ONS DURING STARTUP Initialization failed The Aircraft is in Bind Mode The Aircraft is in a No Fly Zone CGOET CAMERA LED STATUS INDICATIONS Without T card or T card Memory Full WiFi Error WiFi Initialized WiFi Connected Recording Video Pulses red 3 times per second Blinks orange very rapidly 10 times per second Blinks red and white rapidly 5 times per second Blinks yellow Blinks red Blinks green Gl...

Page 23: ...from that to which the receiver is connected This device complies with part 15 of the FCC rules Operation is subject to the fol lowing two conditions 1 This device may not cause harmful interference and 2 this device must accept any interference received including interference that may cause unde sired operation NOTE This equipment has been tested and found to comply with the limits for a Class B ...

Page 24: ...re compliance IC RADIATION EXPOSURE STATEMENT FOR CANADA This device complies with Industry Canada license exempt RSS standard s Op eration is subject to the following two conditions 1 this device may not cause interference and 2 this device must accept any interference including interfer ence that may cause undesired operation of the device Le présentappareilestconforme aux CNR d Industrie Canada...

Page 25: ...tario Mills Parkway Ontario CA91764 USA Tel 1 855 284 8888 EU Yuneec Europe GmbH Address Niklaus Otto Strasse 4 24568 Kaltenkirchen Germany Tel 49 4191 932620 CN Youyu Shanghai Digital Technology Co Ltd Address B 15F 461 HongCao Road CaoHeJing Software Building XuHui District Shanghai China Tel 86 400 8207 506 COLLECTION AND PROCESSING OF DATA Yuneec may collect navigation information such as GPS ...

Page 26: ...ctivities ii take precautions against poten tial liability iii protect the security of the Yuneec Apps embedded into or down loaded onto your drone or any associated equipment and services iv protect the legal rights of ourselves or any others Any information we collected maybe disclosed or transferred to an acquirer suc cessor or assignee as part of any potential merger acquisition debt financing...

Reviews: