background image

30

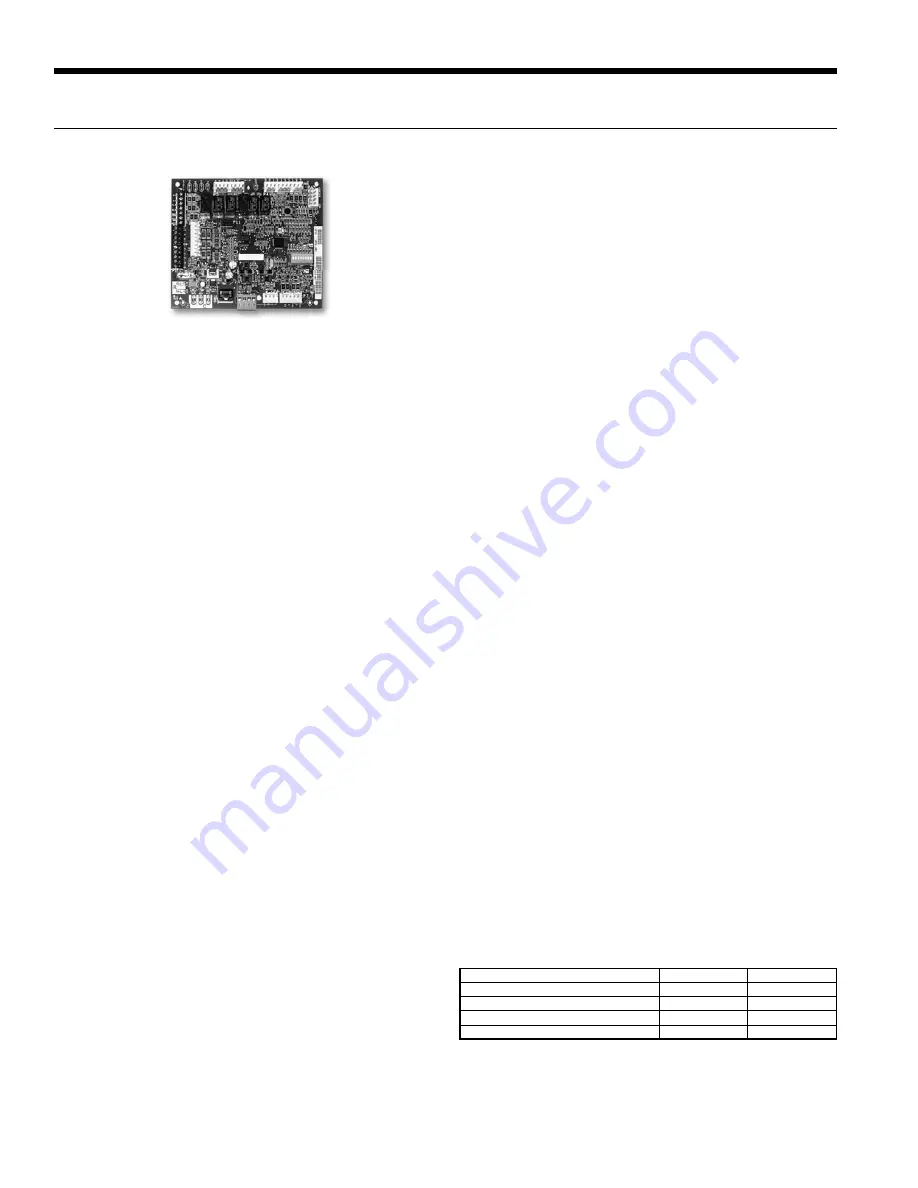
Aurora ‘Base’ Control

NOTE:

 Refer to the Aurora Base Control Application and 

Troubleshooting Guide and the Instruction Guide: Aurora Interface and 
Diagnostics (AID) Tool for additional information.

Control Features

Software ABC Standard Version 2.0

Single or Dual Capacity Compressors

Either single or dual capacity compressors can be operated.

ECM Blower Motor Option

An ECM blower motor can be driven directly using the onboard 
PWM output. Four blower speeds are available based upon the 
G, Y1, Y2, and W input signals to the board. The blower speeds 
can be changed either by the ECM manual configurations mode 
method or by using the Aurora AID Tool directly. All four blower 
speeds can be set to the same speed if desired. 

5-Speed ECM Blower Motor Option

A 5-Speed ECM blower motor will be driven directly using the 
thermostat connections. Any of the G, Y1, or Y2/W signals can 
drive any of the 5 available pre-programmed blower speeds on 
the motor.

Other Control Features

•  Random start at power up
•  Anti-short cycle protection
•  High and low pressure cutouts
•  Loss of charge
•  Water coil freeze detection
•  Air coil freeze detection
•  Over/under voltage protection
•  Condensate overflow sensor
• Load shed
•  Dehumidification (where applicable)
• Emergency shutdown
•  Hot gas reheat operation (where applicable)
• Diagnostic LED
•  Test mode push button switch
•  Two auxiliary electric heat outputs
• Alarm output
•  Accessory output with N.O. and N.C.
•  Modbus communication (master)
•  Modbus communication (slave)

Field Selectable Options via Hardware

DIP Switch (SW1)


– Test/Configuration Button (See SW1 

Operation Table)

Test Mode

The control is placed in the test mode by holding the push button 
switch SW1 for 2 - 5 seconds. In test mode most of the control 
timings will be shortened by a factor of sixteen (16). LED3 (green) 
will flash at 1 second on and 1 second off. Additionally, when 
entering test mode LED1 (red) will flash the last lockout one 
time. Test mode will automatically time out after 30 minutes. Test 
mode can be exited by pressing and holding the SW1 button for 
2 to 5 seconds or by cycling the power. 

NOTE: 

Test mode will 

automatically be exited after 30 minutes.

ECM Configuration Mode

The control is placed in the ECM configuration mode by holding 
the pushbutton switch SW1 for 5 to 10 seconds, the high, low, 
and “G” ECM speeds can be selected by following the LED 
display lights. LED2 (yellow) will fast flash when entering the 
ECM configuration. When setting “G” speed LED3 (green) will 
be continuously lit, for low speed LED1 (red) will be continuously 
lit, and for high speed both LED3 (green) and LED1 (red) will be 
continuously lit. During the ECM configuration mode LED2 (yellow) 
will flash each of the 12 possible blower speeds 3 times. When 
the desired speed is flashed press SW1, LED2 will fast flash until 
SW1 is released. “G” speed has now been selected. Next select 
low speed, and high speed blower selections following the same 
process above. After third selection has been made, the control 
will exit the ECM configuration mode. Aux fan speed will remain at 
default or current setting and requires the AID Tool for adjustment.

Reset Configuration Mode

The control is placed in reset configuration mode by holding the 
push button switch SW1 for 50 to 60 seconds. This will reset 
all configuration settings and the EEPROM back to the factory 
default settings. LED3 (green) will turn off when entering reset 
configuration mode. Once LED3 (green) turns off, release SW1 
and the control will reset.

DIP Switch (SW2) 

SW2-1

  FP1 Selection – Low water coil temperature limit setting 

for freeze detection. On = 30°F; Off = 15°F.

SW2-2

  FP2 Selection – On = 30°F; Off = N/A

SW2-3

  RV – O/B - thermostat type. Heat pump thermostats 

with “O” output in cooling or “B” output in Heating can be 
selected. On = O;   Off = B.

SW2-4

  Access Relay Operation (P2)

and 2-5

Access Relay Operation

SW2-4

SW2-5

Cycle with Blower

ON

ON

Cycle with Compressor

OFF

OFF

Water Valve Slow Opening

ON

OFF

Cycle with Comm. T-stat Hum Cmd

OFF

ON

Controls - Aurora Base Control

LX ULTRA SERIES INSTALLATION MANUAL

Summary of Contents for 33p502-05

Page 1: ...70 75 THRU 6 NOMINAL TONS Due to continuous product improvement specifications are subject to change without notice Visit us on the web at www yorkgeothermal com Additional rating information can foun...

Page 2: ......

Page 3: ...17 Freeze Detection 18 Electrical Connections 18 Electrical Data 19 21 Blower Performance Data 21 27 Wiring Schematics 28 29 Controls Aurora Base Control 30 33 Unit Startup 34 Operating Limits and Op...

Page 4: ...n 0 Composite No Secondary Connection 1 Composite Secondary Connection 2 Stainless Steel No Secondary Connection 3 Stainless Steel Secondary Connection Cabinet Option 0 Unpainted 1 in MERV 4 Filter Ra...

Page 5: ...ing the units from the packaging if necessary Units in question should also be internally inspected If any damage is noted the carrier should make the proper notation on the delivery receipt acknowled...

Page 6: ...open return applications Deluxe filter rack for ductable return applications 2 61 cm Service Access Left Return Right Return opposite side 2 61 cm Alternate Service Access Field installed duct flange...

Page 7: ...uct flange installed 0 10 in Return Connection using deluxe filter rack 0 10 in M N P Q R S T U V W Filter Rack Width Supply Width Supply Depth Return Depth Return Height 009 012 in 2 2 10 0 10 0 6 1...

Page 8: ...E AIR COIL SIDE 0 5 in 1 3 cm knockout 1 in 2 5 cm knockout 1 in 2 5 cm knockout 0 5 in 1 3 cm knockout BP BP FILTER RACK FILTER RACK Standard filter rails Standard filter rails Deluxe filter rack opt...

Page 9: ...8 0 8 1 9 2 9 1 cm 64 8 134 6 53 8 4 6 17 3 2 0 25 4 mm 23 4 23 1 070 in 25 5 61 0 21 2 1 8 6 8 0 8 1 9 2 9 1 cm 64 8 154 9 53 8 4 6 17 3 2 0 25 4 mm 23 4 23 1 Horizontal Models Discharge Connection...

Page 10: ...a double nut is required since vibration could loosen a single nut To allow filter access install hanger brackets as illustrated in the Hanger Bracket Locations section The unit should be pitched app...

Page 11: ...8 28 1 24 4 cm 157 0 71 4 62 0 10 29 13 Weight Distribution Model Vertical Shipping Weight Horizontal Shipping Weight Horizontal Weight Distribution Front Back D E F G 009 lb 110 120 46 23 26 25 kg 50...

Page 12: ...t whenever the unit operates To assure proper flow use pressure temperature ports to determine the flow rate These ports should be located at the supply and return water connections on the unit The pr...

Page 13: ...han 0 5 ppm Less than 0 5 ppm Ammonia Nitrate Less than 0 5 ppm Less than 0 5 ppm Less than 0 5 ppm Ammonia Hydroxide Less than 0 5 ppm Less than 0 5 ppm Less than 0 5 ppm Ammonia Sulfate Less than 0...

Page 14: ...t the system from dirty water conditions Dirty water will result in system wide degradation of performance and solids may clog valves strainers flow regulators etc Additionally the heat exchanger may...

Page 15: ...ow Open System Groundwater Application Flexible Duct Collar Vibration Absorbing Pad P T Plugs Drain Hot Water Generator Connections Low Voltage to Thermostat and Valve Unit Supply Aux Heat Supply Wate...

Page 16: ...the water heater tank 4 Drain the tank by opening the valve on the bottom of the tank then open the pressure relief valve or hot water faucet 5 Flush the tank by opening the cold water inlet valve to...

Page 17: ...st the temperature setting on the tank On tanks with both upper and lower elements the lower element should be turned down to the lowest setting approximately 100 F The upper element should be adjuste...

Page 18: ...factory wired for 230 volt operation For 208 volt operation the red and blue transformer wires must be switched on terminal strip PS CAUTION When installing a unit with an ECM blower motor in 460 60...

Page 19: ...2 60 0 n a 2 0 13 2 16 0 25 208 230 60 3 187 253 13 9 8 9 58 0 34 8 2 2 11 1 13 3 20 460 60 3 414 506 6 5 4 2 28 0 16 8 1 1 5 3 6 4 10 15 036 208 230 60 1 187 253 27 0 17 3 96 7 38 7 2 2 19 5 23 8 40...

Page 20: ...9 8 9 58 0 34 8 4 1 13 0 15 2 20 460 60 3 414 506 6 5 4 2 28 0 16 8 2 1 6 3 7 4 10 15 036 208 230 60 1 187 253 27 0 17 3 96 7 38 7 4 1 21 4 25 7 40 265 60 1 238 292 19 0 12 2 72 0 n a 3 6 15 8 18 9 3...

Page 21: ...15 036 208 230 60 1 187 253 27 0 17 3 96 7 38 7 4 0 21 3 25 6 40 265 60 1 238 292 19 0 12 2 72 0 n a 4 1 16 3 19 3 30 208 230 60 3 187 253 20 0 12 8 95 0 57 0 4 0 16 8 20 0 30 460 60 3 414 506 10 0 6...

Page 22: ...1485 1445 1410 1310 1215 1130 1030 L 1180 1170 1160 1140 1120 1100 1080 1050 1020 970 930 875 060 H 11 x 10 1 2360 2330 2300 2270 2240 2215 2190 2160 2130 2095 2060 1985 1920 1855 M 2165 2130 2095 207...

Page 23: ...23 Setting Blower Speed PSC CAUTION Disconnect all power before performing this operation PSC BLOWER MOTOR BODY HIGH LOW MEDIUM F A N S P E E D W I R E LX ULTRA SERIES INSTALLATION MANUAL...

Page 24: ...85 1250 1220 1190 1158 1125 1085 1045 960 Med High 4 1265 1253 1240 1220 1200 1175 1150 1120 1090 1053 1015 Med 3 1160 1143 1125 1113 1100 1085 1070 1055 1040 1020 1000 Med Low 2 1110 1095 1080 1065 1...

Page 25: ...nnects Line 1 orange wire to L Ground green wire to G Line 2 for 208V 230V units to N brown wire Signal Connection 1 4 in quick connects Common to C 24VAC to Taps 1 5 Applying 24VAC power between any...

Page 26: ...1300 1500 1600 1800 L M H 048 0 50 650 750 850 950 1050 1150 1250 1325 1375 1475 1550 1600 L M H 048 w 1hp 0 75 800 1000 1100 1300 1500 1600 1800 L M H 060 0 75 750 900 1000 1200 1400 1600 1700 1850 2...

Page 27: ...reen displays the current variable speed ECM settings It allows the technician to enter the setup screens to change the variable speed ECM settings Change the highlighted item using the and buttons an...

Page 28: ...h Pressure Lockout Low Pressure Lockout Low Water Coil Limit Lockout FP1 Low Air Coil Limit Lockout FP2 Reserved Condensate Overflow Lockout Over Under Voltage Shutdown Reserved Reserved Air Water Coi...

Page 29: ...3 Red 32 Black 35 Black White Black White Yellow LED4 LED5 G G Note 5 Note 6 Slow Flash Fast Flash Flash Code Status LED LED1 Green Configuration LED LED2 Yellow Fault LED LED3 Red Status LED LED1 Gre...

Page 30: ...one time Test mode will automatically time out after 30 minutes Test mode can be exited by pressing and holding the SW1 button for 2 to 5 seconds or by cycling the power NOTE Test mode will automatica...

Page 31: ...ed shall flash the fault code To reset lockout conditions with SW2 8 On thermostat inputs Y1 Y2 and W must be removed for at least 3 seconds To reset lockout conditions with SW2 8 Off thermostat input...

Page 32: ...command is removed Regardless of blower input G from the thermostat the blower will remain on for 30 seconds at the end of each heating cycle Cooling Operation In all cooling operations the reversing...

Page 33: ...plugs into the exterior of the cabinet in the AID Tool port ABC Control Board Layout Aurora Base Control LED Displays These three LEDs display the status configuration and fault codes for the control...

Page 34: ...easuring the pressure drop through the heat exchanger using the P T plugs and comparing to the pressure drop table 6 Check the temperature of both the supply and discharge water Refer to Unit Operatin...

Page 35: ...375 10 14 7 11 7 10 28 34 90 1 5 170 177 425 460 14 18 12 16 8 11 42 50 3 0 174 181 435 470 14 18 12 16 8 11 42 50 110 2 3 3 0 11 10 09 NOTES Cooling performance based on entering air temperatures of...

Page 36: ...6 14 0 9 1 8 8 8 5 8 2 7 9 048 6 0 2 0 1 7 1 3 1 0 0 6 9 0 4 2 3 8 3 5 3 1 2 7 12 0 6 7 6 3 5 9 5 6 5 2 16 0 11 5 11 2 10 8 10 5 10 1 060 9 0 3 6 3 3 3 0 2 7 2 3 12 0 6 1 5 8 5 5 5 2 4 8 15 0 9 6 9 2...

Page 37: ...Bad Valves Low High Low High Normal High Low Low TXV Bulb Loss of Charge Low Low Low High High Low Low Scaled Coaxial Heat Exchanger Heating Low Low Low Normal Low High Low Low Scaled Coaxial Heat Exc...

Page 38: ...5 1 13 1 31 1 07 1 23 0 83 0 91 4 43 4 90 n a 041 042 0 49 1 03 1 29 1 49 n a 0 81 1 05 4 33 4 99 5 11 5 64 048 0 51 0 58 1 36 1 57 n a 0 91 1 05 3 60 4 14 4 16 4 78 060 0 29 0 34 0 76 0 87 n a 0 56 0...

Page 39: ...26 2 31 4 32 2 31 6 30 8 29 7 030 4 0 18 9 25 9 32 9 35 2 35 4 37 0 6 0 14 5 19 9 27 0 33 4 35 1 37 2 37 6 37 6 34 7 8 0 15 2 20 9 28 0 34 0 35 2 39 1 39 7 37 9 35 0 036 5 0 24 6 33 0 41 7 47 4 45 3...

Page 40: ...place the compressor If sufficient cooling or heating is not obtained 1 Check control for improper location or setting 2 Check for restriction in water flow 3 Check refrigerant subcooling and superhea...

Page 41: ...__ AMPS n ______ AMPS Watts m x n x 0 85 o _____ WATTS o ______ WATTS 6 CAPACITY Cooling Capacity HR o x 3 413 p _____ btu hr Heating Capacity HE o x 3 413 p _____ btu hr 7 EFFICIENCY Cooling EER p o...

Page 42: ...ltage Loop Open Unit Amp Draw Closed COAX SOURCE HEA7 1 ANALYSIS EXPANSION VALVE F AIR COIL F COMPRESSOR DISCHARGE SUCTION Subcooling Superheat REVERSING VALVE PSI F SAT F PSI SAT F F F LIQUID LINE Li...

Page 43: ...e Drain In areas where airborne bacteria produce a slime in the drain pan it may be necessary to treat chemically to minimize the problem The condensate drain can pick up lint and dirt especially with...

Page 44: ...14S553 02 Not Available High Static VS ECM Blower Housing Not Available 53P515B01 53P515B01 Not Available PSC Motor Blower PSC Motor 208 230 60 1 14P506 02 14P507B01 14P508B01 14P509B01 14P510B01 14P5...

Page 45: ...ailable High Static VS ECM Blower Housing Not Available 53P515B01 53P515B01 Not Available PSC Motor Blower PSC Motor 208 230 60 1 14P506 02 14P507B01 14P508B01 14P509B01 14P510B01 14P511B01 14P512B01...

Page 46: ...46 Revision Guide Pages Description Date By All First Published 18 Oct 2013 DS LX ULTRA SERIES INSTALLATION MANUAL...

Page 47: ......

Page 48: ...t LX Ultra Series Type Geothermal Water Source Heat Pumps Size 0 75 6 Ton Document Type Installation Manual Part Number IM1200AK6 Release Date 10 13 2013 The manufacturer has a policy of continual pro...

Reviews: