background image

Warranty :

EMI Emmisssion Certification:

1 Year

return


 to factory Warranty on Electric Drive components, sensors and Downloading support hardware.

Please ensure you agree to the warrantry conditions before proceeding to purchase this product, read the warranty form 
at the end of this user guide.  Installation wiring to sensors and wear and tear on connectors not covered

 
NOTE:


The

 
We


question.


smallest


the


even


have


you


if


'Anytime'

upport 

s


dealer


your


Call


help.


to


here


are


system.


the


by


released


being


is


amounts


correct


the


ensure


to


system


metering


the


on


bag


a


ith

w


runs


test


drill


needed


if


and


system


the


understand


should


operator


issue.


out


with


operating


is


it


ensure


to


system


the


monitor


to


and


correctly


up


system


drive


Electric


the


set


dealer


to

or


operator


the


of


responsibilty


sole


the


is

 t


I


product.


this


using


from


result


that


irregularities


planting


mishaps,


any


for


responsible


or


liable


way


no


in


is


Limited


Zealand


New


Gtech


.

Electro magnetic interference emmission certification are a series of tests that required to be passed beforean
electronic device can be sold. These test are related to how much electron magnetic radiation is emmitted by
an electronic device.

The Area meter has the following certifications and is suitable for sale in the following countries:
     Certification

Countries

     C-Tick Z874 Class B

New Zealand, Australia


Europe


CE

3


Summary of Contents for Field Mate 3

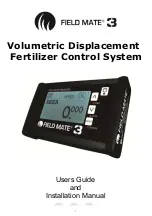
Page 1: ...Volumetric Displacement ontrol C System Fertilizer Users Guide and Installation Manual 1...

Page 2: ...part be copied photocopied reproduced stored or reduced to any electronic medium or machine readable form without permisssion from G Tech NZ Ltd If you Need to Call Customer Service Please complete th...

Page 3: ...l needed if and system the understand should operator issue out with operating is it ensure to system the monitor to and correctly up system drive Electric the set dealer to or operator the of respons...

Page 4: ...onitoring Hardware fault monitors on all motor channels Real time motor RPM displayed to give real world proformance measurment ott he users Fast drill calibration Instant feed back on system operatio...

Page 5: ...Hold signal Switch to GND to trigger 3 Pump Paint Distance Green GPS Sync Pulse Switch to GND to trigger 2 Brown 7 Red 4 Blue Pump Supply Solenoid solenoid Gnd P wer o power Power 8 rive D Brown Green...

Page 6: ...Sync pulse spacing Current distance travelled from sync pulse State machine status Relects fert release function control Ground speed system voltage plant counter The fert distance counts down here p...

Page 7: ...R key Inside the JOB menu Change the job Hold ARROW key to select Bin1 libary select Currently set to 1 Bin2 libary select Currently set to 1 Move to new job if required Current JOB To reset or view d...

Page 8: ...AREA drilled for this job This total can be cleared by holding down any ARROW key If reset no other totals are effected Speed of the drill in KM HR NOTE get this number right so the true speed of teh...

Page 9: ...Inside the OPERATE menu More Working RATE of the Drill Displayed in Hectare Hour 15...

Page 10: ...for ever Speed sensor pulse Working width of the drill Quick Press the POWER key to enter the SETUP mode NOTE When exiting SETUP turn the monitor OFF then ON If not done CYCLE POWER will flash and the...

Page 11: ...REPORT menu Move through the REPORT screens using the ARROW keys Quick Press Quick Press the POWER key to enter the REPORT mode Name of BIN1 Name of BIN2 Name of BIN3 Name of BIN4 Name of this monitor...

Page 12: ...T menu More Time with the drill in RUN mode and Drilling Time with the drill in RUN mode and stationary Time with the drill in HOLD Mode with the drill moving Time with the drill in HOLD Mode the dril...

Page 13: ...ze of the DISTANCE PULSE number used to calc the area for this job Size of the DRILL WIDTH number used to calc the area for this job Number of Speed pulses counted while drilling Number of speed pulse...

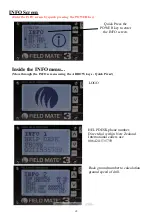
Page 14: ...FO menu Move through the INFO screens using the ARROW keys Quick Press Quick Press the POWER key to enter the INFO screen LOGO 24 HELP Direct International use 0064211535759 callers Zealand New in wit...

Page 15: ...rate drilling of rate drill educed R status sensor bin ow L number Serial monitor into voltage Battery units easurement M temperature Monitor These counter on off Power metrics proformance system or...

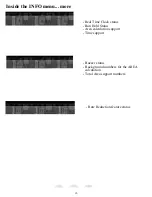
Page 16: ...ore menu O INF the Real Run support Time support calculation Area Status Hold status Clock Time Buzzer numbers support Area Total calculation AREA the for numbers ground Back status Rate Reduction fea...

Reviews: