background image


<8.  Setting Parameters>

8-18

IM 01C27C01-01EN

8.4.2  Alert Report

EJX generates alert information related to 

Diagnostic Status and automatically sends to a field 

wireless gateway. To use this function, the following 

alert setting is necessary. When “Out of Service” for 

Diagnostic Status alert is required, choose “FALSE” 

for [Out of Service.Alert Disable] in the UAPMO 

block.  Refer to the field wireless gateway User’s 

Manual for the setting procedure to obtain the alert 

information from the gateway.

The alert report consists of the list of parameter 

names as shown Table 8.3 below.

Table 8.3 

Contents of Alert Report

Parameter name

Description

DetectObjectTLPort Alert detection port UAP (0xF0B2) 

fixed

DetectObject

Alert detection block UAPMO (1) 

fixed

DetectTime

Time stamp

AlertDirection

1: generated, 0: clear

AlertPriority

Alert priorities set by users

AlertType

Alert types, see 8.4 Self-

Diagnostics

AlertValue

NAMUR107 category 

0:Failure, 1:checkFunction, 

2:OffSpec, 3:MaintenaceRequired 

CAUTION

For a wireless gateway which does not support 

the alert report function, the alert setting in 

UAPMO block for the transmitter must be set 

to “Disable.” Note that YFGW710 field wireless 

integrated gateway does not have the alert 

report function.

Summary of Contents for DPHarp EJX210B

Page 1: ...User s Manual Y okogawa Electric Corporation EJX210B Flange Mounted Differential Pressure Transmitter IM 01C27C01 01EN IM 01C27C01 01EN 13th Edition ...

Page 2: ...ssure Connection 2 3 2 6 Restrictions on Use of Radio Transceivers 2 3 2 7 Insulation Resistance and Dielectric Strength Test 2 3 2 8 Installation of an Explosion Protected Instrument 2 4 2 8 1 FM Approval 2 5 2 8 2 CSA Certification 2 6 2 8 3 ATEX Certification 2 6 2 8 4 IECEx Certification 2 8 2 9 EMC Conformity Standards 2 9 2 10 Pressure Equipment Directive PED 2 9 2 11 Low Voltage Directive 2...

Page 3: ...ctive Device and Wiring 6 4 6 2 Grounding 6 4 6 3 Power Supply Wiring Precautions 6 5 6 4 Selecting the Wiring Materials 6 5 6 5 Connection of the External Power Source Terminal 6 5 7 Operation 7 1 7 1 Preparation for Starting Operation 7 1 7 2 Zero Point Adjustment 7 2 7 3 Starting Operation 7 3 7 4 Connecting to the Field Wireless Network 7 3 7 5 Shutting Down The Transmitter 7 5 7 6 Venting or ...

Page 4: ...he Device Configuration Tool 8 17 8 4 2 Alert Report 8 18 8 4 3 Checking with Integral Indicator 8 20 9 Maintenance 9 1 9 1 Overview 9 1 9 2 Calibration Instruments Selection 9 1 9 3 Calibration 9 1 9 4 Disassembly and Reassembly 9 3 9 4 1 Replacing the Integral Indicator 9 3 9 4 2 Replacing the RF Assembly 9 4 9 4 3 Replacing the CPU Assembly 9 4 9 4 4 Replacing the Process Connector Gaskets 9 5 ...

Page 5: ...ered by this manual are limited to those for the standard type under the specified model number break down and do not cover custom made instruments When products whose suffix code or optional codes contain code Z and an exclusive document is attached please read it along with this manual Please note that changes in the specifications construction or component parts of the instrument may not immedi...

Page 6: ...t may be impaired In this case Yokogawa cannot guarantee that the instrument can be safely operated Please pay special attention to the following points a Installation This instrument may only be installed by an engineer or technician who has an expert knowledge of this device Operators are not allowed to carry out installation unless they meet this condition With high process temperatures care mu...

Page 7: ...in the EEA European Economic Area is Yokogawa Europe B V Euroweg 2 3825 HD Amersfoort The Netherlands 1 2 Radio Wave IMPORTANT This instrument is equipped with a wireless module which is designated as a certification of construction type as a wireless facility for 2 4 GHz band low power data communication system of the Radio Act Refer to 2 12 Regulatory Compliance for Radio and Telecommunication f...

Page 8: ...ogawa The purchaser shall bear the responsibility for repair costs even during the warranty period if the malfunction is due to Improper and or inadequate maintenance by the purchaser Malfunction or damage due to a failure to handle use or store the instrument in accordance with the design specifications Use of the product in question in a location not conforming to the standards specified by Yoko...

Page 9: ...cts in the People s Republic of China 電子情報製品汚染制御管理弁法 中国版RoHS 产品中有害物质或元素的名称及含量 产品中有害物质或元素的名称及含量 型号 部件名称 有害物质 铅 Pb 汞 Hg 镉 Cd 六价铬 Cr VI 多溴联苯 PBB 多溴二苯醚 PBDE EJX B series 无线差压 压力 变送器 YTA510 无线温度变送器 壳体 膜盒组件 基板组件 电源连接线 天线组件 电池组件 表示该部件的所有均质材料中的有害物质的含量均在 GB T26572 标准中所规定的限量以下 表示至少该部件的某些均质材料中的有害物质的含量均在 GB T26572 标准中所规定的限量以上 环保使用期限 该标识适用于 SJ T11364 中所述 在中华人民共和国销售的电子电气产品的环保使用期限 注 该年数为 环保使用期限 并非产品的质量保证期 ...

Page 10: ...connector gasket Bolt F0201 ai No antenna is provided for Amplifier housing code 9 Antenna Figure 2 1 Transmitter Mounting Hardware 2 1 Model and Specifications Check The model name and specifications are written on the name plate attached to the case Refer to USER S MANUAL Made in Japan TOKYO 180 8750 JAPAN MODEL SUFFIX SUPPLY OUTPUT MWP mA DC V DC STYLE CAL RNG NO F0202 ai Figure 2 2 Name Plate ...

Page 11: ...t exceed 30 C NOTE When storing the instrument with a battery pack it is recommended to put the instrument in Deep Sleep mode to conserve the batteries For details on how to switch to Deep Sleep mode refer to subsection 8 3 13 Switching to Deep Sleep Mode 2 4 Selecting the Installation Location The transmitter is designed to withstand severe environmental conditions However to ensure that it will ...

Page 12: ...than the specified maximum working pressure 2 6 Restrictions on Use of Radio Transceivers IMPORTANT Although the transmitter has been designed to resist high frequency electrical noise if a radio transceiver is used near the transmitter or its external wiring the transmitter may be affected by high frequency noise pickup To test this start out from a distance of several meters and slowly approach ...

Page 13: ...ent limit on the dielectric strength tester to 0 1 mA then turn ON the power and gradually increase the test voltage from 0 to the specified voltage 5 When the specified voltage is reached hold it for one minute 6 After completing this test slowly decrease the voltage to avoid any voltage surges NOTE When storing the instrument with a battery pack it is recommended to put the instrument in Deep Sl...

Page 14: ... excluding glass parts or coated parts of the Pressure Transmitter shall be avoided Model EJX L Series Date March 8 2010 Rev 1 May 21 2010 Doc No IFM037 A20 P 1 Rev 2 October 16 2012 Rev 3 April 24 2014 Rev 4 July 11 2016 Yokogawa Electric Corporation Notes 1 No revision to this drawing without prior approval of FM 2 Installation must be in accordance with the National Electric Code NFPA 70 ANSI I...

Page 15: ...nce with Canadian Electrical Code Part I and Local Electrical Code Do not alter drawing without authorization from CSA The instrument modification or parts replacement by other than authorized representative of Yokogawa Electric Corporation is prohibited and will void Canadian Standards Intrinsically safe and nonincendive Certification Installation Diagram F0205 ai Transmitter Intrinsically Safe G...

Page 16: ... or F9915NS for the battery pack Precaution shall be taken to minimize the risk from electrostatic discharge when replacing the battery pack in a hazardous area Use only TL 5930 S or SL 2780 S TADIRAN or SB D02 Vitzrocell for the cells The cells must be replaced in a non hazardous area Note 5 Maintenance and repair WARNING A modification of the equipment would no longer comply with the constructio...

Page 17: ...ay that even in the event of rare incidents an ignition source due to impact and or friction sparks is excluded Precaution shall be taken to minimize the risk from electrostatic discharges or propagating brush discharges on the non metallic parts excluding glass parts or coated parts of the equipment Note 3 Installation and erection See the control drawing If the equipment is mounted in an area wh...

Page 18: ...ropriate measures at the device or system level to protect transmitters if they are to be operated near an external heat source 2 11 Low Voltage Directive Applicable standard EN61010 1 EN61010 2 030 1 Pollution Degree 2 Pollution degree describes the degree to which a solid liquid or gas which deteriorates dielectric strength or surface resistivity is adhering 2 applies to normal indoor atmosphere...

Page 19: ...RF Exposure rules This equipment should be installed and operated keeping the radiator at least 20 cm or more away from person s body This radio transmitter IC Number 8999A WIC001 1 8999A WIC013 2 has been approved by Industry Canada to operate with the antenna types listed below with the maximum permissible gain indicated Antenna types not included in this list having a gain greater than the maxi...

Page 20: ...itch Position Note 1 Note 2 H L E D H L E D E WR D Not in use Write protection switch Slide switch Antenna Note 1 Set the switch as shown in the figure above to set the write protection The hardware write protection switch is set to E side Set to H side for the switch of not in use Note 2 When the switch is D side write protection setting provisioning is acceptable For details of provisioning refe...

Page 21: ...e flange as shown in Figure 4 1 The mating flange gasket stud bolts and nuts are to be procured by the customer Gasket Stud bolt Nut F0401 ai Figure 4 1 Transmitter Mounting IMPORTANT Please use a gasket with an inside diameter ød that is greater than the diameter of the diaphragm seal If a gasket with a smaller inside diameter is used the diaphragm may not function correctly Refer to Subsection 1...

Page 22: ... attaching the integral indicator 4 5 Changing the direction of the antenna Adjust the direction of the antenna to be in the upright position To change the installation angle follow the procedure below 1 Loosen the two mounting screws at the bottom of the antenna by using a 2 5 mm Allen wrench see Figure 4 3 The screws might come off and be lost if loosened too much loosen the screws by about thre...

Page 23: ...Process Flange Tighten the bolts to completely close the gap between the ring and the pressure detector section The mating flange gasket stud bolts and nuts are to be procured by the customer F0406 ai Ring Diaphragm Pressure detector section Gasket Mating flange Spiral gasket Figure 4 6 Mounting to Process Flange IMPORTANT Confirm that there is no gap between the ring and the process detector sect...

Page 24: ...nge the its shape 3 Affix the teflon film over the diaphragm and gasket area 4 Next carefully inspect the cover and try to identify any entrapped air between the diaphragm and the teflon film The air must be removed to ensure optimum performance If air pockets are present use your fingers to remove the air by starting at the center of the diaphragm and work your way out 5 Position the gasket on th...

Page 25: ... Low pressure connection Figure 5 1 H and L Symbols on a Capsule Assembly 2 Tightening the Process Connector Mounting Bolts After connecting the impulse line tighten the process connector mounting bolts uniformly Apply a torque of 39 49N m 4 5kgf m 3 Removing the Impulse Piping Connecting Port Dustproof Cap The impulse piping connecting port of the transmitter is covered with a plastic cap to keep...

Page 26: ... transmitter installation location the process piping layout and the characteristics of the process fluid corrosiveness toxicity flammability etc etc and make appropriate changes and additions to the connection configurations F0502 ai Open Tank Pipe opened to atmosphere at low pressure side Tap valve Union or flange Vent plug Tee Drain valve Drain plug Closed Tank Figure 5 2 Impulse Piping Connect...

Page 27: ... connection to be protected 2 Wind the butyl rubber self bonding tape around the connection See the manual of the tape about the winding 3 To protect the butyl rubber self bonding tape from the environment such as ultraviolet rays and so on wind vinyl tape or a vinyl type self bonding tape on it 6 1 1 Mounting the antenna Screw the provided antenna into the antenna connector of the transmitter The...

Page 28: ...e antenna into the antenna connector of the antenna extension cable on the bracket 1 Tighten the antenna connector with a torque of 2 to 3 N m 4 Protect the connection as necessary For details of the protection see 6 1 Mounting Antenna and Wiring 6 1 2 2 Wiring of Antenna Extension Cable 1 Use the provided antenna extension cable to connect the antenna connector with the external antenna Tighten t...

Page 29: ...sion cable 2 10 m Antenna Antenna Antenna extension cable 1 3 m Antenna extension cable 1 3 m Protect by self bonding tape Transmitter body Surge protective device Figure 6 4 Wiring the antenna extension cable CAUTION Use the dedicated antenna extension cable provided by Yokogawa as accessories for the transmitters ...

Page 30: ...ension cable with an arrestor Class C grounding with the grounding resistance of 10 Ω is required Always ground the transmitter case in accordance with national and local electrical codes The most effective transmitter case grounding method is a direct connection to earth ground with minimal impedance IMPORTANT Proper grounding is necessary to maintain the function and performance of this product ...

Page 31: ...lderless terminal lugs for 4 mm screws with insulating sleeves be used for leadwire ends IMPORTANT External powered type does not have a power switch Install a breaker on the power supply line and turn the power ON OFF 6 5 Connection of the External Power Source Terminal For the external powered type connect the power supply wiring to and terminals If the power supply cable has shield wires connec...

Page 32: ...ield wireless network Battery case is installed in the transmitter when shipped from the factory however batteries are sold separately and not included c Using the field wireless configuration tool or the device configuration tool confirm that the transmitter is operating properly Check parameter values or change the setpoints as necessary Integral Indicator s indication can be used to confirm tha...

Page 33: ...ameters Use a slotted screwdriver to turn the zero adjustment screw Turn the screw clockwise to increase the output or counterclockwise to decrease the output The zero point adjustment can be made with a resolution of 0 01 of the setting range The degree of zero adjustments varies with the screw turning speed turn the screw slowly to make a fine adjustment quickly to make a rough adjustment Using ...

Page 34: ...g device and procedure for connecting the transmitter to the Field Wireless Network refer to the User s Manual FieldMate Versatile Device Management Wizard IM 01R01A01 01E and YFGW410 Field Wireless Management Station IM 01W02D01 01EN F0704 ai within 30cm Figure 7 4 Provisioning Example Provisioning work This subsection describes provisioning work using FieldMate as the provisioning device Provisi...

Page 35: ...less integrated gateway is not found and a specified time based on the silence mode has elapsed a cycle of a one hour pause and six minute search is repeated until the instrument can join the field wireless network For details on the procedure to switch to silence mode refer to subsection 8 3 14 Switching to Silence Mode NOTE If the transmitter searches the Field Wireless Network for long time at ...

Page 36: ...either draining nor venting will be required if the impulse piping is configured appropriately for self draining or self venting operation If condensate or gas collects in the transmitter pressure detector section the measured pressure may be in error If it is not possible to configure the piping for self draining or self venting operation you will need to loosen the drain vent screw on the transm...

Page 37: ...dy or inhalation of vapors When you loosen the vent screw the accumulated liquid or gas will be expelled in the direction of the arrow Vent screw F0711 ai Figure 7 7 Venting the Transmitter 7 6 3 Draining Condensate for Flushing Connection Ring 1 Gradually open the drain screw to drain from the flushing connection ring 2 When the flushing connection ring is completely drained close the drain screw...

Page 38: ...nted close the vent screw 3 Tighten the vent screw to a torque of 10 N m 1 kgf m F0713 ai Vent screw When you loosen the vent screw the accumulated liquid or drain will be expelled in the direction of the arrow Figure 7 9 Venting for Flushing Connection Ring WARNING Since the accumulated liquid or gas may be toxic or otherwise harmful take appropriate care to avoid contact with the body or inhalat...

Page 39: ...nd DeviceDTM for your transmitter wireless EJX are installed in the device configuration tool Refer to the following website for the latest information on CF DD and DeviceDTM http www yokogawa com CF Capabilities File DD Device Description A CF contains information such as the vendor of the field device its model and revision available types of process data flow rate temperature pressure etc and n...

Page 40: ...lize output near 0 if output signal is the square root mode Two modes are available forcing output to 0 for input below a specific value or changing to proportional output for input below a specific value Integral indicator range of scale and unit Sets one of differential pressure pressure value static pressure value or temperature value for the integral indicator scale Note LRV and URV can be set...

Page 41: ... Contract_Status Actual_Phase PUB_ITEM ObjectID AttributeID AttributeIndex Size Tag Description Block Info Configuration Calibration REVISION Others F0802 1 ai Others Special Cmd Others Other Faults Alert Faults Non compliance Alert Faults Process Influence Alert Simulation Active Alert Soft Update Incomplete Alert Power Low Alert Power Critical Low Alert Fault Prediction Alert Environmental Condi...

Page 42: ...it PV Range Linerization Type Flow Constant Lower Cutoff Low Cut Mode H L Swap T Zero Cmp Temp Zero Temp Select Others PV Range PV Range EU at 100 PV Range EU at 0 PV Range Units Index PV Range Decimal F0802 2 ai Block Mode Cal Cmd Cal Status Calibration Highest Point Calibration Lowest Point Calibration Minimum Span External Zero Trim Calibration Block Mode Mode Target Mode Actual Mode Permitted ...

Page 43: ...U at 0 Scale Units Index Scale Decimal Upper Limit Lower Limit PV Range Linerization Type Flow Constant Lower Cutoff Cal Cmd Cal Status Calibration Highest Point Calibration Lowest Point Calibration Minimum Span Static Pres Type SP Select Others PV Range PV Range EU at 100 PV Range EU at 0 PV Range Units Index PV Range Decimal F0802 3 ai Transducer Value Status Transducer Value Value Transducer Va...

Page 44: ...Target Mode Actual Mode Permitted Mode Normal Scale Scale EU at 100 Scale EU at 0 Scale Units Index Scale Decimal Sensor Range Tertiary Value Sel Others Sensor Range Sensor Range EU at 100 Sensor Range EU at 0 Sensor Range Units Index Sensor Range Decimal F0802 4 ai Transducer Value Status Transducer Value Value Transducer Value Simulate Value Status Simulate Value Value Simulate Value Online Menu...

Page 45: ...lock Mode Upper Limit Lower Limit PV Range Linerization Type Flow Constant Lower Cutoff Low Cut Mode H L Swap T Zero Cmp Temp Zero Temp Select Others PV Range EU at 100 PV Range EU at 0 PV Range Units Index PV Range Decimal PV Range Mode Target Mode Actual Mode Permitted Mode Normal Block Mode Scale EU at 100 Scale EU at 0 Scale Units Index Scale Decimal Scale Tag Description Block Info Configure ...

Page 46: ...mitted Mode Normal AI3 Temp Block Info Tag Description Sensor Range Tertiary Value Sel Others Block Mode Concentrator OID Scale Process Value Filter Time Configuration Mode Target Mode Actual Mode Permitted Mode Normal Block Mode Scale EU at 100 Scale EU at 0 Scale Units Index Scale Decimal Scale PV Range EU at 100 PV Range EU at 0 PV Range Units Index PV Range Decimal PV Range Configure Setup Blo...

Page 47: ...alue Simulation Process Variable AI3 Temp Process Value Simulation Dynamic Variables Process Value Status Process Value Value Process Value Simulate Switch Transducer Value Simulate Value Simulation Transducer Value Status Transducer Value Value Transducer Value Simulate Value Status Simulate Value Value Simulate Value Transducer Value Status Transducer Value Value Transducer Value Simulate Value ...

Page 48: ...ery life is initialized by Reset Energy Left parameter 6 LCD display The following steps describe how to set LCD display 1 On Off of display When Enable in LCD Mode is selected the LCD displays a set of screens to be shown and turns off for the specified time based on LCD Intermittent Time and the display keeps the cycle repeatedly Not selecting this parameter turns the LCD off 2 On Off of continu...

Page 49: ...ge limit values sent to the transmitter Procedure to call up the PV Range display AI1 AI2 block PV Range Select the AI1 block for the differential pressure and the AI2 block for the static pressure then select EU at 0 and EU at 100 displayed in the PV Range parameters and input the lower range and upper range values for the range respectively 8 3 7 Output Signal Low Cut Mode Setup Low cut mode can...

Page 50: ...essure AI2 block and temperature AI3 block selected in the Display Selection parameter 8 3 9 Unit for Displayed Temperature When the instrument is shipped the temperature units are set to C Centigrade Follow the procedure below to change this setting Procedure to call up the Sensor Range Units Index display AI3 block Sensor Range Units Index Confirm that C deg C is selected in the Sensor Range Uni...

Page 51: ...ure Al1 block Procedure to call up the calibration status parameter Cal Status AI1 block Cal Status Confirm the value of CAL_SUCCESS 1 using the Cal Status parameter b To match current input and output value follow procedure Like tank level measurement that is impossible to set actual level to zero output value is adjustment to actual level by other measurement using glass gauge This is an adjustm...

Page 52: ...value as parameter the transmitter calculates quantity of adjustment and performs adjustment automatically Procedure to call up the lower limit value parameter Calibration Lowest Point AI1 block Calibration Lowest Point Set the lower limit adjustment value on the differential pressure AI1 block Calibration Lowest Point parameter screen Apply a reference pressure corresponding to the lower limit of...

Page 53: ...tial setting as well Procedure to call up the calibration adjustment parameter Cal Cmd AI1 AI2 block Cal Cmd CAL_CLEAR 8 3 12 Software Write Protection Hardware write protection and software write protection functions are available for this transmitter Procedure to call up the protection setting parameter UAP Option UAPMO block UAP Option The following settings can be configured in the UAP Option ...

Page 54: ...s a function to pause the instrument when it cannot join the field wireless network after a specified time has elapsed This function is effective in conserving battery power when for example the installation of the field wireless integrated gateway is delayed compared to that of field wireless devices The default value is 28800 seconds 8 hours Thereafter a cycle of a one hour pause and six minute ...

Page 55: ... Bit01 vendor specific area Bit00 Detail information available 1 available 0 no available Checking the Diagnostic Status category allows taking the proper action The Diagnostic Status contents are common for all ISA devices and the setting for the Diagnostic Status category can be changed For further details refer to Diagnostic Status Detail In Diagnostic Status Contents that can be diagnosed by t...

Page 56: ...ists of the list of parameter names as shown Table 8 3 below Table 8 3 Contents of Alert Report Parameter name Description DetectObjectTLPort Alert detection port UAP 0xF0B2 fixed DetectObject Alert detection block UAPMO 1 fixed DetectTime Time stamp AlertDirection 1 generated 0 clear AlertPriority Alert priorities set by users AlertType Alert types see 8 4 Self Diagnostics AlertValue NAMUR107 cat...

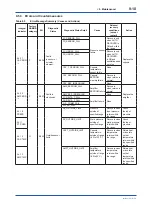
Page 57: ...IT LCD display outside of limits Out of service 75 C AI1_OUT_OF_SERVICE AI1 O S mode AI2_OUT_OF_SERVICE AI2 O S mode AI3_OUT_OF_SERVICE AI3 O S mode Outside sensor limits 74 O DP_OUTSIDE_LIMIT Pressure outside of range SP_OUTSIDE_LIMIT Static pressure outside of range CAPT_OUTSIDE_LIMIT Capsule temperature outside of range AMPT_OUTSIDE_LIMIT Amplifier temperature outside of range Environmental con...

Page 58: ...cator NOTE If an error is detected by running self diagnostics an error number is displayed on the integral indicator If there is more than one error the error number changes at three second intervals See Table 9 3 regarding the error codes F0808 ai Figure 8 5 Integral Indicator ...

Page 59: ... required accuracy level Exercise care when handling these instruments to ensure they maintain the specified accuracy 9 3 Calibration Use the procedure below to check instrument operation and accuracy during periodic maintenance or troubleshooting 1 Insert the battery pack or turn on the power and then perform provisioning to have the transmitter join the Field Wireless Network or preparing the in...

Page 60: ...0 kPa 0 2 of rdg 0 1 of F S for 80 to 0 kPa 5 For 130 kPa abs class Accuracy 0 03 of rdg 6 digits for 0 to 130 kPa abs Select a manometer having a pressure range close to that of the transmitter Pressure generator Model MC100 pneumatic pressure standard for 200 kPa 2 kgf cm2 25 kPa 2500 mmH2O Accuracy 0 05 of F S Requires air pressure supply Dead weight gauge tester 25 kPa 2500 mmH2O Accuracy 0 03...

Page 61: ...the cover 9 4 Disassembly and Reassembly This section describes procedures for disassembly and reassembly for maintenance and component replacement CAUTION Precautions for the intrinsic safe type transmitters Intrinsic safe type transmitters must be as a rule removed to a non hazardous area for maintenance and be disassembled and reassembled to the original state Check and confirm the insulation w...

Page 62: ...er 9 4 3 Replacing the CPU Assembly This subsection describes how to replace the CPU assembly see Figure 9 2 Removing the CPU assembly 1 Remove the cover Remove the integral indicator and the RF assembly refer to subsections 9 4 1 and 9 4 2 2 Turn the zero adjustment screw to the position as shown in Figure 9 2 3 Disconnect the power cable cable with brown connector at the end When doing this ligh...

Page 63: ... 5 Replacing the Battery Pack Regarding the transmitter with intrinsically safe approval the battery pack can be replaced without removing the device in hazardous area Preparation Initialize the remaining battery life by using the parameter of Reset Energy Left in UAPMO block When the battery power is burned and emptied initialize the remaining battery after prompt replacement of the battery pack ...

Page 64: ... each pack Under normal conditions the battery materials are self contained and are not reactive as long as the batteries and the pack integrity are maintained Care should be taken to prevent thermal electrical or mechanical damage Protect the electrode of the battery pack to avoid rapid electrical discharge Discharged a battery may lead to fluid leakage and excessive heat Batteries should be stor...

Page 65: ...ries means they shall be sorted out and collected as ordained in ANNEX II in DIRECTIVE 2006 66 EC Procedure to remove the batteries safely Refer to subsection 9 4 5 Replacing the Battery Pack and subsection 9 4 6 Replacing the Batteries 9 4 8 Replacing the Power Supply Module Removing 1 Turn off the power 2 Remove the terminal box cover 3 Loosen the two power supply module mounting screws see Figu...

Page 66: ...arts Check display of the error code Check self diagnostics by the device configuration tool Does the self diagnostic indicate problem location Contact Yokogawa service personnel F0907 ai The following sorts of symptoms indicate that transmitter may not be operating properly Example There is no output signal Output signal does not change even though process variable is known to be varying Output v...

Page 67: ...00 Connect the device configuration tool and check self diagnostics Contact Yokogawa service personnel F0909 ai Is impulse piping connected correctly Refer to Alarm Message Summary in Subsection 9 5 3 Provide lagging and or cooling or allow adequate ventilation Refer to Section 9 2 Calibration Instruments Selection Refer to individual model user manuals and connect piping as appropriate for the me...

Page 68: ...ronics AMP_EEPROM_FAIL Amplifier EEPROM failure Recovers when returns to normal Replace the amplifier AMP_EEP_IRREGULAR None FC_DELTA_T_FAIL Amplifier failure None FR_DELTA_T_FAIL G_A_COMM_FAIL WL_AD_FAIL AL 10 PRESS O Bit 23 Outside sensor limits DP_OUTSIDE_LIMIT Pressure outside of specified range Recovers when input pressure returns within the range Check the input pressure AL 11 ST PRSS SP_OUT...

Page 69: ...tatic pressure zero adjustment variable AL 79 OV DISP LCD_OUTSIDE_LIMIT LCD display outside of specified range Recovers when display value returns within the range Check the display setting AL 30 RANGE O Bit 22 Environmental conditions out of device specification DP_OUTSIDE_RANGE Input pressure setting outside of range Recovers when setting returns within the range Check the input pressure setting...

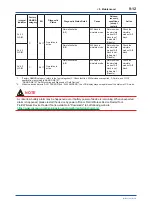
Page 70: ...ck is simulate mode Returns when the simulate mode of AI3 block is set to disable 1 Disable Check the simulate mode of AI3 block 1 Factory NAMUR category refers to the four categories C Check function M Maintenance required F Failure and O Off specification according to NAMUR NE107 NAMUR NE107 Self Monitoring and Diagnosis of Field Devices 2 When the device detects AL01 CAP ERR and AL02 AMP ERR th...

Page 71: ...e calculated in a normal way Output status BAD Device Failure Output value calculated in a normal way Output status BAD Device Failure CAP_EEP_IRREGULAR AL 02 AMP ERR 2 F Bit 27 Faults in electronics AMP_EEPROM_FAIL Output value hold value Output status BAD Device Failure Output value hold value Output status BAD Device Failure Output value calculated in a normal way Output status BAD Device Failu...

Page 72: ...n Specific Output value calculated in a normal way Output status UNCERTAIN Sensor Conversion not Accurate Normal action AL 13 AMP TMP AMPT_OUTSIDE_LIMIT Normal action Normal action Normal action Output value calculated in a normal way Output status UNCERTAIN Sensor Conversion not Accurate AL 53 P ADJ C Bit 25 Installation calibration problem DP_TRIM_SPAN_ OUTSIDE Output value calculated in a norma...

Page 73: ...62 AI OOS AI3_OUT_OF_SERVICE Normal action Normal action Output value hold value Output status BAD Out of Service Output value hold value Output status BAD Out of Service AL 63 AI SIM C Bit 17 Simulation is active SimulationActive AI1 Normal action Normal action Normal action Normal action AL 64 AI SIM SimulationActive AI2 Normal action Normal action Normal action Normal action AL 65 AI SIM Simula...

Page 74: ...ct 1 On 0 Off Enable hardware write protect 1 Enable 0 Disable default Enable diagnostic status configuration 1 Enable 0 Disable default The following table shows the relationship between the hardware write protection and software write protection Enable hardware write protect Hardware write protect Software write protect Write protect Disable Off or On Off No Writable Disable Off or On On Yes Unw...

Page 75: ... TRUE 2 Alert report priority 0 to 15 Not available for EJX 1 TRUE 2 15 W 114 Power low Alert The On Off or priority for Power low Alert can be set 1 On Off setting 0 FALSE 255 TRUE 2 Alert report priority 0 to 15 1 TRUE 2 15 W 115 Power Critical low Alert The On Off or priority for Power Critical low Alert can be set 1 On Off setting 0 FALSE 255 TRUE 2 Alert report priority 0 to 15 1 TRUE 2 15 W ...

Page 76: ...Alert can be set 1 On Off setting 0 FALSE 255 TRUE 2 Alert report priority 0 to 15 Not available for EJX 1 TRUE 2 15 W 2 UDO block 2 DESCRIPTION Indicates the version and model information of the downloaded data R 3 STATE Indicates the status of UAP block 0 Idle 1 Downloading 3 Applying 4 DLComplete 6 DLError R 5 MAX_BLOCK_ SIZE Maximum block size This value is smaller than the maximum data size o...

Page 77: ...nd the computation process is in continuous mode regardless of the measurement mode When 0 is set measurement period is set to 30 seconds regardless of measurement setting intermittent mode W 7 Wireless Status Indicate the communication status 1 Indicates the initial idle status or join status idle status join status 2 Indicates whether Contract Pub is established not establishment establishment 3...

Page 78: ...atus Each O S Auto and Man can select from 1 Target Specify Al object mode 2 Actual Indicates current mode of Al object 3 Permitted Indicates the mode selected by Target of Al object 4 Normal Indicate normal status mode of Al object 1 Target Auto 2 Actual Auto 3 Permitted Auto 4 Normal Auto W 3 Concentrator OID Indicates the Concentrator object value that corresponds to the data update of the PV v...

Page 79: ...l Cmd Specifies the calibration method 0 CAL_NONE Initial state in which calibration is not performed 1 CAL_LOW Applies an actual input and adjusts the lower limit using the value specified in Calibration Lowest Point 2 CAL_HIGH Applies an actual input and adjusts the higher limit using the value specified in Calibration Highest Point 5 CAL_CLEAR Clears the adjustment variable 0 reading value is a...

Page 80: ... Indicates the mode selected by Target of Al object 4 Normal Indicate normal status mode of Al object 1 Target O S 2 Actual O S 3 Permitted O S 4 Normal O S W 3 Concentrator OID Indicates the Concentrator object value that corresponds to the data update of the PV value 3 R 4 Scale Allows specifying the upper or lower limit for the PV scaling unit code etc 1 EU at 100 Indicate the upper limit of th...

Page 81: ...ual input and adjusts the higher limit using the value specified in Calibration Highest Point 5 CAL_CLEAR Clears the adjustment variable 0 reading value is always 0 W 58 Cal Status Indicates the calibration status 0 CAL_NONE Start up and default value 1 CAL_SUCCESS Indicates that calibration was successful 7 CAL_BAD_TRIM_POINT Indicates this status when the adjustment variable is outside of range ...

Page 82: ...llows adjusting the time constant for filtering the PV value Setting unit Second This is enabled for the Continuous mode 0 second W 28 Simulate Switch A simulation function switch for the AI object test Disable Enable Disable W 29 Transducer Value When Simulate Switch is set to Disable this value is used as the input value for the AI object R 30 Simulate Value When Simulate Switch is set to Enable...

Page 83: ...DE_RANGE Input pressure setting outside of range Bit22 O 6 SP_OUTSIDE_RANGE Static pressure setting outside of range Bit22 O DiagnosticDetail_2 31 AI1_OUT_OF_SERVICE AI1 O S mode Bit24 C 30 AI2_OUT_OF_SERVICE AI2 O S mode Bit24 C 29 AI3_OUT_OF_SERVICE AI3 O S mode Bit24 C 28 AI1_SIMULATION_ACTIVE AI1 simulation mode Bit17 C 27 AI2_SIMULATION_ACTIVE AI2 simulation mode Bit17 C 26 AI3_SIMULATION_ACT...

Page 84: ...itle Document No EJX110B EJX310B EJX430B Differential Pressure Transmitter GS 01C25B01 01EN EJX210B Flange Mounted Differential Pressure Transmitter GS 01C25C01 01EN EJX510B EJX530B Absolute and Gauge Pressure Transmitters GS 01C25F01 01EN EJX118B EJX438B Diaphragm Sealed Differential Pressure Transmitter GS 01C25H01 01EN EJX110B EJX110A and EJX110B Differential Pressure Transmitters High Damping ...

Page 85: ...of optional accessories 10th May 2017 1 1 1 2 2 10 1 2 1 2 1 5 2 8 2 5 Change due to YFGW710 discontinuation Change due to Amplifier Code 7 discontinuation Change due to RoHS Addition of Patent Making Addition of Product Disposal information Addition of China RoHS Revision of PED descriptions Revision of the applicable standard for ATEX 11th Dec 2018 2 4 2 5 2 5 2 7 2 9 2 10 Release of output sign...

Reviews: