CHASSIS
3-23
EAM20136
CHASSIS
EAM30479
ADJUSTING THE FRONT DISC BRAKE
TIP
There should be no free play at the brake lever
end.
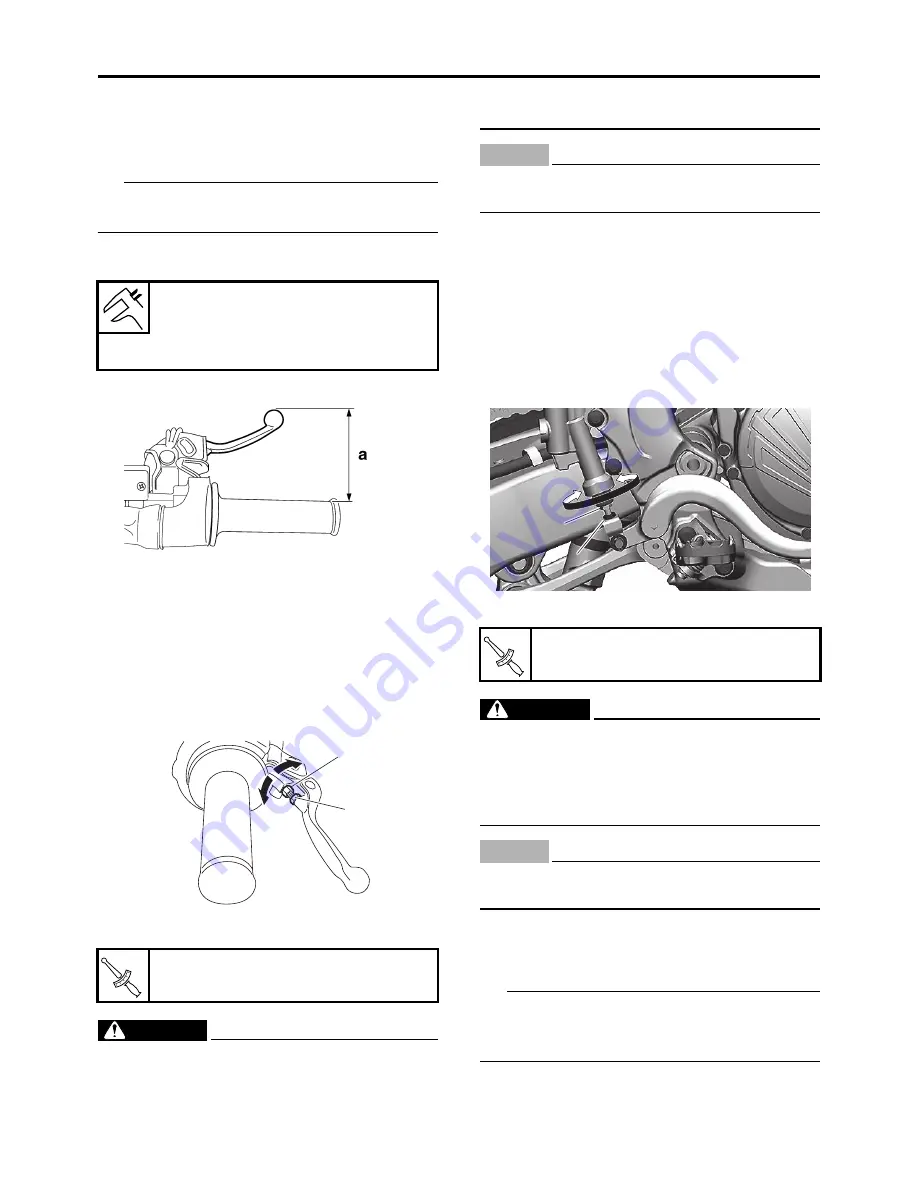
1. Check:
•
Brake lever position “a”
2. Remove:
•
Brake lever cover
3. Adjust:
•
Brake lever position
a. Loosen the locknut “1”.
b. Turn the adjusting bolt “2” until the speci-
fied brake lever position is obtained.
c. Tighten the locknut.
WARNING
EWA13050
A soft or spongy feeling in the brake lever
can indicate the presence of air in the brake
system. Before the vehicle is operated, the
air must be removed by bleeding the brake
system. Air in the brake system will consid-
erably reduce braking performance.
NOTICE
ECA13490
After adjusting the brake lever position,
make sure there is no brake drag.
4. Install:
•
Brake lever cover
EAM30480
ADJUSTING THE REAR DISC BRAKE
1. Adjust:
•
Brake pedal position
a. Loosen the locknut “1”.
b. Turn the adjusting bolt “2” until the brake
pedal is in the correct position.
c. Tighten the locknut.
WARNING
EWA19150
A soft or spongy feeling in the brake pedal
can indicate the presence of air in the brake
system. Before running, bleed the brake sys-
tem. Air in the brake system will cause brak-
ing performance to be reduced.
NOTICE
ECA13510
After adjusting the brake pedal position,
make sure there is no brake drag.
EAM30234
CHECKING THE BRAKE FLUID LEVEL
1. Stand the vehicle upright on a level surface.
TIP
In order to ensure a correct reading of the brake
fluid level, make sure that the top of the brake
fluid reservoir is horizontal.
2. Check:
•
Brake fluid level
The minimum level mark “a” or below
Add.
Brake lever position
100 mm (3.94 in)
Extent of adjustment
86–105 mm (3.39–4.13 in)
Locknut
5 N·m (0.5 kgf·m, 3.7 lb·ft)
2
1
T
R
.
.
Locknut
6 N·m (0.6 kgf·m, 4.4 lb·ft)
1
1
2
2
T
R
.
.
Summary of Contents for YZ 2023 Series
Page 6: ...EAM20162 YAMAHA MOTOR CORPORATION U S A YZ MOTORCYCLE LIMITED WARRANTY...
Page 10: ......
Page 44: ...MOTORCYCLE CARE AND STORAGE 1 32...
Page 61: ...TIGHTENING TORQUES 2 16...
Page 62: ...CABLE ROUTING DIAGRAM 2 17 EAM20152 CABLE ROUTING DIAGRAM Frame and engine left side view...
Page 64: ...CABLE ROUTING DIAGRAM 2 19 Frame and engine right side view...
Page 66: ...CABLE ROUTING DIAGRAM 2 21 Handlebar front view...
Page 68: ...CABLE ROUTING DIAGRAM 2 23 Frame and engine top view...
Page 70: ...CABLE ROUTING DIAGRAM 2 25 Frame and battery top view...
Page 72: ...CABLE ROUTING DIAGRAM 2 27 Rear brake right side view...
Page 74: ...CABLE ROUTING DIAGRAM 2 29...
Page 112: ...ELECTRICAL SYSTEM 3 36...
Page 148: ...REAR BRAKE 4 34 system Refer to BLEEDING THE HYDRAULIC BRAKE SYSTEM on page 3 25...
Page 154: ...HANDLEBAR 4 40 Throttle grip free play 3 0 6 0 mm 0 12 0 24 in...
Page 187: ...INSTALLING THE TRANSMISSION 5 74...
Page 190: ...LUBRICATION SYSTEM CHART AND DIAGRAMS 5 3 1 Oil filter element 2 Oil pump...
Page 191: ...LUBRICATION SYSTEM CHART AND DIAGRAMS 5 4 1 Intake camshaft 2 Exhaust camshaft...
Page 264: ...TRANSMISSION 5 77...
Page 274: ...WATER PUMP 6 9...
Page 284: ...THROTTLE BODY 7 9...
Page 287: ......
Page 288: ...IGNITION SYSTEM 8 1 EAM20142 IGNITION SYSTEM EAM30277 CIRCUIT DIAGRAM...
Page 292: ...ELECTRIC STARTING SYSTEM 8 5 EAM20143 ELECTRIC STARTING SYSTEM EAM30279 CIRCUIT DIAGRAM...
Page 296: ...CHARGING SYSTEM 8 9 EAM20144 CHARGING SYSTEM EAM30282 CIRCUIT DIAGRAM...
Page 299: ...CHARGING SYSTEM 8 12...
Page 300: ...SIGNALING SYSTEM 8 13 EAM20154 SIGNALING SYSTEM EAM30348 CIRCUIT DIAGRAM...
Page 304: ...FUEL INJECTION SYSTEM 8 17 EAM20145 FUEL INJECTION SYSTEM EAM30284 CIRCUIT DIAGRAM...
Page 329: ...FUEL INJECTION SYSTEM 8 42...
Page 330: ...FUEL PUMP SYSTEM 8 43 EAM20146 FUEL PUMP SYSTEM EAM30287 CIRCUIT DIAGRAM...
Page 362: ...SELF DIAGNOSTIC FUNCTION AND DIAGNOSTIC CODE TABLE 9 15...
Page 372: ...CHASSIS 10 9...
Page 374: ......
Page 376: ......
Page 377: ...YZ250FXP 2023 WIRING DIAGRAM BAJ 2819U 13_WD indd 1 2022 04 01 9 58 37...
Page 378: ...YZ250FXP 2023 WIRING DIAGRAM BAJ 2819U 13_WD indd 2 2022 04 01 9 58 37...


