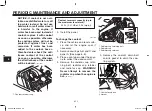
6. Remove the coolant reservoir
cap.
1. Coolant reservoir cap
7. Move the hose clamp in the
direction shown, and then dis-
connect the coolant reservoir
hose to drain the reservoir.
1. Hose clamp
2. Coolant reservoir hose
3. Coolant reservoir
8. After the coolant is completely
drained, thoroughly flush the
cooling system with clean tap
water.
9. Connect the coolant reservoir
hose, and then move the hose
clamp back to its original posi-
tion.
10. Install the coolant drain bolt and
its new gasket, and then tighten
the bolt to the specified torque.
11. Pour the recommended coolant
into the reservoir to the maximum
level mark, and then install the
coolant reservoir cap.
12. Pour the recommended coolant
into the radiator until it is full.
13. Install the radiator cap, start the
engine, let it idle for several minu-
tes, and then turn it off.
14. Remove the radiator cap to
check the coolant level in the
radiator. If necessary, add suffi-
cient coolant until it reaches the
top of the radiator, and then ins-
tall the radiator cap, retainer and
retaining bolt.
15. Check the coolant level in the
reservoir. If necessary, remove
the coolant reservoir cap, add
coolant to the maximum level
mark, and then install the cap.
Antifreeze/water mixture ratio:
1:1
Recommended antifreeze:
High-quality ethylene glycol
antifreeze containing corrosion
inhibitors for aluminum engines
Coolant quantity:
Radiator capacity (including all
routes):
0.70 L (0.74 US qt, 0.62 Imp.qt)
Coolant reservoir capacity (up to
the maximum level mark):
0.29 L (0.31 US qt, 0.26 Imp.qt)
Tightening torque:
Coolant drain bolt:
9 Nm (0.9 m•kgf, 6.5 ft•lbf)
PERIODIC MAINTENANCE AND ADJUSTMENT
6-16
6
1HD-F819D-E0 7/3/11 20:27 Página 53
2AS-F819D-E0.indd 53
31/07/12 10:09
Summary of Contents for TZR50
Page 87: ...1HD F819D E0 7 3 11 20 27 Página 87 2AS F819D E0 indd 87 31 07 12 10 09 ...
Page 88: ...1HD F819D E0 7 3 11 20 27 Página 88 2AS F819D E0 indd 88 31 07 12 10 09 ...
Page 89: ...1HD F819D E0 7 3 11 20 27 Página 89 2AS F819D E0 indd 89 31 07 12 10 09 ...
Page 90: ...1HD F819D E0 7 3 11 20 27 Página 90 2AS F819D E0 indd 90 31 07 12 10 09 ...
Page 91: ...1HD F819D E0 7 3 11 20 27 Página 91 2AS F819D E0 indd 91 31 07 12 10 09 ...


