PERIODIC MAINTENANCE AND ADJUSTMENT
7-25
2
3
4
5
6
7
8
9
the brake rod from the brake cam-
shaft lever.
3. Disconnect the brake torque rod
from the brake shoe plate by re-
moving the cotter pin, the nut, and
the bolt.
4. Loosen the locknut and drive chain
adjusting nut on each end of the
swingarm.
5. Lift the rear wheel off the ground
according to the procedure on
page 7-21.
6. Remove the axle nut and washer,
and then pull the wheel axle out.
7. Push the wheel forward, and then
remove the drive chain from the
rear sprocket.
TIP
The drive chain does not need to be
disassembled in order to remove and
install the wheel.
8. Remove the spacer, chain pullers
and wheel by pulling it back.
EAU41571
To install the rear wheel
1. Install the drive chain onto the rear
sprocket.
2. Install the wheel by inserting the
chain pullers, spacer and then in-
sert the wheel axle from the
right-hand side.
3. Install the brake rod onto the brake
camshaft lever, and then install the
brake pedal free play adjusting nut
onto the brake rod.
4. Connect the brake torque rod onto
the brake shoe plate by installing
the bolt and nut, and then tighten
the nut to the specified torque.
5. Insert a new cotter pin into the
brake torque rod bolt.
WARNING!
Always use a new cotter
pin.
[EWA10831]
6. Install the washer and axle nut,
and then lower the rear wheel so
that it is on the ground.
7. Adjust the drive chain slack. (See
page 7-16.)
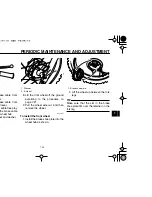
1. Brake pedal free play adjusting nut
2. Spacer
3. Chain puller
4. Wheel axle
5. Drive chain slack adjusting nut
6. Locknut
7. Brake torque rod
8. Brake torque rod bolt
9. Cotter pin
10.Brake torque rod nut
1
6
5
2
4
7
9
8
10
3
Tightening torque:
Brake torque rod nut:
15.5 Nm (1.6 m·kgf, 11.2 ft·lbf)
Summary of Contents for PW80(Z)
Page 10: ...ONTENTS 9 1 ION 10 1 10 1 ...
Page 12: ...F IMPORTANT LABELS 1 2 4 2817L 10 100 1 00 15 100 1 00 15 5PG 2816R 00 ...
Page 14: ...F IMPORTANT LABELS 1 4 h Africa 1 3 2 ...
Page 20: ...3 1 N EAU10410 1 2 3 4 5 6 7 8 e 7 10 ge 4 6 page 4 4 ...
Page 21: ...DESCRIPTION 3 2 2 3 4 5 6 7 8 9 EAU10420 6 1 2 3 4 5 9 p page 7 7 5 ...
Page 22: ...N 3 3 EAU10430 uments 1 2 4 3 4 1 ...
Page 72: ...ED PAPER YAMAHA MOTOR CO LTD PRINTED IN JAPAN 2009 04 0 2 1 E ...


