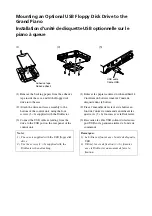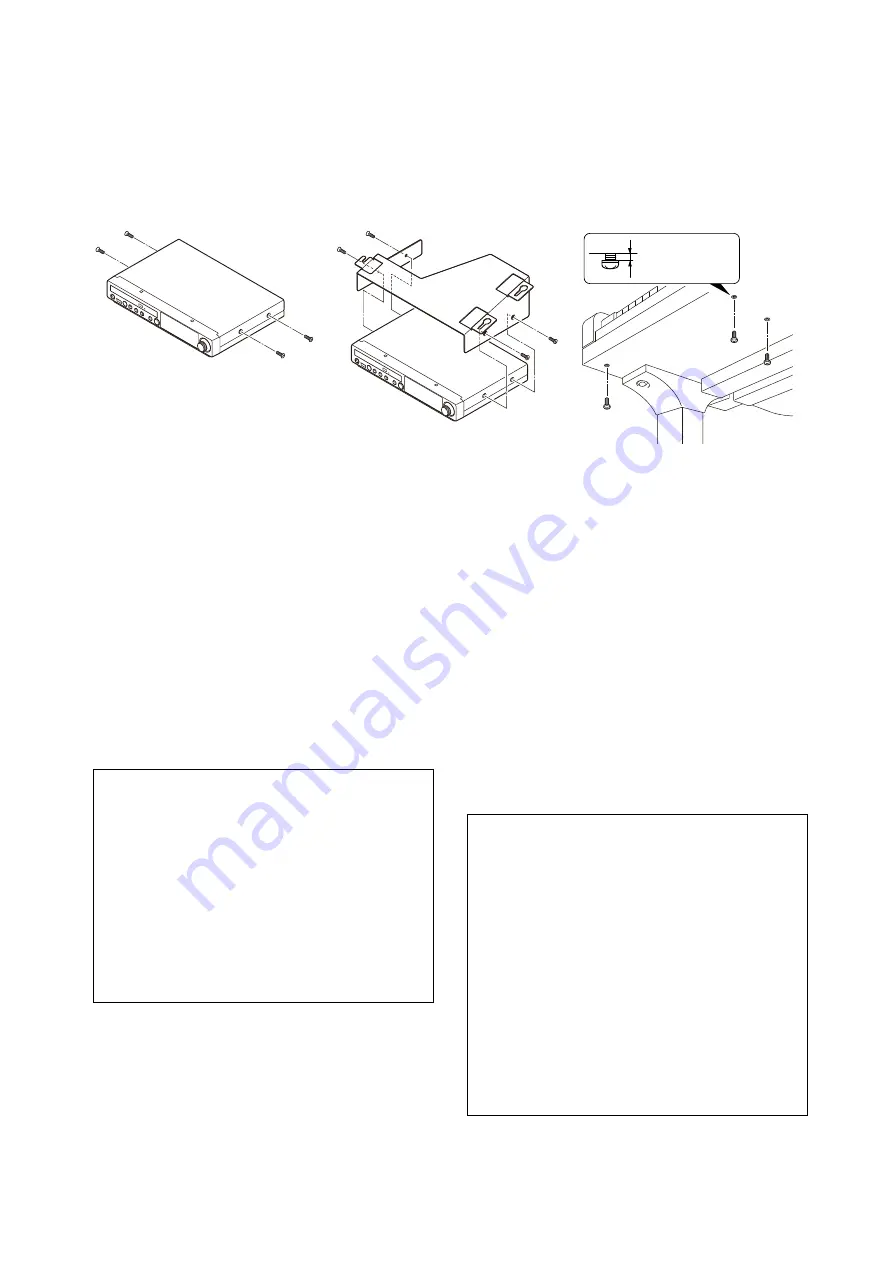
Mounting the Control Unit to the Grand Piano
Installation du boîtier de commande sur un piano à queue
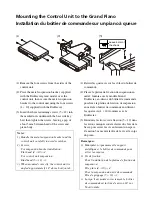
(1) Remove the four screws from the sides of the
control unit.
(2) Place the metal suspension bracket, supplied
with the Disklavier grand model, over the
control unit, then secure the metal suspension
bracket to the control unit using the four screws
(4
10) supplied with the Disklavier.
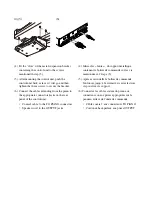
(3) Insert the three restraining screws (5
12) into
the marked nuts underneath the bass side key
bed, then tighten the screws, leaving a gap of
about 5 mm between head of the screw and
piano body.
(1) Retirer les quatre vis sur les côtés du boîtier de
commande.
(2) Placez la platine de fixation de suspension en
métal, fournie avec le modèle Grand
Disklavier, au-dessus du boîtier de commande,
puis fixez la platine de fixation de suspension
en métal au boîtier de commande en utilisant
les quatre vis (4
10) fournies avec le
Disklavier.
(3) Introduire les trois vis de fixation (5
12) dans
les écrous marqués sous le clavier du côtés de la
basse, puis serrer les vis en laissant un espace
d’environ 5 mm entre la tête de la vis et le corps
du piano.
Leave 5 mm of
the shank
(1) (2) (3)
Notes:
1) Handle the metal suspension bracket and the
control unit carefully to avoid scratches.
2) Screws;
For suspension bracket installation:
Flat head (4
10)
4
For control unit suspension:
Bind head (5
12)
3
3) When mounted correctly, the control unit is
angled approximately 18° above horizontal.
Remarques:
1) Manipuler soigneusement le support
métallique et le boîtier de commande pour
éviter les rayures.
2) Vis de fixation;
Pour l'installation de la platine de fixation de
suspension:
Tête plate (4
10)
4
Pour la suspension du unité de commande:
Tête de grippage (5
12)
3
3) Lorsqu’il est monté correctement, le boîtier
de commande est incliné d’environ 18° sur
l’horizontale.
Summary of Contents for DISKLAVIER E3 CLASSIC
Page 1: ......
Page 11: ...English Classic Operation manual ...
Page 157: ...Appendix Classic Appendix ...


