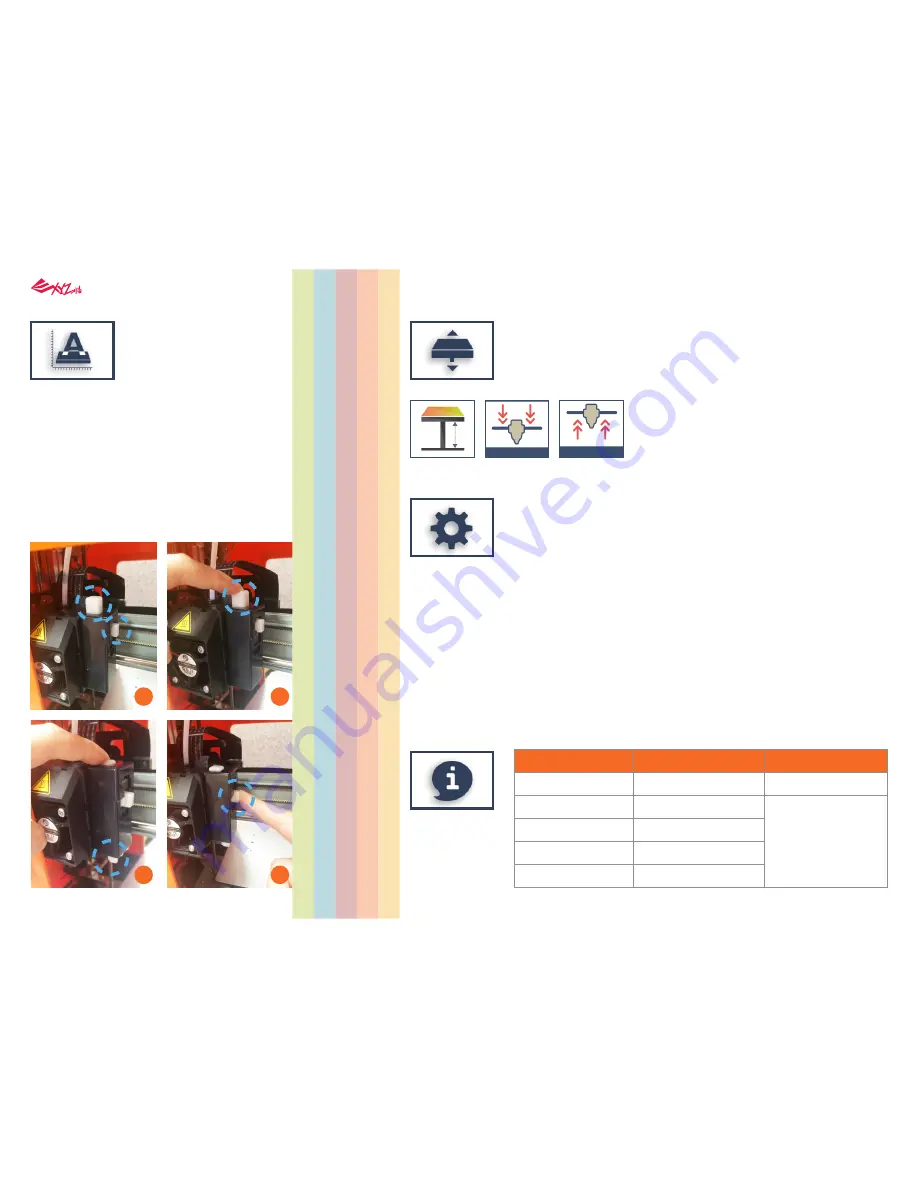
Platform calibration may be implemented before
the printing process.
The printing device may move to the lower left
corner of the printing area. Please refer to the
platform calibration instructions provided in the
software.
Before calibration, press
Button A
of the printing
module. After calibration, press
Button B
on the
printing module in order to retract the sensor
device.
If calibration was faild, please make sure that
Button A
(detector) has been pressed before
restarting the calibration process.
Serial Number
Firmware Version
Total Print Time
Last Time
Connection Type
Printer IP
WiFi MAC Address
SSID
WiFIi Signal Strength
Calibrate Value
●Automatic horizontal calibration
Automatic horizontal calibration may either be ON or OFF. Default: ON.
The software would automatically implement horizontal calibration and
compensation accordingly.
Printing speed may be improved if automatic horizontal calibration has
been switched OFF. However, this may affect printing quality.
●Buzzer
Buzzer is turned on by default, you can select "OFF" to change the
setting.
When the buzzer is turned on, the printer will output an audible signal
when a button is pressed, receiving data, print job is finished, or issue is
detected.
●Restore Default
Clicks "Restore Default" all settings will be reset to factory default.
Upwards and downwards to adjust the printing distance between the
bed and printing module.
Each adjust has a step of 0.05 mm.
If the first layer distance is too high (too large) or too low (too close), we
recommend you using z-offset to adjust the printing distance.
5. Info
4. Others
3. Z-Offset
2. Calibrate
Button A
Button B
1
2
3
4
Printer Info
Printer Name and
Printer Type
Connection Info
Calibrate Info
- 13 -


