Installing or removing planer blades
CAUTION: Tighten the blade installation bolts and left-handed thread bolts carefully when
attaching the blades to the tool.
Always check to see they are tightened securely. A loose bolt can be dangerous.
CAUTION: Handle the blades very carefully. Use gloves or rags to protect your fingers or
hands when removing or installing the blades.
CAUTION: Use only the Liangye wrench pro- vided to remove or install the blades. Failure
to do so may result in overtightening or insufficient tighten- ing of the installation bolts.
This could cause an injury.
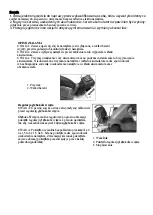
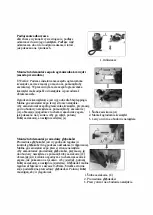
To install the planer blades onto the
tool, perform as follows:
1. Tighten the three left-handed thread
bolts on the drum plate with the wrench
by turning them anticlockwise until the
bolts touch the side surface of the drum
plate.
1. Left-handed thread bolts
2. Drum plate
1
2
1
2
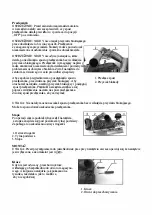
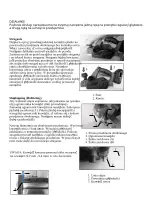
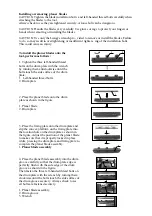
2. Place the planer blade onto the drum
plate as shown in the figure.
1. Planer blade
2. Drum plate
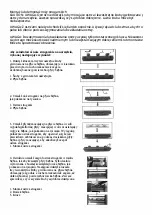
3. Place the fixing plate onto the drum plate and
slip the convex platform on the fixing plate into
the location hole on the drum plate as shown in
the figure. Adjust the position of the planer blade
to make sure that it is properly locked in place
while pressing the drum plate and fixing plate to
complete the planer blade assembly.
1
1.
Planer blade assembly
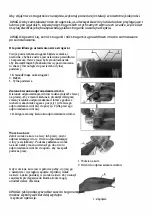
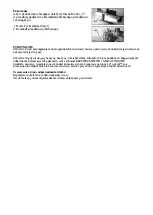
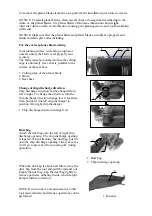
4. Place the planer blade assembly into the drum
groove carefully so that the drum plate edge is
perfectly flush with the side edge of the drum
groove as shown in the figure.
Then fasten the three left-handed thread bolts on
the drum plate with the wrench by turning them
clockwise until the bolts touch the side surface of
the drum groove securely. Always check to see
all bolts are fastened securely.
1. Planer blade assembly
2. Drum groove
3. Wrench
1
2
3

