background image

Matrix1608A User's guide  


www.xtendlan.com 

Press “EXIT” key to exit to the main Menu.


4.2.1


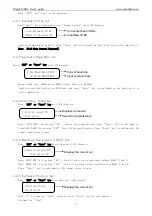
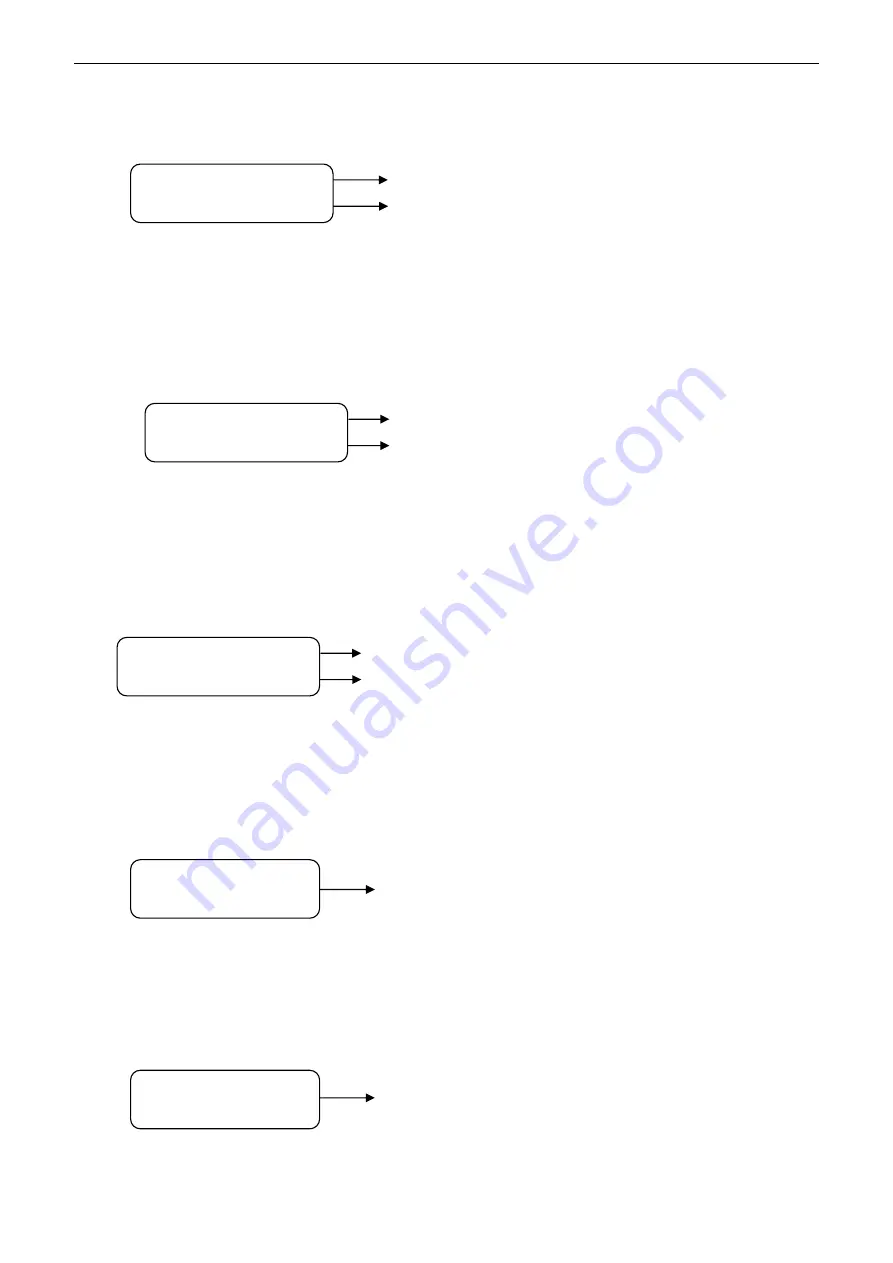
Keyboard ID No Set  

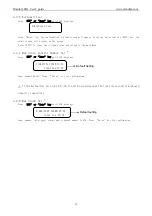
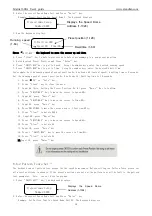
Press”Enter” key on keyboard screen “Keyboard setup” until LCD displays: 


Input the number 0(must be zero), press “Enter” key for confirmation. New ID will be in effect immediately. 

Note:  ID:00 Main Control Keyboard

6


4.2.2


Keyboard Baud Rate Set 


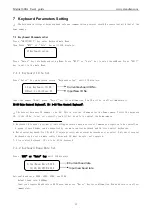
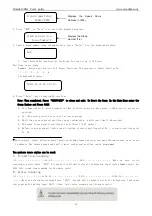
Press “MPX” or “Auto” key until LCD displays: 


Optional baud rate: 9600(must be 9600) Default baud rate: 9600bps. 

Input your required baud rate in DATA area, and press “Enter” key for confirmation. New baud rate is in 

effect immediately. 


4.2.3


Key-press Sound Set 

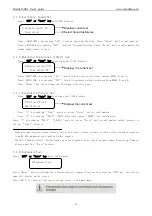
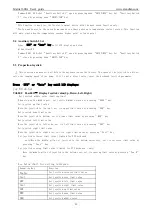
Press “MPX” or “Auto” key until LCD displays: 


Press < SHIFT+MON > key showing “ON”; turns on the sound function. Press “Enter” key for confirmation. 

Press< SHIFT+CAM > key showing “OFF”; turns off the sound function. Press “Enter” key for confirmation.The 

normal sound status is open.


4.2.4


Matching Resistance (150Ω) Set 

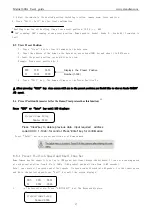
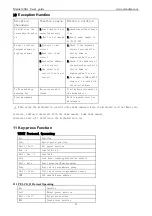
Press “MPX” or “Auto” key three times until LCD displays: 


Press< SHIFT+MON > key showing “ON”, this will place suited resistance between RS485 D+ and D-, 

Press< SHIFT+CAM > key showing “OFF”, this will separate suited resistance from RS485 D+ and D-,  

Press “Enter” key for confirmation. The normal status is open.


4.2.5


Keyboard Protocol Set 

Press “MPX” or “Auto” key four times until LCD displays: 


Press “1” key showing “Vinet” protocol, press “Enter” key for confirmation. 

Note:must be “Vinet”


  Current keyboard ID No.


  Input New ID No. 

1.Cur.Keyboard ID:XX 
0=Mast,1→16=Slave:XX


Current baud rate. 

Input new baud rate 

2.Cur.Baud Rate:XXXX 

12/24/48/9600:XXXX


Displays current set 

Select Sound preference 

3.Current sound: ON 

Your select:


Displays the current set 

4.Match resister:ON 

Your select:ON


Displays the current set 

5.Protocol:Vinet 
New Protocol:


Summary of Contents for MATRIX1608A

Page 1: ...MATRIX1608A Video Matrix Switcher User s Guide...

Page 2: ...eters Set 8 4 2 1 Keyboard ID No Set 9 4 2 2 Keyboard Baud Rate Set 9 4 2 3 Key press Sound Set 9 4 2 4 Matching Resistance 150 Set 9 4 2 5 Keyboard Protocol Set 9 4 2 6 Keyboard Test 10 4 2 7 Max Sla...

Page 3: ...nning 360 Scanning 16 8 4 Set Preset Position 16 8 5 View Preset Position 17 8 6 Preset Position Parameter Set for the Dome Vinet protocol has this function 15 17 8 6 1 Preset Position Speed and Dwell...

Page 4: ...g electric surges This technology prevents damage to the device resulting from impulse signals such as lightning strikes or surges under 500W power Allow for enough distance between the RS 485 and vid...

Page 5: ...up sensor and light auto switch image and start recording after alarming Alarm mode Timed manual normally alarm arming alarm disarming and alarm recording Various protocols controlling P T and high sp...

Page 6: ...ear Zoom Tele Zoom Wide DVR MPX Scan Auto Shif t Pan_ A Call COM ALARM LINK ACK10 100M Logi n Exit 7 8 9 4 5 6 1 2 3 Clea r 0 Ente r Enabl e AREA MON CAM ACK List GRP SEQ Next AREA MON CAM DATA 00 01...

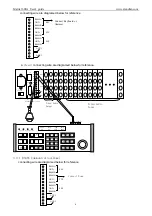
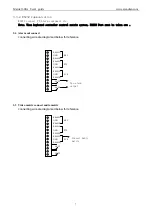
Page 7: ...must be taken out 3 4 Alarm out connect connecting wire are diagramed below for reference 3 5 Video matrix connect audio matrix connecting wire are diagramed below for reference AUX2 AUX1 RS485B GND...

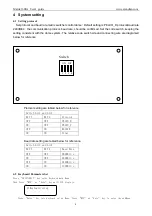
Page 8: ...agramed below for reference Protocol setting are tabled below for reference Switch bit1 and bit2 BIT 1 BIT 2 Protocol OFF OFF PELCO_D ON OFF PELCO_P OFF ON KALATE ON ON Vinet Baud rate setting are tab...

Page 9: ...showing OFF turns off the sound function Press Enter key for confirmation The normal sound status is open 4 2 4 Matching Resistance 150 Set Press MPX or Auto key three times until LCD displays Press...

Page 10: ...Max Slave Control Number Set 10 Press MPX or Auto key until LCD displays Input number 00 16 Press Enter key for confirmation If the keyboard is set as 01 02 16 it will be considered as the total slave...

Page 11: ...t N 8 1 4 Power input AC DC 9V 12V 5 Max controlled dome camera 1024 2 6 Power 5W 6 Intelligent Keyboard Drawing 6 1 Intelligent Keyboard Connection Insert one end of keyboard data line into keyboard...

Page 12: ...4 Shift Clear Clear Alarm Pan_A Set the start point of dome camera auto scanning Pan_B Set the end point of dome camera auto scanning Auto Finish Dome Camera auto action select Menu items down Shift...

Page 13: ...the keyboard ID if the ID No is not set correctly you will Not be able to control the dome camera 5 Keyboard ID is used to set multi controlling keyboards when a series of Cameras are required to be c...

Page 14: ...confirmation Press 2 key showing PEL D PELCO D 9 protocol press ENTER for confirmation Press 3 key showing PEL P PELCO P protocol press Enter key for confirmation default protocol is the our Vinet Pr...

Page 15: ...be more than or equal to the total actual vice control keyboard quantity 11 You should set the total alarm input terminal quantity for alarm dome camera if such dome camera is adopted The number desi...

Page 16: ...a dwell time for Point A Example If Dwell time is 2 seconds the keyboard displays 3 Press PAN A key 4 To set Point B move the joystick to the desired position 5 In the Main Menu enter a Dwell time fo...

Page 17: ...Grade 64 280 S speed 8 6 Preset Position Parameter Set for the Dome Vinet protocol has this function 15 Press MPX or Auto key until LCD displays Press Enter key into preset position set of dome camera...

Page 18: ...Speed 00 5 Input 64 press Enter key 6 Press SHIFT MON key to move the cursor to Time 00 7 Input 05 press Enter key 8 Press SHIFT MON to move the cursor back to 1 Position 001 9 Press Clear to delete 0...

Page 19: ...onds The speed to each preset position can be different 1 64 grades Default cruise group will auto scan by starting at preset position point No 1 to preset position point No 16 16 Pattern tours Layout...

Page 20: ...n to start or stop The keyboard recognizes this action as a Switch ON Start OFF Stop Press SHIFT MON key ON Startup the guard location Press SHIFT CAM key OFF Stop guard location Example Press SHIFT M...

Page 21: ...Dome MENU cursor left Pan_A Select DVR Keyboard function Menu exit to upper MENU dome camera MENU set should consult Dome Camera manual 9 Auxiliary Function Set The auxiliary function is used with oth...

Page 22: ...ue Up Down Left Right Set Joystick middle value dwelling time When stop on the middle part set joystick middle status by pressing AREA key Set joystick up limit value Move the joystick to top up set i...

Page 23: ...can t accord with the object address No Bi sound when pressing key Key press sound is closed Start up key press sound in the keyboard set Other phenomena Back to manufacturer for maintenance When usi...

Page 24: ...output isolates 55dB Audio channel bandwidth 50Hz 30KHz Video channel bandwidth 12MHz Switch attribute Manual auto crosspoint switch and salvos Video Audio switch Synchronous switch Switch method Powe...

Reviews: