


Matrix1608A User's guide
www.xtendlan.com
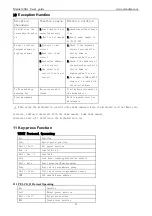
19
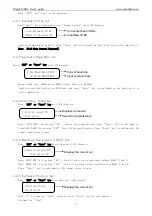
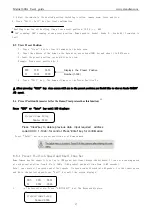
3. Press “MPX” or “Auto” key, until the keyboard displays:
4. Input a Group number using the number keys, press “Enter” key, the keyboard displays:
5.
Input desired Pattern Tour for the Group. You can set up to 16 Preset
Positions in one Group.
Example: Desired pattern tour of 6 Preset Positions. The sequence is Preset Position No.
1 – 2 – 3 – 4 – 5 – 6 –
The keyboard displays:
6. Press ”Enter” key to confirm Pattern Tour.
Note: When completed, Press “SHIFT+MON” to close and exit. To Start the Scan: In the Main Menu enter the
Group Number and Press SCAN.
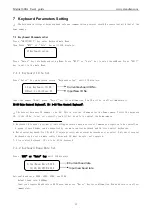
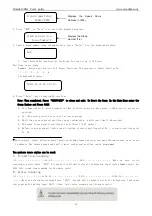
¾
This dome can set 8 cruise groups with a Max of 16 cruise points. Each group (1-128 points at any preset
position).
¾
Set the preset position at each of the cruise groups
¾
Dwell time at each preset position can be customized at a different time (1-60 seconds).
¾
The speed to each preset position can be different (1-64 grades)
¾
Default cruise group will auto scan by starting at preset position point No. 1 to preset position point
No. 16.
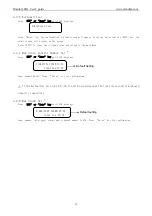
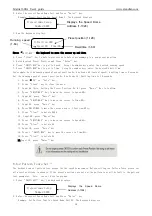
16
Pattern tours: Layout different preset position for Dome Camera as one group, make the camera scan as set route
in advance. The running speed and dwell time of each preset position can be programmed.
Two pattern tours styles can be used:
A .To-and-from Scanning
1-2-···········.-16-1-2-···········-16-1-··········· Make an auto circle
scanning by points.Press “EXIT” key and exit to default status of the keyboard. Input cruise Number adjust key
SCAN into to-and-from scanning (as the above route)
B. Cruise Scanning
1-2···········15-16-15-···········-2-1-2-···········-15-16-15-·······
····Make an auto cruise scanning Press “EXIT” key and exit to default status of the keyboard. Then input
cruise group No and then input Shift + Scan. Into cruise scanning (as the above route).
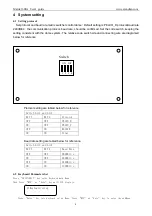
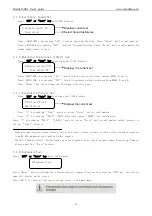
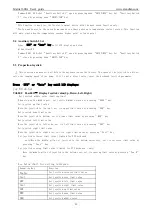
Displays the Speed Dome
Address (1-1024)
Displays the Group
Number (1-8)
1)speed dome Setup
Number:0002
3)Add pre-position
Group Number:0
Add
Add:1→2→3→4→5→2→