background image

54 

HRS 8750 CI+


Engl

ish 

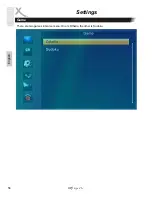
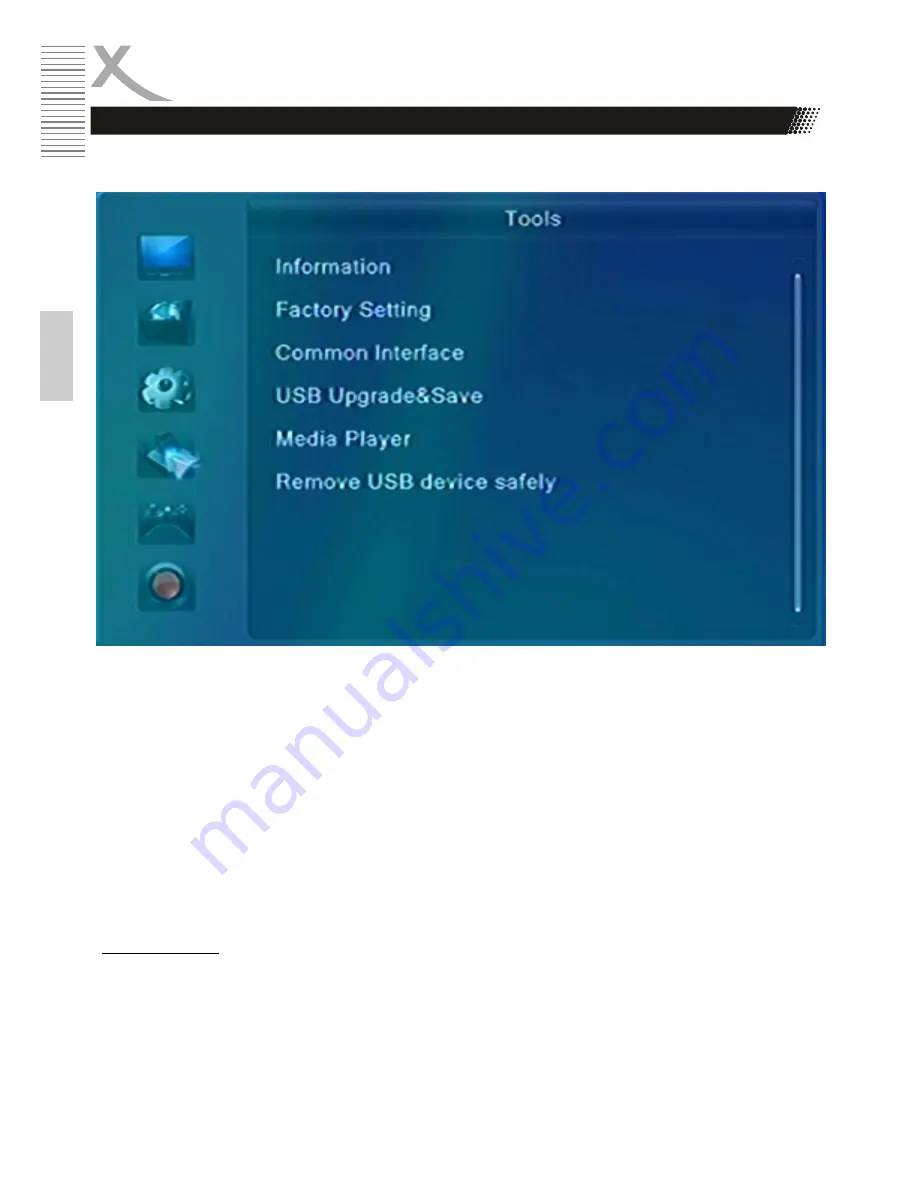
The Tools menu contains options for Information, Factory Setting, Common Interface, USB Upgrade 
& Save, Media Player, Remove USB device safely. 

Information 

Display version information such as software or hardware. 


Factory Setting 

You have the opportunity to make undo all the settings and changes by load the default settings.  
 

Note: 

All settings are reset. Then that they should also perform the search again. 


USB Upgrade & Save 

Lets you install a new software version on the device. This of course must be connected to a USB 
memory with only the update file in the root directory. 
  

Upgrade & Save      

You can select “Upgrade” or “Save “.  
  

Upgrade    

          Upgrading a new software version


Save        

            Saving the data of current software version 


Tools 

Settings 

Summary of Contents for HRS 8750 CI+

Page 1: ...Bedienungsanleitung V3 User s Manual V2 DVB S2 Receiver mit CI USB PVR Ready Time Shift HD Media Player HRS 8750 CI...

Page 2: ......

Page 3: ...tellitenliste 20 Antenneneinstellung 21 Suchlauf 22 DiSEqC 23 Drehbare Antenne 24 Unicable 26 Funktionen Wichtige Tasten und deren Funktion 27 EPG 29 Rekorder Timerprogrammierung aus EPG Aufnahme 30 Z...

Page 4: ...instellungen Favoriten Erweiterte Einstellungen 48 Einstellung ber Xoro HRS 8750CI Werkseinstellung CI CI 50 Firmware aktualisieren Senderliste sichern 51 Spiele 52 REC Einstellungen 52 OSD Favoriten...

Page 5: ...ewahrt werden Satellitenempfangsanlage Der Xoro HRS 8750CI ist f r den Betrieb an einer den Vorschriften entsprechenden Empfangsanla ge vorgesehen Um Sach oder Personensch den zu vermeiden und einen e...

Page 6: ...mann ausgetauscht werden vergewissern Sie sich dass das Ger t wieder sicher funktioniert Um das Ger t vor einem Blitzeinschlag zu sch tzen sollten Sie es aus der Steckdose entfernen Dies gilt auch f r...

Page 7: ...das Ger t l nger nicht nutzen 7 Die ffnungen des Geh uses dienen der L ftung damit das Ger t nicht berhitzt Diese m ssen immer frei gehalten werden 8 Das Ger t darf nicht in der N he von Hitzequellen...

Page 8: ...3 Verwenden Sie originale Ersatzteile Falsche Ersatzteile k nnen zu Kurzschl ssen oder Feuer und anderen Pannen f hren 4 Bitte beachten Sie im Abschnitt Fehlerbehebung unsere Serviceadressen und Telef...

Page 9: ...Wiederverwertung von Papier und Pappe Das Materialwiederverwertungssymbol auf dem Verpackungskarton und dem Benut zerhandbuch bedeutet dass diese recyclingf hig sind Entsorgen Sie die Verpa ckung nic...

Page 10: ...haben DVB S2 Empf nger f r hoch aufl sendes digitales Fernsehen durch Satellit Common Interface zum Einf gen eines CI CI Moduls HDMI Anschluss Elektronischer Programmf hrer EPG und Videotext USB 2 0...

Page 11: ...tereo Tonausgang Audio R L 9 HDMI Ausgang 10 Digital Audio Ausgang Koaxial Hinweis Achten Sie bei der Installation des Antennenkabels darauf dass das Ger t vom Stromnetz ge trennt ist 1 LED Anzeige 2...

Page 12: ...er als 60 sein 4 Entfernen Sie die Batterien aus der Fernbedienung wenn Sie den Receiver eine l ngere Zeit nicht benutzen Hinweise 1 Entfernen und erneuern Sie alte Batterien Sie k nnten auslaufen und...

Page 13: ...Men s und Listen bl ttern ZOOM Bildausschnitt vergr ern ZUR CK vorherigen Programmplatz aufru fen Bereich 4 FARBTASTEN rot gr n gelb blau Men funktionen aufrufen INFO A B Informationen anzeigen A B W...

Page 14: ...HDMI oder SCART Kabel den HDMI bzw SCART Ausgang des Receivers mit dem entsprechenden HDMI bzw SCART Eingang Ihres Fernsehger tes b Verbinden Sie das Antennenkabel mit dem Antenneneingang LNB IN des...

Page 15: ...h die Ger te von dem Stromnetz 3 Verbinden Sie den HRS 8750CI mit einem koaxialen Kabel zu Ihren externen Decoder oder Verst rker 4 Schalten Sie beide Ger te an 5 Aktivieren Sie bei dem externen Decod...

Page 16: ...TV Anbieter oder im Fachhandel Die Smart Card stellt i d r der Pay TV Anbieter bereit Beides geh rt nicht zum Lieferumfang des HRS 8750 CI Receivers Hinweise Bitte installieren Sie das CI CI Modul na...

Page 17: ...i sp ren Sie einen leichten Widerstand 7 Wenn das CAM Modul richtig eingerastet ist dann k nnen Sie es nicht weiter eindr cken 8 Nach dem ordnungsgem en Einf gen des CAM Moduls rastet die die Auswurft...

Page 18: ...haben w hrend ein weiteres USB Ger t mit dem Recei ver verbunden bliebt In diesem Fall m ssen Sie zun chst alle USB Ger te vom Receiver trennen und dann das andere Ger t anstecken damit dieses zum Au...

Page 19: ...htiger Einstellung werden ggf an dieser Stelle noch nicht die korrekte Uhrzeit und nicht das korrekte Datum angezeigt Der Receiver wird Uhrzeit und Datum einstellen wenn die Instal lation abgeschlosse...

Page 20: ...ale also fest installierte Satellitenantenne haben oder ob Ihre Antennen durch einen Motor gedreht werden kann Satellitenliste Suchen Sie den Satelliten mit den Pfeiltasten aus den Sie mit Ihrer Anten...

Page 21: ...nd Signalqualit t zeigen die Werte des hier ausgew hlten Transpon ders an 22KHz Abh ngig von der gew hlten LNB Frequenz m ssen Sie die Option 22KHz einstellen Beachten Sie dazu die Dokumentation Ihrer...

Page 22: ...o h ren dann k nnen Sie die Option Nur TV ausw hlen Andern falls nutzen Sie die Option TV und Radio Suchmodus Standardsuche Programme werden anhand einer im Receiver hinterlegten Transponder liste ges...

Page 23: ...en aus den Sie konfigurieren wollen Konfigurieren Sie die Einstellungen LNB Frequenz DiSEqC usw f r den ausgew hl ten Satelliten W hlen Sie einen weiteren Satelliten aus den Sie konfigurieren wollen u...

Page 24: ...ngabe der geografischen Position und die Satelliten werden auto matisch gefunden vorausgesetzt die Kurvenbahn des Drehmotors ist mechanisch korrekt einge stellt worden Motor Antenne Rufen Sie das Men...

Page 25: ...ve the position speichern Dr cken Sie die Taste um die Drehbewegung des Motors auszuf hren Dr cken Sie die OK Taste um die aktuelle Motorposition zu speichern Neuberechnung Dr cken Sie die OK Taste um...

Page 26: ...age aus ndern Sie den Eintrag LNB Frequenz auf Unicable 9750 10600 Es erscheint ein Popup Fenster Unicable Setting Dort m ssen Sie die zugeh rigen Einstellungen f r Ihr Unicable LNB vornehmen IF Chann...

Page 27: ...elt filtern Best tigen Sie Ihre Auswahl mit der OK Alphabetische Senderliste Sie k nnen die Senderliste nach Alphabet sortieren Dr cken Sie die Taste um den ersten Buchstabe des Senders zu bestimmen A...

Page 28: ...w hrend des Fernse hens ver ndern Dr cken Sie die DISP Taste und die Aufl sung ndert sich bei jedem Dr cken Navigieren bei den Men einstellungen Mit den Tasten des Navigationskreuzes k nnen Sie sich i...

Page 29: ...Titelzeile Datum und Uhrzeit Links Oben Aktuelles Programm Rechts Oben Vorschau des Livebildes Links Senderliste Rechts Aktuelles Programm und n chstes Programm Die Bedienung erfolgt mit den Tasten W...

Page 30: ...r cken Sie die Taste RECORD um die Aufnahme des aktuellen Fernsehprogramms zu starten Der Receiver beendet die Aufnahme nach 2 Stunden automatisch M chten Sie eine l ngere Sendung aufzeichnen dr cken...

Page 31: ...bschalten bzw ndern siehe Seite 53 F r die Time Shift Funktion ist ein ausreichend schneller USB Speicher erforderlich Sollte es bei der Verwendung von Time Shift zu Bildfehlern kommen verwenden Sie b...

Page 32: ...ufnahme auch dann abspielen w hrend eine gerade laufende Sendung aufge nommen wird Aufnahme verwalten Sie k nnen die Aufnahme l schen umbenennen und sperren Siehe dazu Seite 40 Hinweise Sender die zum...

Page 33: ...eachten Sie bitte dass der HRS 8750CI ein bisschen Zeit ben tigt um den USB Speicher zu erkennen und den Inhalt zu listen W hlen Sie die gew nschte Option Video Bilder Musik oder Aufnahme mit den Tast...

Page 34: ...werden diese in dem Dateibrowser auf gelistet und das erste Bild auf der rechten Seite als Vorschaubild dargestellt Navigationshilfen im Dateibrowser OK Starten der Diavorf hrung aller Bilder in diese...

Page 35: ...ergabe auch Musik h ren Dazu m ssen Sie zuerst das Musik st ck ausw hlen und dann zu den Bildern wechseln Wiedergabeliste Navigationshilfe GR N f gt das ausgew hlte Bild zur Wiedergabeliste hinzu GELB...

Page 36: ...Wiederholdungsmodus Einzel Ordner Ordner zuf llig Wechsel zum vorherigen bzw n chsten Musikdatei EXIT R ckkehr zum vorherigen Verzeichnis Musikwiedergabe Wechsel zum n chsten Musikst ck Wechsel zum vo...

Page 37: ...maximale Bitrate und den Profilen Verschiedene Codecs werden unterst tzt Sie m ssen sollten nach dem anerkannten Stan dards erstellt worden sein F r MPEG 2 gilt ISO IEC 13818 f r MPEG 4 gilt ISO IEC 1...

Page 38: ...rherigen Verzeichnis USB Media Player Suffix Container Video Codec Max Resolution Bit rate DAT VOB MPG VOB MPEG 1 2 720x576 20 Mbps MPG MPG MPEG 1 2 MPEG 2 1920 x 1080 30p 20 Mbps TS MPEG 2 TS H264 TS...

Page 39: ...ie Wiedergabe PAUSE Unterbricht die Videowiedergabe Beendet die Wiedergabe und R ckkehr in den Browser schneller R ck und Vorlauf Wechsel zum vorherigen Film Wechsel zum n chsten Film AUDIO Wechsel de...

Page 40: ...rlauf GR N Sprung zu einem selbst definierten Zeitpunkt Datei umbenennen W hlen Sie aus der Aufnahmeliste die Datei aus die Sie umbenen nen m chten Dr cken Sie die ROTE Taste und jetzt k nnen Sie den...

Page 41: ...th lt die Untermen s TV Senderliste Radio Senderliste und Alles l schen TV Senderliste Mit dem Untermen haben Sie die M g lichkeit die gefundenen Sender entspre chend Ihren W nschen zu sortieren bzw z...

Page 42: ...den Tasten den zu sperrenden TV Sender aus und dr cken Sie die ROTE Taste Eine Passwortabfrage erscheint auf dem Bildschirm Geben Ihr das Passwort ein An dem ausgesuchten Programm erscheint dann ein...

Page 43: ...dieser Option k nnen Sie die Sender nach den Vorgaben Name A Z Name Z A Frei Verschl sselt und Sperren innerhalb der Liste sortieren Dr cken Sie die ROTE Taste und w hlen Sie mit den Pfeiltasten die S...

Page 44: ...Kanalliste Die verschiedenen Optionen sind bei der Radio Liste dieselben wie bei der TV Liste Alle l schen Mit dieser Funktion k nnen Sie alle TV und Radio Kan le in auf einmal l schen W hlen Sie dies...

Page 45: ...gemodus Seitenverh ltnis die Videoausgabe und die Tonausgabe Video Aufl sung Hier k nnen Sie die Aufl sung der Video Ausgabe f r HDMI festlegen Aspektmodus Mit diesem Men geben Sie die Art Ihres TV Fe...

Page 46: ...erte erzeugen blassere Farben Disp Helligkeit Mit dieser Einstellung k nnen Sie die Helligkeit der Anzeige an der Ger tevorderseite einstellen ndern Sie die Werte mit der Taste 0 Display aus 8 volle H...

Page 47: ...lentasten 0 9 eingegeben Sind alle Einstellungen vorgenommen dann navigieren Sie zu dem Speichern Feld und dr cken Sie die OK Taste Die Programmierung wird in die Timerliste bernommen Timer Funktion b...

Page 48: ...efinieren Sie die Anzeigezeit von Informationen Men s oder Hinweisen w hrend des Livebildes Sie k nnen zwischen 1 und 10 Sekunden ausw hlen Transparenz Hiermit k nnen Sie die Transparenz des Bildschir...

Page 49: ...Standby Die Einstellung Auto Stand By mit der Voreinstellung von 3 Stunden ist Teil der Umsetzung zu EuP Die kodesign Richtlinie 2009 125 EG auch Energy using Products EuP genannt dient der Schaf fun...

Page 50: ...ie M glichkeit alle Einstellungen und nderungen r ckg ngig zu machen in dem Sie die Werkseinstellungen laden Rufen Sie die Option auf und best tigen Sie ggf die Sicherheitsabfrage in dem Sie das Ja Fe...

Page 51: ...odus auf Userdb Wechseln Sie zum Men punkt Datei W hlen Sie die Datei user_database udf aus Starten Sie das Wiederherstellen der Senderliste mit der Taste OK Beantworten Sie die Frage nach der Firmwar...

Page 52: ...t mehrere Partitionen Volumes enth lt k nnen Sie zwischen den Partitionen wechseln GELB Formatierungsdialog anrufen BLAU PVR Einstellungen aufrufen Aufnahmeger t festlegen Schlie en Sie zwei USB Speic...

Page 53: ...ALLE Daten gel scht die sich auf dem USB Speicherger t befinden Nach dem Formatieren ist der USB Speicher leer alle Daten sind verloren Hinweis Das Dateisystem FAT FAT32 wird von nahezu allen aktuelle...

Page 54: ...ier k nnen Sie festlegen wie lange das Aufnahmesymbol roter Punkt nach dem Starten einer Aufnahme auf dem Bildschirm angezeigt wird Never Kein Aufnahmesymbol wird angezeigt Infinite Aufnahmesymbol wir...

Page 55: ...Bild kein farbiges Bild berpr fen Sie die Verbindung zum TV Fernsehger t berpr fen Sie die Videoeinstellungen Seite 45 TV Sys tem TV Programm ist verschl sselt Kein Bild ber HDMI W hlen Sie den richt...

Page 56: ...Batte rien Die Mangelanspr che werden entsprechend der aktuellen gesetzlichen Gew hrleistung erf llt Die Gew hrleistung gilt nur in dem Land in dem das Produkt gekauft wurde Folgendes ist von der Gew...

Page 57: ...d MPEG 2 up to level MP ML and MP HL MPEG 4 H 264 up to High Profile Level 4 Seitenverh ltnis 4 3 16 9 Aufl sung 1080p 1080i 720p 576i 480i 576p 480p Audio Decoder Standard ISO IEC 11172 Layer I II MP...

Page 58: ......

Page 59: ...User s Manual DVB S2 Receiver mit CI USB PVR Ready Time Shift HD Media Player HRS 8750 CI...

Page 60: ...nstallation 18 Single connection of satellite and receiver 19 Using multiple satellites via DiSEqC 1 0 23 Using multiple satellites via DiSEqC 1 1 24 Using multiple satellites via DiSEqC 1 2 25 Using...

Page 61: ...file 38 USB Port Connecting USB storage 39 Photo 40 Specification of picture files 41 Music 41 Specification of music files 42 Video 43 Specification of video files 43 Record 45 Specification of recor...

Page 62: ...d use instructions should be followed Satellite dish The DVB S receiver is connected to a satellite dish 1 If you want to connect or disconnect the satellite dish and the receiver please switch off th...

Page 63: ...the appliance 11 Pull out the main plug if the appliance is not to be used over a longer period of time 12 Take care that nobody can trip over the power supply cable USB port 1 Due to legal requireme...

Page 64: ...ection 7 Switch the player off by the Off On switch if it is not going to used for a longer period of time 8 Disconnect the main plug during thunderstorms 9 Slots and openings in the cabinet are provi...

Page 65: ...e the same characteristics as the original part Unauthorized substitutions may result in fire electric shock or other hazards 5 Nicotine can damage the electronic components In case of service regardi...

Page 66: ...e Dispose them not with the normal household waste Green Dot The Gr ne Punkt denotes that the MAS Elektronik AG pays a duty to the Gesellschaft f r Abfallvermeidung und Sekund rrohstoffgewinnung Batte...

Page 67: ...player in its original packing Do not change or modify any components of the device or accessories High Definition DVB S Receiver Common Interface for CAM module and Pay TV card HDMI port Electronic p...

Page 68: ...hind the flap Description of the elements 1 Aerial Input 13V 18V max 400mA 2 USB Port B 3 SCART output TV 4 Power Cord 5 Power On Off 6 Loop Out Aerial output 7 FBAS video output CVBS 8 Stereo audio o...

Page 69: ...ng time Notes 1 Remove and exchange old batteries Leaking out battery acid can damage your health and the remote control 2 Clean leaking out battery acid with a cloth 3 In case of skin contact immedia...

Page 70: ...5 P Page up down 16 FAV Display favorite channel list 17 Switch to the previous viewed channel 18 ZOOM Picture Zooming function 19 FIND Quickly find channels which you want 20 MARK Mark a position whe...

Page 71: ...Guide 1 Connect a SCART or HDMI cable to the DVB S receiver 2 Connect the aerial cable to the aerial input LNB IN of the HRS 8750 CI Screw the plug to the input 3 Connect the SCART or HDMI cable to th...

Page 72: ...t your decoder or amplifier Note The Cables are not part of the accessories There are just a few channels which use digital audio You can gain information about the audio signal by pressing the AUDIO...

Page 73: ...ing the card and the CAM Module 1 Open the flap on the front right side 2 Push the subscription card Smartcard in the CAM module CI Module Follow the Position of the golden Chip on the subscription ca...

Page 74: ...show the USB stick to the top Remove the USB stick only when you are back in Live program otherwise the drive could be damaged Notes 1 Due to legal requirements of CE conformity the customer is asked...

Page 75: ...ices There are Fixed Antenna and Motor Antenna Satellite List In this menu you can Add Delete Edit Select the satellite You can press GREEN button to add a satellite And press RED button to edit the s...

Page 76: ...r e g 12538 H 41250 DiSEqC1 0 Disable DiSEqC1 1 Disable 22KHz Auto Polarity Auto Satellite Here you can choose the satellite which you want LNB Frequency This option is usually associated with the sel...

Page 77: ...tenna setting Highlight on the Search option and then press the OK button to start scanning In search menu you can specify additional search parameters These are individual with the options FTA Only N...

Page 78: ...general the search with the default option is sufficient However there are always changes to the transponder list If any programs are not found then go to the option blank After further search paramet...

Page 79: ...installation and during the search operation are possible 2 Use of multiple satellites via DiSEqC 1 0 from page 23 3 Use of multiple satellites via DiSEqC 1 1 from page 24 4 Use of multiple satellite...

Page 80: ...a Setup menu for set the configuration of the satellite 4 Navigate with the arrow key DOWN to the DiSEqC1 0 Select the Port1 with LEFT RIGHT key 5 Navigate with the arrow key DOWN to the Satellite Sel...

Page 81: ...n of the satellite 4 Navigate with the arrow key DOWN to the DiSEqC1 1 Select the 2Cascades Port1 with LEFT RIGHT key 5 Navigate with the arrow key DOWN to the Satellite Select the other satellite you...

Page 82: ...entering to Antenna Setup menu DiSEqC1 2 Navigate with the arrow key DOWN to the Motor Type option and select the DiSEqC1 2 with the button Then navigate with the arrow key DOWN to the Motor Setting...

Page 83: ...ght the Limit setup item and move the dish to west or east by pressing the button Once having reached the target place press the OK button to set the limit If you want to disable the limit select the...

Page 84: ...hanically Motor Antenna Firstly navigate in this installation menu to the option Antenna Connection and enter this menu with the OK button Then select the Motor Antenna with the buttons Then exit the...

Page 85: ...ted programming when using Unicable LNB or multi switching products Unicable LNB Special LNBs have been developed for use in single cable distribution systems The LNB further includes a mixer to combi...

Page 86: ...ave connected the receiver to different satellites than you can handle the list by each satellite If there are favourite groups press the button also can change the favourite group Searching programs...

Page 87: ...r of channels to be listed could be changed with the buttons VOL VOL All channels beginning with the letter appear on the list Favourites Press the FAV button to open the favourite list It is categori...

Page 88: ...propriate option in the setup menu Press the DISP button on the remote control and the resolution changes with each pressing Change Volume To increase or decrease the volume press the button Mute Pres...

Page 89: ...rograms availability of teletext etc Pressing it twice shows the detail information of the current program It shows information about satellites transponders PID of the TV programs and signal quality...

Page 90: ...ide Actually program and next program Navigation in the space of the EPG window Previous Next channel Change TV program OK Detailed EPG informations GREEN Start the recording of the actually program o...

Page 91: ...nticate If you insert the CI module there appears a dialogue windowe shown on the right side It will be followed by another dialogue window in a few minutes saying Waiting few minutes Your Module is o...

Page 92: ...Press the PLAY button to resume the paused image Format of the recording Recorded files take the form of TS The recorded files are on the disk in the folder ALIDVRS2 in the subdirectories The subdirec...

Page 93: ...ation into this list occurs with the following buttons OK Starting option menu of the Timer programming Next previous programming EXIT Exit timer setting menu You could make a total of 32 entries Canc...

Page 94: ...ected setting can be changed In general a popup window with the various options will appear With the buttons the different options can be selected and confirmed with the OK button The start time and d...

Page 95: ...playback a file from the list please highlight them by using the navigation button To start the file press the OK button on the remote control The video shows in Full Screen mode And you can record an...

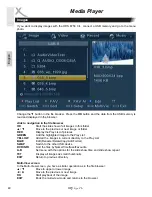
Page 96: ...am or navigate to Menu Tools Media Player then press the OK button to enter The media player will start with the following opening screen The choices are Video Music Image and Record The pointer is at...

Page 97: ...GREEN Add the highlighted image to the Play List YELLOW Add all the images in current directory to the Play List BLUE Edit Rename Delete Copy Add Folder SWAP Switch to the other USB device DVR INFO S...

Page 98: ...me Edit You can edit the files and add the new folders Pressing the BLUE button to enter the edit mode You can press RED button to rename the highlighted file and press GREEN button to copy the file t...

Page 99: ...button to play them The play list will save to the USB memory You can play the favourite music files in the play list next time Edit You can edit the files and add the new folders Pressing the BLUE b...

Page 100: ...SUB Sami SMI SSA 7 Supported audio formats in MPEG 4 files AC3 MP3 AAC MPEG 2 MP2 MPA AC3 Notes The variety of different video codes audio codes video container and PC programs it is possible that som...

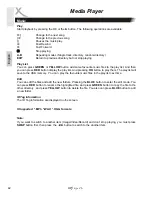
Page 101: ...arts playing directly in full screen OK Starts play Pause and pressing again enter step mode PLAY Cancel pause continues playing Stop and returns to the browser GREEN Jump to a certain self defined ti...

Page 102: ...ordings Navigating while playing back Move to the previous or next file or folder OK Starts playback of the file or open the folder RED Rename the selected file GREEN Lock the selected file YELLOW Del...

Page 103: ...ress RED button to switch between the caps on and caps off You can use the numeric keys to input the character After finishing the new name press the YELLOW button You can also cancel rename by pressi...

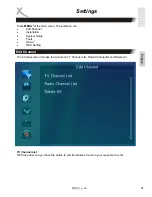
Page 104: ...re Edit Channel Installation System Setup Tools Game REC Setting The Channel menu includes the sub menu TV Channel List Radio Channel list and Delete All TV Channel List With the sub menu you have the...

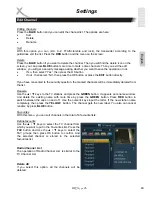
Page 105: ...e locked TV channels for the password Enter the password and then you can look at the TV station Channel skip Use the keys to the TV stations and press the GREEN button The selected TV channel is prov...

Page 106: ...estion the marked channels will be immediately deleted from the list Rename Use the keys to the TV stations and press the GREEN button It appears an rename window And delete the existing name with mor...

Page 107: ...rently available are the following languages German English French Spanish Italian Portuguese Russian Turkish Polish and Arabic TV System Enter Language menu you can set the Video Resolution Aspect Mo...

Page 108: ...connected AV amplifier please use the LPCM setting Otherwise bit stream BS out Display Setting The display settings can set Brightness Contrast Saturation Hue Sharpness Led brightness You can press t...

Page 109: ...ock function will invalid New Password New Password is used for change the password You can input the new password in this item by using numeric keys directly Confirm Password After you finished the N...

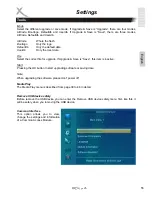
Page 110: ...ken Other The Other item contains option for LNB Power and Auto Standby LNB Power You can press the button to switch the LNB Power On or Off On Receiver will supply power to satellite antenna Off Rece...

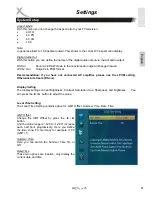
Page 111: ...to make undo all the settings and changes by load the default settings Note All settings are reset Then that they should also perform the search again USB Upgrade Save Lets you install a new software...

Page 112: ...file for upgrade If Upgrade Save is Save this item is inactive Start Pressing the OK button to start upgrading software or saving data Note When upgrading the software please don t power off Media Pl...

Page 113: ...56 HRS 8750 CI English There are two games in Game menu One is Othello the other is Sudoku Game Settings...

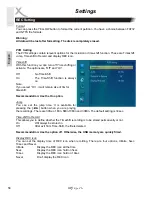
Page 114: ...t the partition If you connect two USB devices press the button to select the USB device Then press BLUE button to set the DVR type There are three options of DVR Type REC TMS REC and TMS REC TMS Both...

Page 115: ...emain size of 3G for timeshift Recommendation Use the On option Jump You can set the jump time It is available for pressing the button when you are playing the recordings There are 30Sec 1Min 5Min 10M...

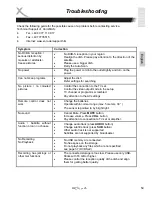
Page 116: ...e in the setup TV channel or program is scrambled Pay attention to the AV settings Remote control does not work Change the batteries Operate within normal range max 5 meters 30 The sensor is pointed t...

Page 117: ...vel MP ML and MP HL MPEG 4 H 264 up to High Profile Level 4 Aspect Ratio 4 3 16 9 Audio Decoder Standard SO IEC 11172 Layer I II Dolby Digital Dolby Digital Sampling Frequency 32 44 1 48 kHz Output Mo...

Page 118: ...eries etc This limited warranty covers the warranty requirements set by authorities in your country This limited warranty only is valid in the coThis limited warranty does not cover finishes accessori...

Page 119: ......

Page 120: ......
Page 121: ...XORO by MAS Elektronik AG Pollhornbogen 19 21107 Hamburg Deutschland Tel 49 040 77 11 09 17 Fax 49 040 76 73 35 15 xoro mas de www xoro de...

Reviews: