CLEARING PAPER MISFEEDS AND JAMS
XEROX DOCUPRINT 4850/4890 NPS TROUBLESHOOTING GUIDE
4-13
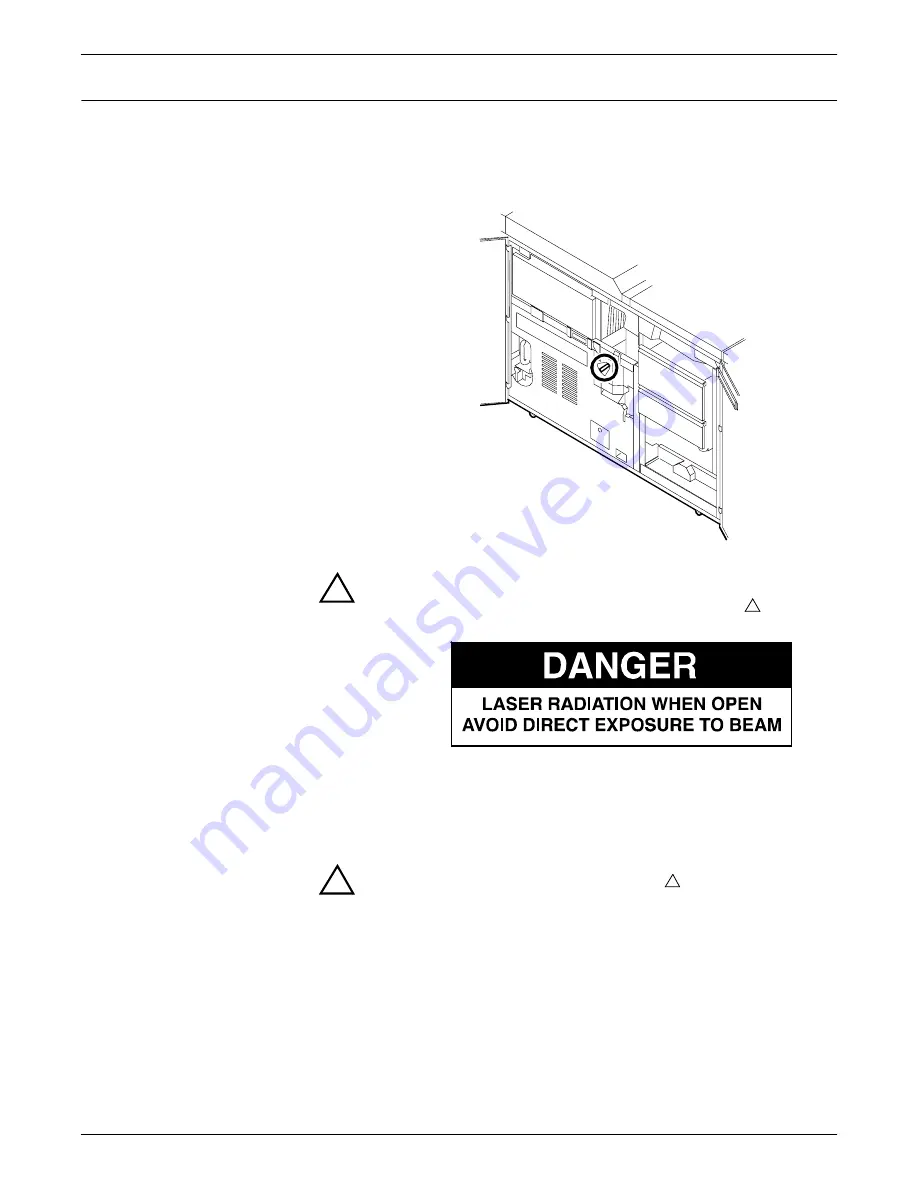
Clearing paper jams from area 4
Follow these steps to clear jams from area 4.
1. Open the middle and left doors and locate area 4. Remember to
clear the jam in area 5 first, if you are directed to clear both
areas.
!
Warning:
The laser safety label located on the inside left front
door of the printer advises you that the panel below it must not
be removed, except by a service representative.
2. With your left hand, move and hold the green latch to the right
(the direction of the arrow marked on it). With your right hand,
pull out the large green handle until the fuser unit latches in the
fully open position.
!
Warning:
Take care not to touch any parts in this area. They
may be hot enough to cause burns.
Summary of Contents for DocuPrint 4850 NPS
Page 10: ...INTRODUCTION x XEROX DOCUPRINT 4850 4890 NPS TROUBLESHOOTING GUIDE...
Page 44: ...CLEARING PAPER MISFEEDS AND JAMS 4 26 XEROX DOCUPRINT 4850 4890 NPS TROUBLESHOOTING GUIDE...
Page 48: ...USING SAMPLE DOCUMENTS 5 4 XEROX DOCUPRINT 4850 4890 NPS TROUBLESHOOTING GUIDE...
Page 60: ...ADJUSTING PRINT QUALITY AND SPEED 6 12 XEROX DOCUPRINT 4850 4890 NPS TROUBLESHOOTING GUIDE...
Page 62: ...CORRECTING STACKING PROBLEMS 7 2 XEROX DOCUPRINT 4850 4890 NPS TROUBLESHOOTING GUIDE...
Page 64: ...SYSTEM UNRESPONSIVE 8 2 XEROX DOCUPRINT 4850 4890 NPS TROUBLESHOOTING GUIDE...
Page 68: ...INDEX INDEX 4 XEROX DOCUPRINT 4850 4890 NPS TROUBLESHOOTING GUIDE...


