CLEARING PAPER MISFEEDS AND JAMS
4-22
XEROX DOCUPRINT 4850/4890 NPS TROUBLESHOOTING GUIDE
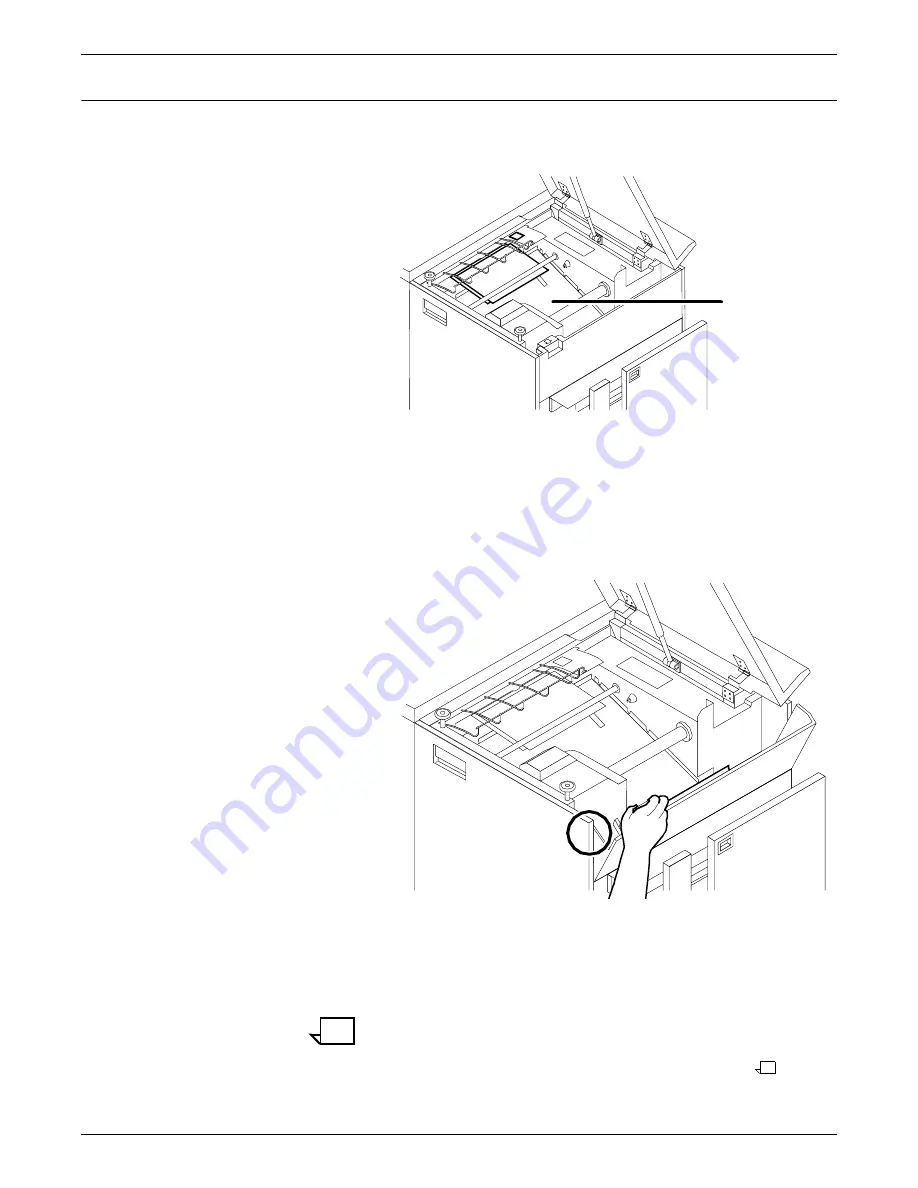
Clearing stitcher/stacker paper jams (areas A and B)
Follow these steps to clear stitcher/stacker jams in areas A and B.
1. Open the top cover of the stitcher/stacker and locate area A in
the center.
2. Remove and discard the paper under the paper guide. The
paper guide is a spring-loaded, heavy wire form guide that pops
up when you open the cover.
3. Locate the side cover of area B on the right.
4. Push the cover to the right (in the direction of the large green
arrow at the front of the cover) to open it.
5. Remove only the set of pages leaving the stitcher/stacker at the
right, and place it on the output in the stacker tray. Do not
remove any other pages from this area.
Note:
The pages were compiled by the stitcher/stacker into a
set (stapled or not), but something prevented the set from being
delivered to the stacker. You put the set in the stacker tray
because the system has counted it as completed.
Area A
Summary of Contents for DocuPrint 4850 NPS
Page 10: ...INTRODUCTION x XEROX DOCUPRINT 4850 4890 NPS TROUBLESHOOTING GUIDE...
Page 44: ...CLEARING PAPER MISFEEDS AND JAMS 4 26 XEROX DOCUPRINT 4850 4890 NPS TROUBLESHOOTING GUIDE...
Page 48: ...USING SAMPLE DOCUMENTS 5 4 XEROX DOCUPRINT 4850 4890 NPS TROUBLESHOOTING GUIDE...
Page 60: ...ADJUSTING PRINT QUALITY AND SPEED 6 12 XEROX DOCUPRINT 4850 4890 NPS TROUBLESHOOTING GUIDE...
Page 62: ...CORRECTING STACKING PROBLEMS 7 2 XEROX DOCUPRINT 4850 4890 NPS TROUBLESHOOTING GUIDE...
Page 64: ...SYSTEM UNRESPONSIVE 8 2 XEROX DOCUPRINT 4850 4890 NPS TROUBLESHOOTING GUIDE...
Page 68: ...INDEX INDEX 4 XEROX DOCUPRINT 4850 4890 NPS TROUBLESHOOTING GUIDE...


