


Note
You do not need to select any other items, such as Change Percentage, for this first set
of test prints.
The 11 test prints are generated and sent to the output area of the machine.
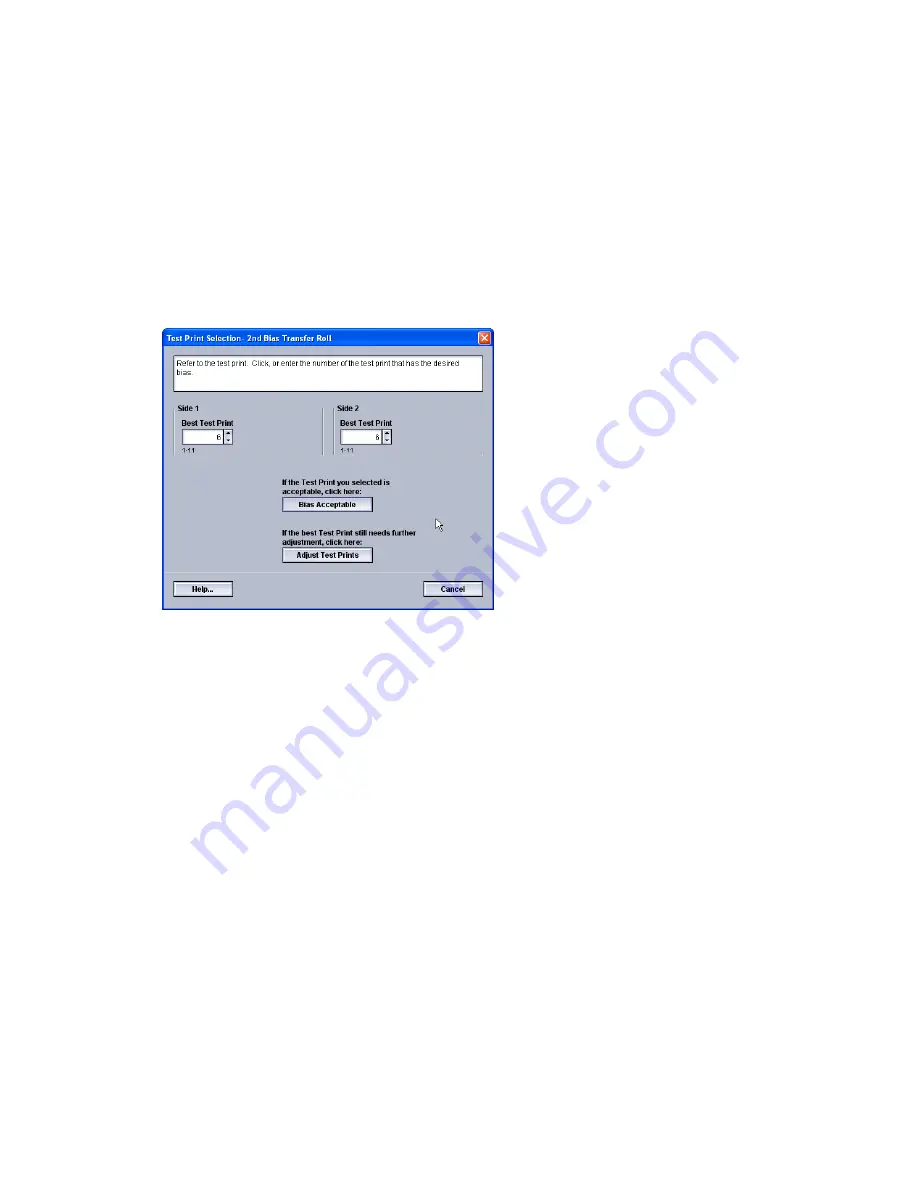
Evaluating the first set of test prints
After the 11 test prints are generated, retrieve and review the test prints to find the one
with the best image quality. For example, if the best image quality is on test print 5, this
is the number you enter for the Best Test Print value on Test Print Selection: 2nd Bias
Transfer Roll window:
Note
The default value is 6.
Adjusting the test prints
Selecting the Adjust Test Prints button returns you to the Test Print Setup: 2nd Bias
Transfer Roll window. Notice that the number 5 is already entered as the Change
Percentage value. (You entered this number for the Best Test Print value on Test Print
Selection: 2nd Bias Transfer Roll window.)
Simply select Start again to generate another 11 test prints. Retrieve and evaluate the
next set of test prints for best image quality. Select the desired button depending on
whether or not the image quality is acceptable.
Selecting the 2nd Bias Transfer Roll settings
Use the following procedure to select the settings for the 2nd Bias Transfer Roll (on the
Advanced Stock Setup window).
1. Logon as Administrator.
2. Select Stock Library.
3-5
Xerox
®
Color 800i/1000i Presses Xerox
®
Color 800/1000 Presses
System Administration Guide
Test Print option


