


3. From either the New Stock Setup or Stock Properties window, select/modify the
attributes as required, including entering a new stock name.
4. Select the Advanced Setup button.
The Advanced Stock Setup window opens.
5. After selecting the advanced settings you need, select the Test Print button at the
bottom of the window.
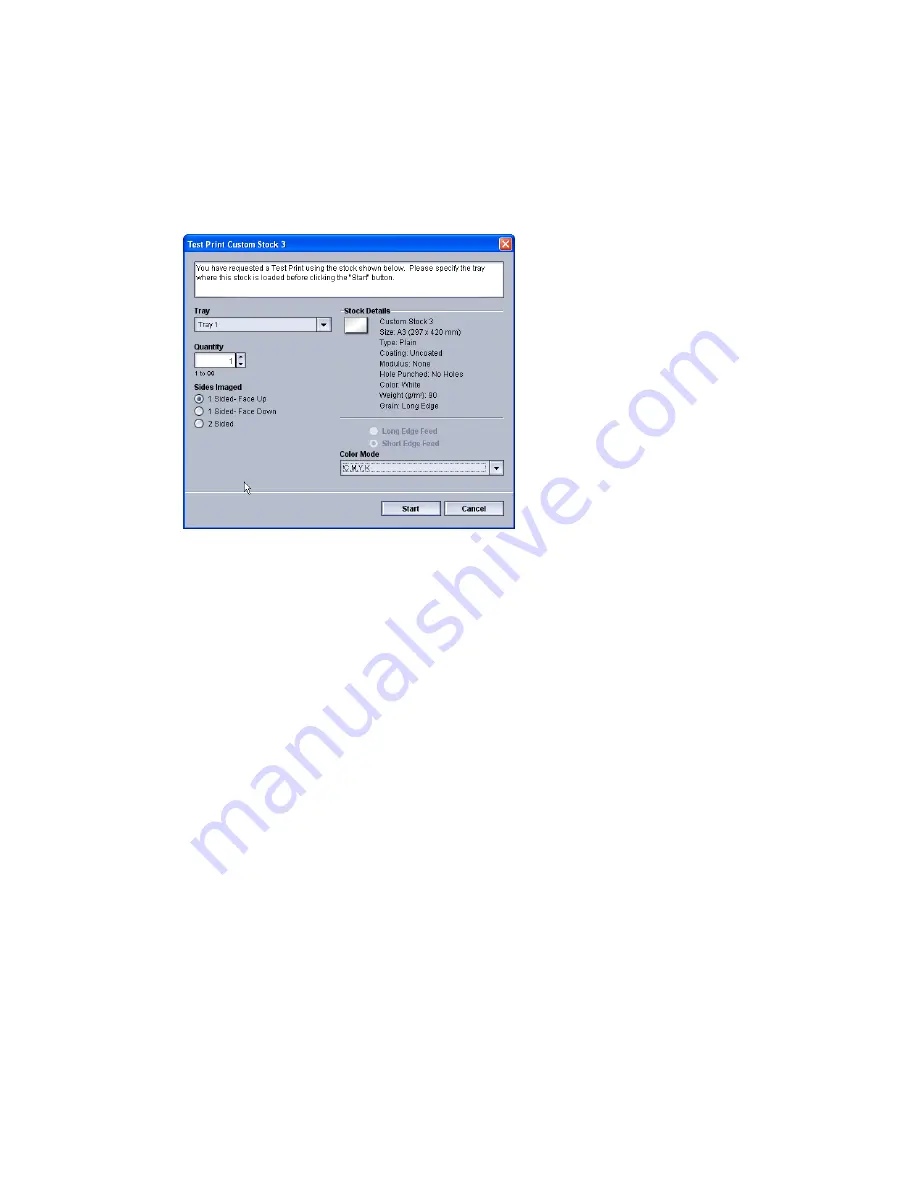
The test print window for that specific stock opens.
6. Select the desired test print settings, including output quantity, and select Start.
Obtain your printed output from the output area of the machine.
7. Evaluate the printed output.
It may take multiple adjustments to the Advanced Stock Setup options and running
test prints before the printed output meets customer satisfaction.
8. Select OK to close the Advanced Stock Setup window.
9. Select OK to save and close either the New Stock Setup window or the Stock Properties
window.
10. Select Close to exit Manage Stock Library.
11. Select Logoff to exit the Administrator mode.
Related Topics:
Logging on as Administrator
3-3
Xerox
®
Color 800i/1000i Presses Xerox
®
Color 800/1000 Presses
System Administration Guide
Test Print option


