background image


3600W Digital Inverter with Pure Sine Wave

AFTER SALES SUPPORT

e-mail: [email protected]

1800 909 909

MODEL: №. INF3800A-1  •  03/2018  •  59905

(toll free)

AFTER SALES SUPPORT

(toll free)

3600W Digital Inverter with Pure Sine Wave

e-mail: [email protected]

1800 909 909

MODEL: №. INF3800A-1  •  03/2018  •  59905

20

21

•    Check to ensure that the fuel drain (13) has been tightened and that fuel is 

not leaking.

•    Be careful not to admit dust, dirt, water or other foreign objects into the fuel.
•   Wipe off spilt fuel thoroughly before starting engine.
•    Ensure you DO NOT fuel the generator in close proximity to any open 

flames, lit cigarettes, or hot objects.

•    The generator should also be located in an open area with fresh air and NOT 

in a confined area.

WARNING: Ensure the engine is switched off while undertaking  

this task.

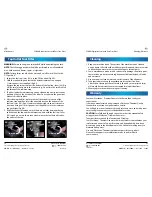
1.   Remove the fuel tank cap (2) by rotating in an anticlockwise direction. 
2.   Remove the fuel tank inlet filter (27) and ensure it is clean and free of debris.   

Check the level of fuel is sufficient.

3.   If the fuel tank inlet filter (27) was removed to check the fuel level, ensure it 

is replaced back before adding fuel.

4.   To add fuel, pour the unleaded fuel from an approved fuel container into the 

fuel tank (1). As fuel expands, DO NOT FILL to the lip of the tank. Maximum 

fill is to the top of the fuel tank inlet filter (27) rim. 

5. Replace fuel tank cap (2) turning in a clockwise direction to lock.

Checking the Engine Oil

The engine of this generator is NOT filled with oil when unpacked.
Prior to starting the engine ensure the oil tank is filled with SAE 10W-30 

4 stroke oil. For the first time fill the engine should be filled with 600ml  

of SAE 10W-30 oil. We recommend GARDENLINE Full Synthetic 4 Stroke Oil.
NOTE: Damage to the engine is not covered under warranty if the engine is 

run with insufficient oil.  
1.   Before checking or refilling oil, be sure the generator is put on a stable and 

level surface, ensuring the engine has been switched OFF.

2.   Remove the oil filler cap (15) by rotating the cap in an anti-clockwise 

direction, and wipe all oil residue off the oil dipstick (15) with a clean rag.  

Re insert the oil filler cap / dipstick (15) and thread the cap fully in position.

Then remove the oil filler cap / dipstick (15) by rotating in an anti clockwise 

direction and view the oil level on the oil dipstick (15).

Engine Oil

Engine Oil

   In any of the above instances, when the red load status indicator light 

(8) turns on, the power supply to the control panel will be disconnected 

automatically. 

    NOTE: The engine must be stopped and the issue resolved before the 

power supply will be restored.

3. Power Supply indicator (Fig N)

The power supply indicator light (9) is a green LED. It will only display 

green when there is a 240V output available, thus the generator must be 

operating. This indicator will remain on when the generator is operating and 

has 240Va.c. available to the control 

panel, with or without appliances 

connected to the AC sockets (12).
In an overload condition, there is no 

240Va.c. available to the panel so the 

green indicator will not operate.

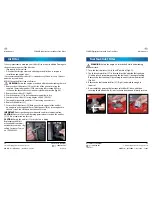
Preparing the Generator

It is important to check the generator 

before you commence operating the unit.
IMPORTANT. Ensure that the engine has oil. When leaving the factory,  

this generator has NO OIL in the engine.
NOTE. The engine will not start if the generator has no oil.

Checking the Engine Fuel

IMPORTANT: Fuel goes off after about 3-4 months. If you find your generator 

does not start, first change the fuel in the tank with newly purchased fresh 

unleaded fuel. Do not use ethanol based fuels.

WARNING.

•   Do not refill fuel tank (1) while engine is running or is hot.

N.

Summary of Contents for 59905

Page 1: ...ITH PURE SINEWAVE User Manual Product Info www powertoolsupport com Read all safety warnings and all instructions thoroughly before operating this product Ensure you keep your manual in a safe place for future reference IM Ed7 03 2018 ...

Page 2: ...00W Inverter Generator with Pure SineWave 2 Contents of carton 2 Description of symbols 3 General safety warnings 4 Additional Safety Rules for Petrol Products 6 Risk of electrocution and fire 8 Risk of fire 9 Risk of injury and property damage when transporting generator 10 Risk of breathing inhalation hazard 10 Risk of unsafe operation 10 Risk of hot surfaces 11 Risk of moving parts 11 Risk from...

Page 3: ...rge protector connected to the generator NOTE This petrol Generator is NOT suitable for Marine applications and should never be used on board water craft Continuous off the grid power Contents of carton 1 x 3600W Inverter Generator 1 x Instruction Manual 1 x Warranty Card details 1 x Quick Start Guide 1 x 10mm Tube Spanner 1 x 21mm Spark PlugTube Spanner 1 x Multi Size Spanner 1 x Double Ended Scr...

Page 4: ...g power tools with your finger on the switch or energising power tools that have the switch on invites accidents d Remove any adjusting key or wrench before turning the power tool on A wrench or key left attached to a rotating part of the power tool may result in personal injuries e Do not overreach Keep proper footing and balance at all times This enables better control of the power tool in unexp...

Page 5: ...n operation Ensure bystanders also keep their distance Additional Safety Rules for Petrol Products Locate the generator for use in a convenient place so as to use the shortest extension lead as possible but still sufficiently away from the exhaust fumes Ensure the generator has oil Before commencing the generator ensure that the unit has been filled with SAE 10W 30 4 stroke oil Any extension cable...

Page 6: ...echanical or electrical problem Have unit repaired by an Authorised Service Centre Do not operate generator with protective guarding removed Risk of fire Hazard What could happen How to prevent it Attempting to fill the fuel tank while the engine is running Fuel and fuel vapours can become ignited by coming in contact with hot components such as the muffler engine exhaust gases or from an electric...

Page 7: ...and understand all of the operating instructions and warnings in this manual Become familiar with the operation and controls of the generator Know how to shut it off quickly Equip area of operation with a fire extinguisher certified to handle fuel fires Keep children or others away from the generator at all times Operating generator while suspended Generator will not operate properly and will caus...

Page 8: ...ndicator light 9 Power Supply indicator light 10 Muffler 11 Exhaust spark arrestor 12 AC sockets X3 13 Fuel drain 14 Control panel 15 Oil Filler cap dipstick 16 Oil drain plug 17 Ground frame terminal 18 Recoil starter 19 Choke lever 20 Air filter cover 21 Air Filter 22 Spark plug lead cover 23 Spark Plug 24 Tap outlet 25 Fuel tap sediment cap 26 Fuel tap lever 27 Fuel tank inlet filter 28 Feet x4...

Page 9: ...ding televisions computers laptops caravans etc It comes fitted with 3 x 240V AC outlets giving you the ability to run 3 x electrical appliances at the one time as long as the combination of the maximum rating of each appliance does not exceed the maximum rated power of the generator The maximum operational combination on this generator is 3400W For a short period to aid appliances plugged in star...

Page 10: ...be spanner 31 to secure the bolt head in position apply the nut onto the end of the bolt and tighten in a clockwise direction using the multi size spanner 33 Fig G Repeat for the second wheel F G E General Assembly General Assembly This generator has been designed to be used as a stand alone compact generator or a larger portable wheeled type generator Compact Stand Alone Assembly Assembly of the ...

Page 11: ...overheated caused by high temperature c Flashing 3 times indicates overload protection caused by an excessive electrical overload d Flashing 4 times indicates there is an electrical problem most likely caused by a short circuit L M Following assembly of the wheels it is recommended to assemble the additional wheel foot 3 for stability and to keep the generator on a level surface 1 Raise the opposi...

Page 12: ...Oil NOTE Damage to the engine is not covered under warranty if the engine is run with insufficient oil 1 Before checking or refilling oil be sure the generator is put on a stable and level surface ensuring the engine has been switched OFF 2 Remove the oil filler cap 15 by rotating the cap in an anti clockwise direction and wipe all oil residue off the oil dipstick 15 with a clean rag Re insert the...

Page 13: ...hen the oil level is close to the low level Fill the oil tank before use each time 4 If the oil is contaminated or has discoloured ensure you change the oil Replace the oil dipstick 15 DO NOT start the generator with the oil dipstick 15 not firmly replaced NOTE This engine is fitted with a low oil indicator light 7 If the oil level is too low the engine will stop operating or the engine will not s...

Page 14: ...e On Off switch 4 to the ON green position as indicated by an I down Fig U This generator will not start without this switch in the ON position 5 To start the engine slowly pull the recoil starter 18 until you feel it engage and then pull it briskly Fig V When starting the engine for the very first time it may require a number of attempts to start until the fuel has travelled from the tank to the ...

Page 15: ...nue to supply 240Va c output for a very short time but if the load is not reduced the 240V supply will be automatically shut down To reduce load firstly you can stop using one appliance and turn it off see if that rectifies the problem If not refer to page 14 on loading s and how they work If this does NOT solve your problem you will need to reset an overload condition and shut down the engine of ...

Page 16: ...be a problem on generators as the loading on the engine can vary considerably Running the generator at low loading for extended periods can cause carbon build up Carbon build up in the engine can be reduced by operating the generator at approximately 75 of rated load for 25 of the time the generator is used i e if the generator is used for 4 hours on low load i e 800W or less run the generator for...

Page 17: ... the fuel totally from the fuel tank 1 Check the fuel tap lever 26 is turned off Fig V Drain and replace the engine oil Clean the generator with a damp soft cloth with mild detergent Do not clean the generator with water Check all nuts bolts and fasteners Ensure they are tightened if needed before storage To ensure the engine is operating correctly the spark plug must be properly gapped and free o...

Page 18: ...and engine wear It is recommended the air filter 21 is cleaned every 50 hours every 10 hours under dusty conditions ALWAYS keep the filter clean at all times WARNING Ensure the engine is switched off while undertaking this task 1 Remove the air filter cover 20 on the side of the generator using the supplied 10mm tube spanner 30 by removing unscrewing the two screws on the face of the cover in an a...

Page 19: ... 26 turned on ensure there are no leaks where the fuel hose is fitted to the outlet of the tap Maintenance Cleaning Warranty AK AJ AL LOOSEN TIGHTEN 1 Keep your machine clean The outside of the machine can be cleaned using a damp soft cloth with a mild detergent if required Never use water to clean the generator as it may cause damage to internal parts 2 Some maintenance products and solvents may ...

Page 20: ...y of your receipt to one of our National Service Agents for repair or call us 1800 909 909 for advice A listing of our Service Agents is included with your product however you can also find our most updated listing on our website www powertoolsupport com by clicking on the Service Agent link Warranty Service Service Environmental protection What your 3 year warranty means Service Support Troublesh...

Page 21: ...is chart please call Customer Service on 1800 909 909 Troubleshooting Specifications Trouble Possible cause Suggested remedy No electrical output 1 Faulty receptacle 1 Have service centre replace receptacle 2 Overload has been triggered red Overload light on 2 Remove all appliances Stop the generator and restart Reconnect appliances but with reduced load 3 Faulty power cord 3 Have an electrician r...

Page 22: ... products are developed to our stringent quality specifications If you are not entirely satisfied with this product please return it to your nearest ALDI store within 60 days from the date of purchase for a full refund or replacement or take advantage of our after sales support by calling the supplier s Customer Service Hotline Made in China WORKZONE Titanium is a registered trademark of ALDI Stor...

Reviews: