Air Brush Kit
AFTER SALES SUPPORT
e-mail: [email protected]
1800 909 909
MODEL: №.
TG212 • 07/2016 • 53633
(toll free)
16
AFTER SALES SUPPORT
(toll free)
Air Brush Kit
e-mail: [email protected]
1800 909 909
MODEL: №.
TG212 • 07/2016 • 53633
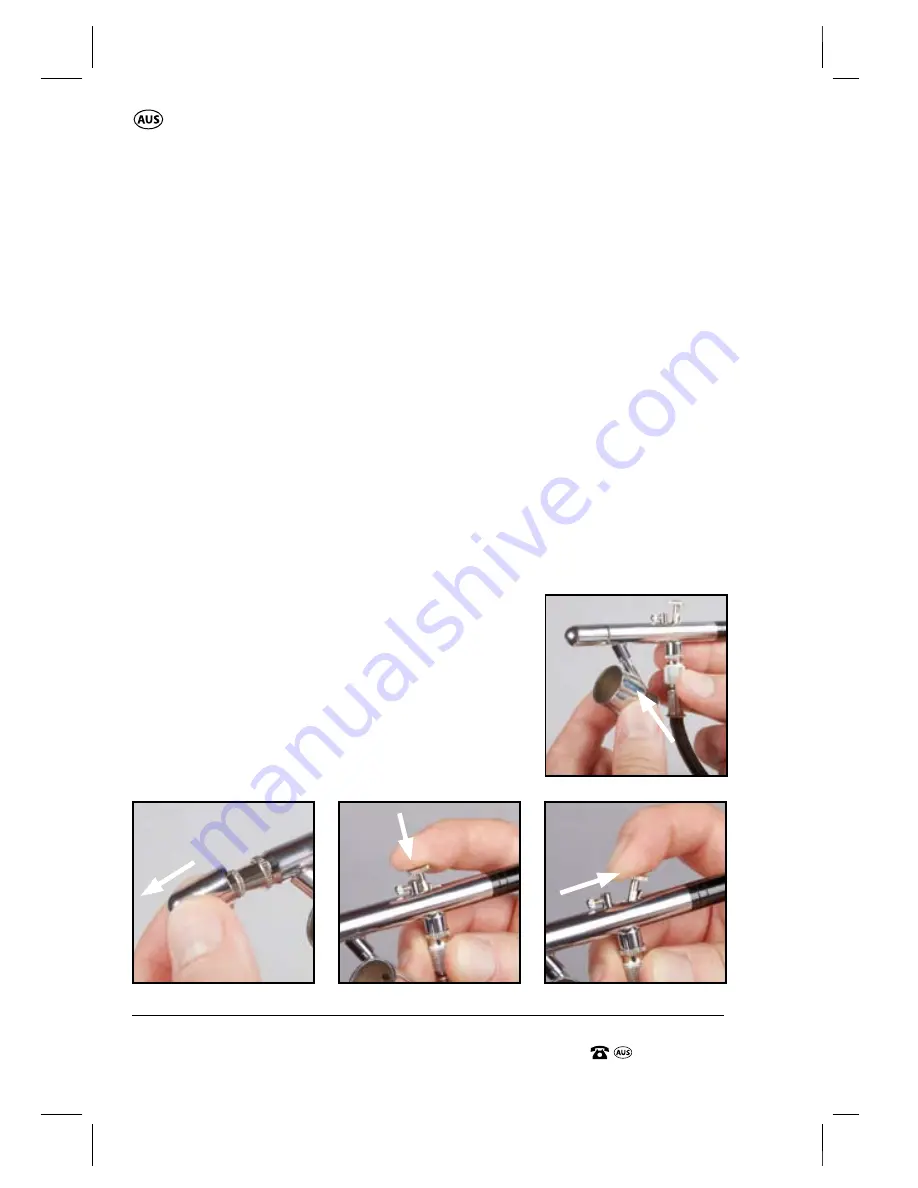
The angle of the metal cup is adjustable by turning the metal cup where
the cup joins to the air brush to the right or to the left, or left central.
The best position of the cup will depend on the angle of the air brush
during use. i.e If the air brush is in use pointing downward, the metal cup
is probably best to be rotated to the right or left as far as possible.
If the air brush is in use in the upward direction the metal cup is probably
better more towards the front.
If the air brush is in use in a horizontal position the metal cup is probably
best to be rotated to the right or left as far as possible.
Operating the Air Brush Gun
1. Remove the protective cap (16) from the air brush gun (Fig M).
2. Turn the on/off switch (1) on the compressor to the ON position as
indicated by an “I” (refer previous Fig E), ensuring the pressure gauge
regulator (6) has been set to the desired pressure level.
3. By pressing down on the trigger (23), air will start to flow through the
paint outlet (17) (Fig N). By pulling the trigger
(23) backwards (Fig O), the paint will atomise
and will start to come through the paint outlet
(17).
NOTE:
The size of the spray pattern is in
accordance with the distance between the
work surface and the nozzle of the air
brush gun.
N.
M.
O.
L.


