Fig. 39. Spark & flame sense electrode assembly.
Open the valves and fill and re-pressurise the system as
described in Section 13.2.
6. Combustion Chamber Insulation.
Check that the electricity supply to the appliance is turned off.
If replacing the rear insulation the appliance must be drained as
described in Section 16.3(a) and 16.3(b) and the gas to water
heat exchanger removed (see 16.4.5).
If changing the front or side pieces it is not necessary to drain
the appliance.
Remove the inner casing cover, combustion chamber front, fan
and flue hood assembly as described in Sections 15.3 (b,e,f & g).
Remove the fibre insulation pads to be changed and fit the
replacements taking care not to damage them.
If the system has been drained, open the valves and fill and re-
pressurise the system as described in Section 13.2.
7. Burner.
See Fig. 37.
Check that the electricity and gas supplies to the appliance are turned off.
Remove the burner assembly as described in Section 15.3 (h).
Fit the replacement burner in the reverse order taking care not to
damage the electrode leads.
8. Burner Injector.
See Fig. 37.
Remove the burner as described in Section 15.3 (h).
Unscrew the brass injector from the manifold.
Fit the replacement injector in the reverse order.
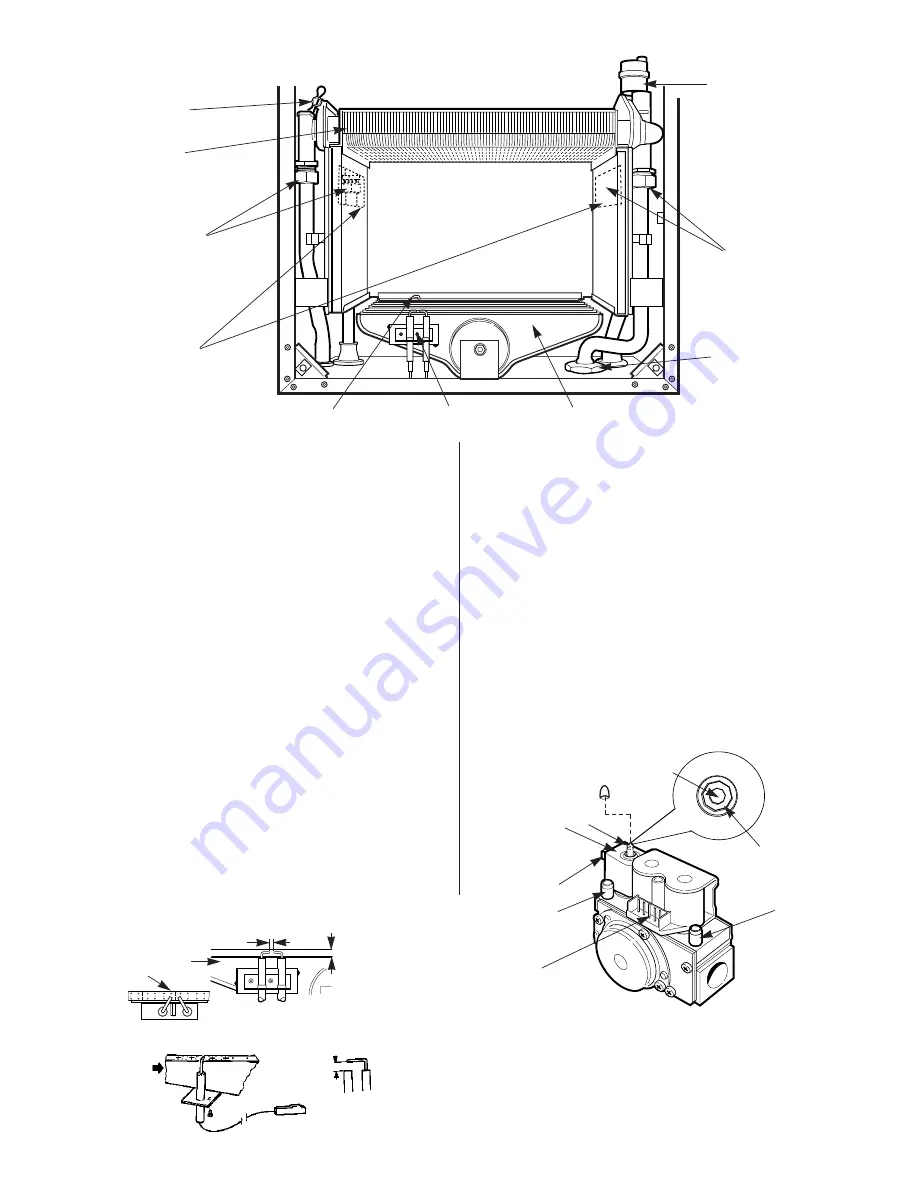
9. Spark Electrode Assembly.
See Fig. 39.
Remove the combustion chamber front as described in 14.3 (g)
Carefully pull off the two electrode leads,
Undo the M4 extended nut and remove the spark electrode
assembly from the burner.
Fit the replacement electrode in the reverse order, checking that
the spark gap is 3.5 to 4.5mm.
10. Flame Sensor.
See Fig. 39.
Remove the burner as described in section 15.3(h).
Undo the M3 screw and remove the sense electrode from the
burner.
Fit the replacement electrode in the reverse order, checking that
the sense gap is 5 to 6mm.
11. Gas Valve.
See Figs. 33. and 40.
Check that the electricity and gas supplies to the appliance are
turned off.
Hinge down the control box assembly in the servicing position
as described in Section 15.3(c).
Note:
The adjuster sealing cap should be fitted after setting the
burner pressure and coated with a small amount of paint to
make any subsequent adjustment obvious.
Whilst supporting the valve unscrew the plug retaining screw
and carefully pull off the electrical solenoid plug connection and
the two modureg leads.
Undo the 8 manifold screws and remove the gas valve. See Fig. 40.
Fit the replacement gas valve in the reverse order ensuring the
“O” rings are correctly fitted.
Turn on the gas supply and check for soundness.
23
3.5-4.5mm
2.5-5mm
Fig. 38. Combustion chamber.
Heat
exchanger
Overheat
Thermostat
Hot water
connections
Cut-outs in
combustion
chamber sides
Pump bulk-head
connector
Central heating
connections
Auto air
vent
Flame Sense Electrode
Spark Electrode Assembly
Burner
Spark electrode
assembly from side
and above
Flame sense electrode
detail
5-6mm
Fig. 40. Gas valve.
1
2
3
4
5
6
1 Burner pressure test point
2 Electrical connections – modulator (Blue : Blue)
3 Modulating solenoid
4 Minimum / Maximum pressure adjuster - Allen key
Note:
Clockwise to increase and anti-clockwise to decrease
the pressure
5 Inlet pressure test point
6 Main gas valve connections
Min
3mm
Allen Key
Max
2mm
Allen
Key
Gas valve
sealing cap


