


Alignment
Blade Guide Arm Alignment
6
6-11
15doc091818
Alignment
Horizontal Alignment
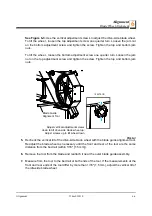
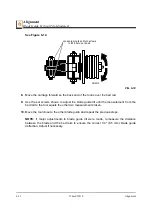
See Figure 6-9.
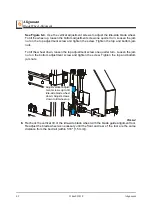
1.
With the blade guide arm still all the way in toward the other blade guide, tighten all the
side screws until they touch the arm. Back the screws off 1/4 turn and tighten the jam
nuts.
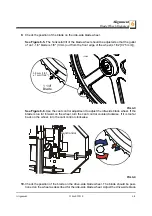
2.
Sight across the horizontal saw head brace to view the blade guide arm. Adjust all side
screws on the blade guide arm housing so the arm is parallel to the saw head brace.
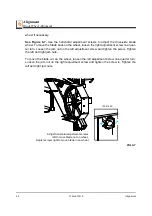
3.
To move the blade guide end of the arm toward the front of the sawmill, loosen jam nuts
on the front inside screw and the rear outside screw. Turn the screws counterclockwise
one full turn and tighten the jam nuts. Loosen the jam nuts on the front outside screw and
the rear inside screw. Turn the screws clockwise until they touch the arm, back off 1/4”
turn, and tighten the jam nuts.
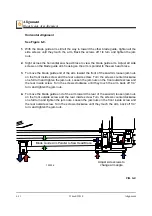
4.
To move the blade guide end of the arm toward the rear of the sawmill, loosen jam nuts
on the front outside screw and the rear inside screw. Turn the screws counterclockwise
one full turn and tighten the jam nuts. Loosen the jam nuts on the front inside screw and
the rear outside screw. Turn the screws clockwise until they touch the arm, back off 1/4”
turn, and tighten the jam nuts.
FIG. 6-9
Blade Guide Arm Parallel to Saw Head Brace
Adjust side screws to
change arm angle
150036


