


13
3061344_201509
Assembly
- Mark the holes to be drilled
∅
12 for the mounting bracket
bearing minimum clearances in mind.
- Insert the rawl plugs and secure the mounting bracket with
the screws provided.
- Hang the boiler with the mounting brace into the mounting
bracket.
Mounting brace
Fig.: Mounting brace on the boiler
An installation template is provided with the boiler to mark out
the fixing holes and connections.
Align the template vertically and mark out the fixing holes.
Maintain the minimum clearances towards walls and ceilings
required for maintenance.
Fig.: Fixing holes for mounting bracket
min. 562mm
Ceiling
Initially, determine the location for the installation of the gas
fired boiler.
In your deliberations, consider the flue gas outlet, the lateral
clearances towards walls and ceilings and any existing con-
nections for gas, central heating, DHW and electrics.
Mounting the boiler with a mounting bracket
During the boiler installation ensure that the fixing
components are sufficiently strong to carry its weight.
Also consider the wall consistency, otherwise gas
or water may escape which would result in a risk of
explosions and flooding.
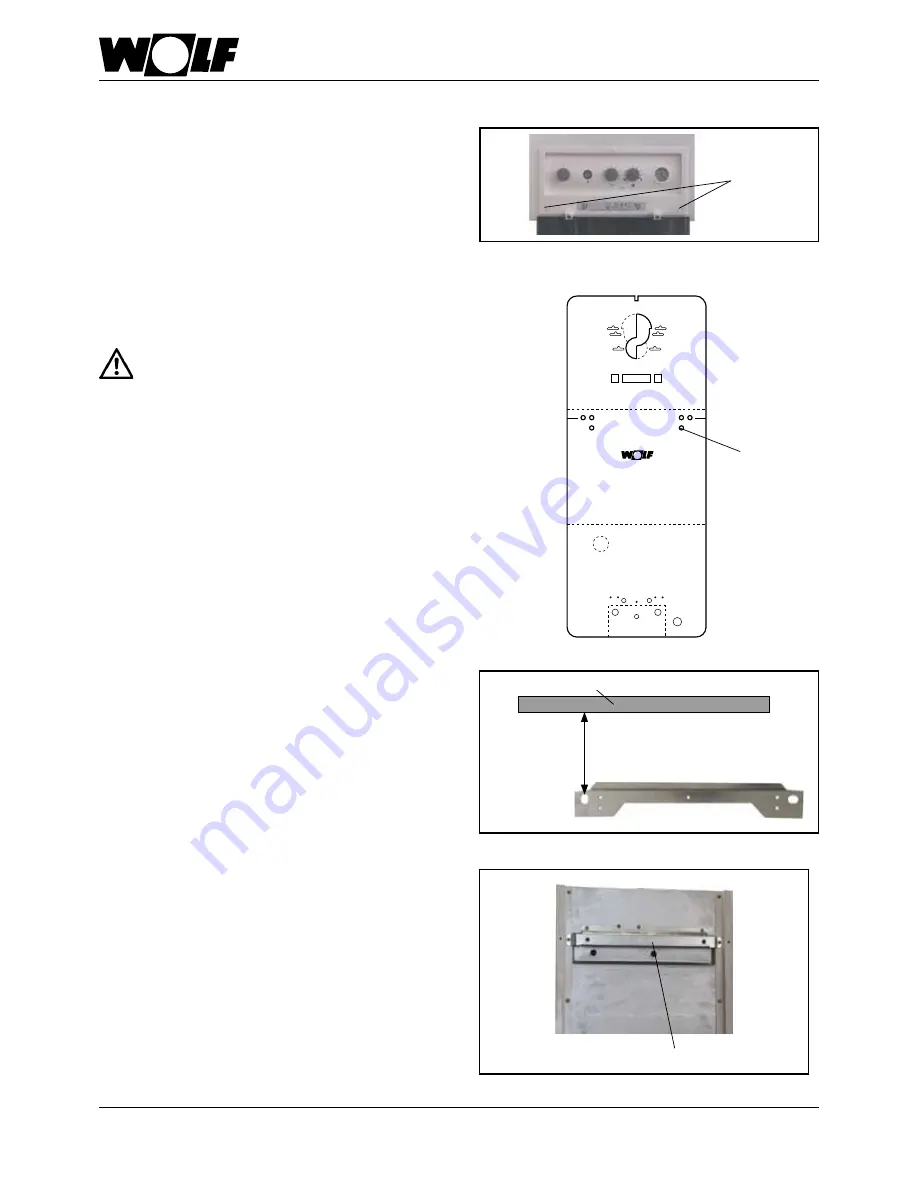
Opening the casing lid
We recommend you remove the casing lid during installation.
Pivot the control unit lid down.
Unlock the casing lid with the l.h. and r.h. rotating bolts.
Release the lower part of the casing lid and unhook at the
top.
Fig.: Installation template
Fixing holes
for mounting
bracket
∅
12
...GU-...
...GG-...
...GB/...CG-...
Fig.: Open the rotating locks
rotating lock


