background image

Page 24

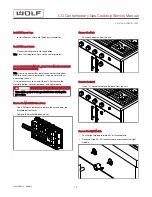
Remove All Burner Caps

Remove all burner caps from the burner assemblies.

Remove All Knobs

Pull all of the knobs away from the unit.

Remove All Bezels

To remove each bezel:

Use a 

3

/

4

" socket to remove the bezel from the unit.

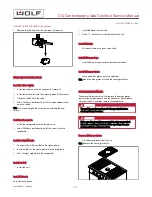
Remove the Light Module

1

Pull the light module forward out of the receptacle.

2

Disconnect the AC-DC rectifier wire connector from the light
module.

Uninstall the Unit

Remove the unit from the installation.

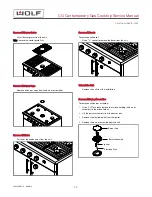
Remove the Receptacle

1

Use a Phillips screwdriver to remove the screws from the
receptacle.

2

Remove the receptacle from the burner valve.

TIP: The spacer(s) typically remain attached to the receptacle.

Remove the Burner Valve

1

Remove the black wire from the normally-open (NO)
terminal.

2

Remove the red wire from the common (C) terminal.

3

Use a 

5

/

16

” combination wrench to remove the simmer

burner tube.

CG Contemporary Gas Cooktop Service Manual


service.subzero.com

828389 REV. A     06/2018

23


Summary of Contents for CG365P/S

Page 1: ...General Information 2 Component Access Removal 4 Troubleshooting Guide 31 Technical Data 34 Wiring Diagrams 35 subzero com 800 222 7820 CG Contemporary Gas Cooktop Service Manual ...

Page 2: ... nor any information or images contained herein may be copied or used in whole or in part without the express written consent of Wolf Appliance Inc Wolf Appliance Inc all rights reserved WOLF PRODUCT RATING PLATE INFORMATION For CG Gas Cooktops the product rating plate is located below the unit Product Rating Plate Important information for each product is listed on the product rating plate Rating...

Page 3: ...laimsAndOrderProcessing Pages WarrantyInfo Warranties start on the day of product installation Search for warranty and service information by serial number customer last name and address using Unit History at http service subzero com Tools UnitHistory CG Contemporary Gas Cooktop Service Manual General Information service subzero com 828389 REV A 06 2018 2 ...

Page 4: ...dule to the igniter bracket 3 Connect the white wire connector to the neutral N terminal 4 Connect the red wire connector to the L1 terminal 5 Connect the electrode wire to the spark module 6 Raise the screw side of the igniter bracket 7 Use a 1 4 nut driver or socket to install the screw holding the igniter bracket to the burner box BURNER BOX BOTTOM PANEL REMOVAL The burner box bottom panel is r...

Page 5: ...rews holding the spark module to the igniter bracket 3 Connect the white wire connector to the neutral N terminal 4 Connect the red wire connector to the L1 terminal 5 Connect the electrode wire to the spark module 6 Raise the screw side of the igniter bracket 7 Use a 1 4 nut driver or socket to install the screw holding the igniter bracket to the burner box MANIFOLD BOTTOM COVER REMOVAL The manif...

Page 6: ...ner Grate Lift the burner grate from the unit BURNER GRATE INSTALLATION Install the Burner Grate Place the burner grate onto the cooktop BURNER CAP REMOVAL To remove the burner cap first remove the burner grate Remove the Burner Grate Lift the burner grate from the unit Remove the Burner Cap Remove the burner cap from the burner assembly CG Contemporary Gas Cooktop Service Manual REMOVE THE MANIFO...

Page 7: ...the knob onto the valve shaft BEZEL REMOVAL To remove the bezel first remove the knob Remove the Knob Pull the knob away from the unit Remove the Bezel Use a 3 4 socket to remove the bezel from the unit BEZEL INSTALLATION Install the Bezel 1 Insert the bezel into the unit 2 Use a 3 4 socket to install the bezel on the unit Install the Knob Push the knob onto the valve shaft CG Contemporary Gas Coo...

Page 8: ...he AC DC rectifier to the light module 2 Insert the tabs of the light module into the receptacle 3 Push the light module into the receptacle Install the Bezel 1 Insert the bezel into the unit 2 Use a 3 4 socket to install the bezel on the unit Install the Knob Push the knob onto the valve shaft BURNER ASSEMBLY REMOVAL To remove a burner assembly first remove the burner grate and burner cap CAUTION...

Page 9: ...mbly Igniter Electrode Wire BURNER ASSEMBLY INSTALLATION Install the Burner Assembly 1 Attach the electrode wire to the igniter 2 Place the burner assembly into the burner pan 3 Use a T 15 Torx bit to install the screws holding the burner assembly to the orifice holder torqued to 24 in lb Install the Burner Cap Place the burner cap onto the burner assembly Install the Burner Grate Place the burner...

Page 10: ...e Igniter 1 Use a Phillips screwdriver to remove the screw from the underside of the burner assembly 2 Remove the igniter from the burner assembly IGNITER INSTALLATION Install the Igniter 1 Install the igniter into the burner assembly 2 Use a Phillips screwdriver to install the screw into the underside of the burner assembly Install the Burner Assembly 1 Attach the electrode wire to the igniter 2 ...

Page 11: ...e power to the product before starting this procedure Remove the Burner Grate Lift the burner grate from the unit Remove the Burner Cap Remove the burner cap from the burner assembly Remove the Burner Assembly 1 Use a T 15 Torx bit to remove the screws holding the burner assembly to the orifice holder 2 Lift the burner assembly from the burner pan 3 Remove the electrode wire from the igniter 4 Rem...

Page 12: ...stall the Burner Grate Place the burner grate onto the cooktop BURNER PAN REMOVAL The burner pan is held to the burner box by the screws that mount the burner assemblies to the orifice holder assemblies To remove the burner pan first remove all burner grates burner caps knobs and bezels Uninstall the unit and then remove the burner assemblies WARNING Turn off the power and gas to the product befor...

Page 13: ...rner assembly 1 Use a T 15 Torx bit to remove the screws holding the burner assembly to the orifice holder 2 Lift the burner assembly from the burner pan 3 Remove the electrode wire from the igniter 4 Remove the burner assembly from the unit Burner Cap Burner Assembly Igniter Electrode Wire Remove the Burner Pan Lift the burner pan from the burner box BURNER PAN INSTALLATION Install the Burner Pan...

Page 14: ... all burner grates onto the cooktop TIP Place the side grates first and the center grate last RECEPTACLE REMOVAL To remove the receptacle first remove the grates burner caps knobs and bezels Then remove the unit from the installation and remove the light modules WARNING Turn off the power to the product before starting this procedure CAUTION If the gas line is not long enough to stay connected whe...

Page 15: ...ttached to the receptacle RECEPTACLE INSTALLATION Install the Receptacle 1 Install the receptacle onto the burner valve 2 Use a Phillips screwdriver to install the screws into the receptacle Install the Unit Install the unit Install the Light Module 1 Connect the AC DC rectifier to the light module 2 Insert the tabs of the light module into the receptacle 3 Push the light module into the receptacl...

Page 16: ...off the power to the product before starting this procedure CAUTION If the gas line is not long enough to stay connected when the unit is pulled out of the opening the gas may need to be disconnected Remove All Burner Grates Lift all burner grates from the unit TIP Remove the center grate first Remove All Burner Caps Remove all burner caps from the burner assemblies Remove All Knobs Pull all of th...

Page 17: ...h to remove the main gas line 3 Use a Phillips screwdriver to remove the screws holding the orifice holder to the sealed burner bracket Gas Line Orifice Holder Screw Sealed Burner Bracket ORIFICE HOLDER INSTALLATION Install the Orifice Holder 1 Use a Phillips screwdriver to install the two screws holding the orifice holder to the sealed burner bracket 2 Use a 1 2 combination wrench to connect the ...

Page 18: ...vable It may be simpler than uninstalling the unit If it is necessary to uninstall the unit first remove the burner grates burner caps knobs bezels and the necessary light module Then uninstall the unit WARNING Turn off the power to the product before starting this procedure CAUTION If the gas line is not long enough to stay connected when the unit is pulled out of the opening the gas may need to ...

Page 19: ...CTIFIER INSTALLATION Install the AC DC Rectifier 1 Place the AC DC rectifier in the unit 2 Use wire ties to secure the AC DC rectifier to the manifold 3 Connect the AC DC rectifier to the unit harness Install the Unit Install the unit Install the Light Module 1 Connect the AC DC rectifier to the light module 2 Insert the tabs of the light module into the receptacle 3 Push the light module into the...

Page 20: ...the unit first remove the manifold bottom cover knob bezel and light module WARNING Turn off the power to the product before starting this procedure Remove the Manifold Bottom Cover 1 Use a Phillips screwdriver to remove the screws from the manifold bottom cover 2 Remove the manifold bottom cover Remove the Knob Pull the knob away from the unit Remove the Bezel Use a 3 4 socket to remove the bezel...

Page 21: ...he unit 2 Use a 3 4 socket to install the bezel on the unit Install the Knob Push the knob onto the valve shaft Install the Manifold Bottom Cover 1 Place the manifold bottom cover on the unit 2 Use a Phillips screwdriver to install the screws into the manifold bottom cover VALVE SWITCH REMOVAL To remove the valve switch first remove the burner grates burner caps knobs bezels and the necessary ligh...

Page 22: ... the light module Uninstall the Unit Remove the unit from the installation Remove the Receptacle 1 Use a Phillips screwdriver to remove the screws from the receptacle 2 Remove the receptacle from the burner valve TIP The spacer s typically remain attached to the receptacle Remove the Valve Switch 1 Use a Phillips screwdriver to remove the color coded screw from the switch 2 Lift the switch from th...

Page 23: ...ch bezel 1 Insert the bezel into the unit 2 Use a 3 4 socket to install the bezel on the unit Install All Knobs Push each knob onto each valve shaft Install All Burner Caps Install all burner caps onto the burner assemblies Install All Burner Grates Place all burner grates onto the cooktop TIP Place the side grates first and the center grate last BURNER VALVE REMOVAL To remove the burner valve fir...

Page 24: ...he light module Uninstall the Unit Remove the unit from the installation Remove the Receptacle 1 Use a Phillips screwdriver to remove the screws from the receptacle 2 Remove the receptacle from the burner valve TIP The spacer s typically remain attached to the receptacle Remove the Burner Valve 1 Remove the black wire from the normally open NO terminal 2 Remove the red wire from the common C termi...

Page 25: ...er to the light module 2 Insert the tabs of the light module into the receptacle 3 Push the light module into the receptacle Install the Unit Install the unit Install All Bezels To install each bezel 1 Insert the bezel into the unit 2 Use a 3 4 socket to install the bezel on the unit Install All Knobs Push each knob onto each valve shaft Install All Burner Caps Install all burner caps onto the bur...

Page 26: ...ezel from the unit Uninstall the Unit Remove the unit from the installation Remove All Burner Assemblies To remove each burner assembly 1 Use a T 15 Torx bit to remove the screws holding the burner assembly to the orifice holder 2 Lift the burner assembly from the burner pan 3 Remove the electrode wire from the igniter 4 Remove the burner assembly from the unit Burner Cap Burner Assembly Igniter E...

Page 27: ...racket 4 Use a 5 8 combination wrench to install the regulator outlet line onto the brass fitting 5 Connect the external gas supply line to the 1 2 NPT nipple on the inlet of the regulator WARNING Only pipe thread compound should be used Do not use Teflon tape to seal gas connections Install the Burner Pan Place the burner pan on the burner box Install All Burner Assemblies To install each burner ...

Page 28: ...ninstall the unit WARNING Turn off the power to the product before starting this procedure CAUTION If the gas line is not long enough to stay connected when the unit is pulled out of the opening the gas may need to be disconnected Remove All Burner Grates Lift all burner grates from the unit TIP Remove the center grate first Remove All Burner Caps Remove all burner caps from the burner assemblies ...

Page 29: ...e switch according to the wiring diagram Install the Unit Install the unit Install All Bezels To install each bezel 1 Insert the bezel into the unit 2 Use a 3 4 socket to install the bezel on the unit Install All Knobs Push each knob onto each valve shaft Install All Burner Caps Install all burner caps onto the burner assemblies Install All Burner Grates Place all burner grates onto the cooktop TI...

Page 30: ...rom the unit ELECTRODE WIRE INSTALLATION Install the Electrode Wire 1 Feed the electrode wire from the burner assembly opening down to the spark module 2 Anchor the electrode wire to the burner assembly 3 Connect the electrode wire to the spark module 4 Raise the igniter bracket into the burner box 5 Use a Phillips screwdriver to install the screw through the igniter bracket in the base of the uni...

Page 31: ...r splice in electrode wire Replace the electrode wire Bad wire connection at spark module Repair the wire connection Defective spark module Replace the spark module Incorrect gas pressure Check the gas pressure and adjust it if necessary Poor ignition at surface burner s Igniter not positioned properly single burner Reposition the igniter The igniter should be seated in the burner pan Partially pl...

Page 32: ...Specifications The supply pressure to the inlet of the unit regulator must be between a minimum of 11 wc and a maximum of 14 wc The outlet of the regulator must be 10 5 wc 0 0 wc The maximum pressure drop from maximum flow to low flow must be less than 5 wc Connecting to the Unit Manifold To check pressure on a CG unit 1 Uninstall the unit 2 Remove the burner pan 3 Once the burner pan is removed r...

Page 33: ...re the following items are to specification If a flex line is installed it must be at least 1 2 internal diameter ID and no longer than 3 feet long Many times the line is 1 2 OD Shut off valve should be 3 4 Most of the 1 2 shut off ball valves are 3 8 through the ball Ensure the supply pressure stays at or above the minimum supply pressure at full load Full load is when all gas appliances in the h...

Page 34: ...54 54 mm Burner valve 9 2K LP 828132 Simmer 816538 33 33 mm Main 816823 34 34 mm Orifice holder 20K Nat 826443 Simmer 817193 79 79 mm Main 824936 205 2 05 mm Orifice holder 20K LP 826444 Simmer 817192 47 79 mm Main 824937 132 2 05 mm Orifice holder 18K Nat 823061 Simmer 817193 79 79 mm Main 824936 205 2 05 mm Orifice holder 18K LP 823074 Simmer 817192 47 47 mm Main 824937 132 1 35 mm Orifice holde...

Page 35: ...826929 826946 CG Contemporary Gas Cooktop Service Manual Wiring Diagrams WIRING DIAGRAMS 36 Contemporary Gas Cooktop CG365C service subzero com 828389 REV A 06 2018 34 ...

Reviews: