Page 23
4
Remove the red wire from the common (C) terminal.
VALVE SWITCH INSTALLATION
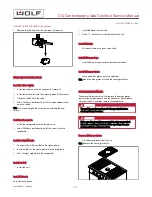
Install the Valve Switch
1
Install the red wire onto the common (C) terminal.
2
Install the black wire onto the normally-open (NO) terminal.
3
Place the switch onto the valve.
4
Use a Phillips screwdriver to install the color-coded screw
onto the switch.
TIP: Do not over-torque the screw when installing the new
switch.
Install the Receptacle
1
Install the receptacle onto the burner valve.
2
Use a Phillips screwdriver to install the screws into the
receptacle.
Install the Light Module
1
Connect the AC-DC rectifier to the light module.
2
Insert the tabs of the light module into the receptacle.
3
Push the light module into the receptacle.
Install the Unit
Install the unit.
Install All Bezels
To install each bezel:
1
Insert the bezel into the unit.
2
Use a
3
/
4
" socket to install the bezel on the unit.
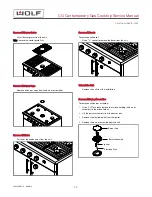
Install All Knobs
Push each knob onto each valve shaft.
Install All Burner Caps
Install all burner caps onto the burner assemblies.
Install All Burner Grates
Place all burner grates onto the cooktop.
TIP: Place the side grates first and the center grate last.
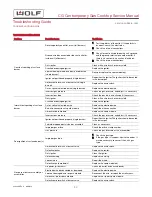
BURNER VALVE REMOVAL
To remove the burner valve, first remove the burner grates,
burner caps, knobs, bezels, and the necessary light module.
Uninstall the unit, and then remove the receptacle.
WARNING
Turn off the power and gas to the product before
starting this procedure.
CAUTION
If the gas line is not long enough to stay connected
when the unit is pulled out of the opening, the gas
may need to be disconnected.
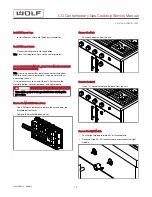
Remove All Burner Grates
Lift all burner grates from the unit.
TIP: Remove the center grate first.
CG Contemporary Gas Cooktop Service Manual
REMOVE THE VALVE SWITCH (continued)
service.subzero.com
828389 REV. A 06/2018
22


