15
OPM-160/A
CAUTION
Never run the AC and DC wiring on the same conduit.
NOTE: There are various DC connectors on the engine
that have nothing connected to them. This was done
intentionally, the connectors are for END OF THE LINE
TESTING and other diagnostic tests. They are not used
during normal operations and can just be ignored.
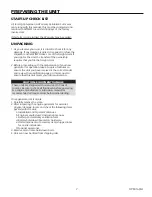
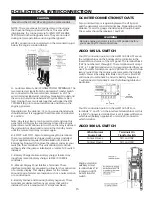
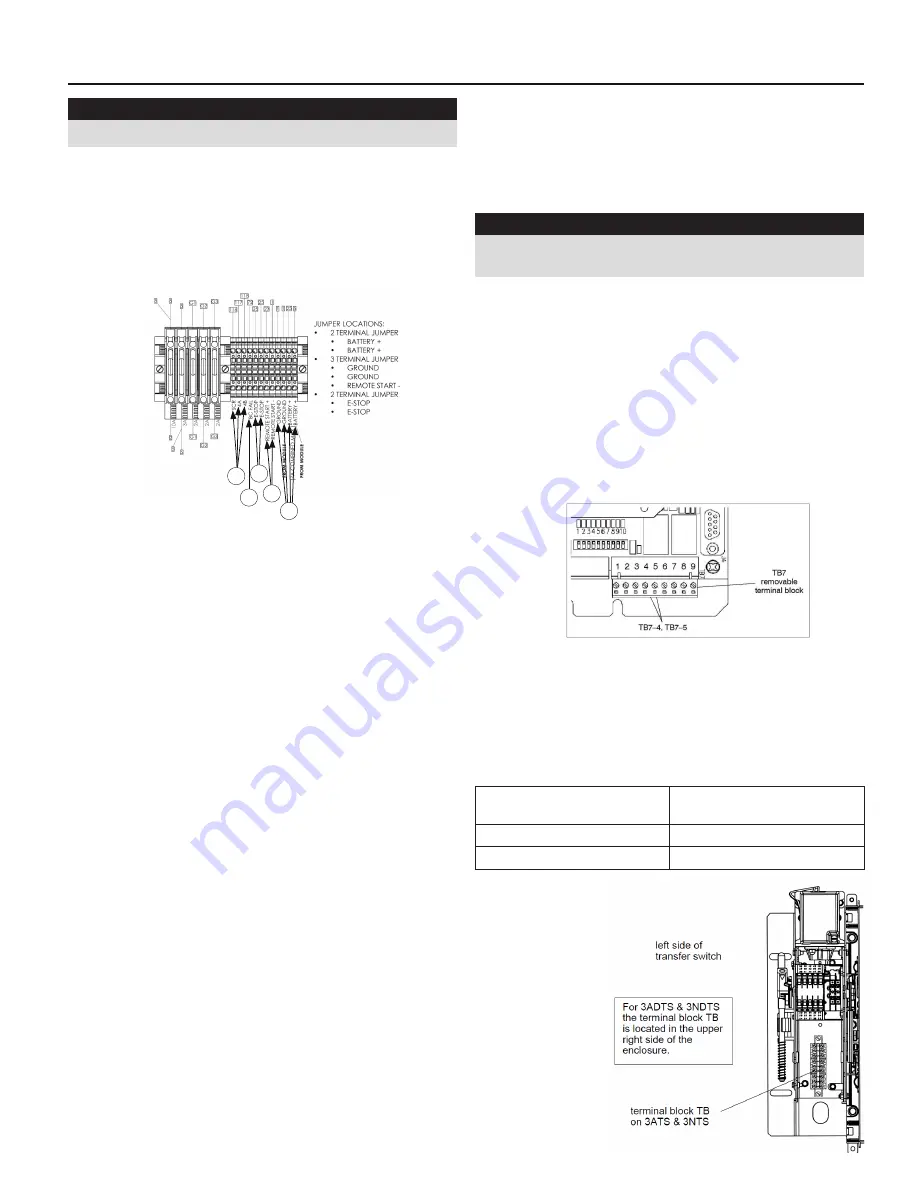
All DC connections are completed on the terminal strip just
below the engine control cabinet.
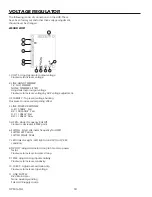
A - Customer Remote Start CONNECTIONS TERMINALS. The
two remote start leads from the Automatic Transfer Switch
are connected to the two terminals marked 1 & 23. The
wire in terminal labeled #1 is Battery Negative/Ground and
the wire in the terminal labeled #23 is your Remote Start
lead. Closing these two leads together will signal the DSE
7310 MKII to go into an autostart mode and start up the
engine generator.
Depending on the distance, 14 to 16 gauge stranded wire
should be used. It is suggested that these wires be labeled
S1 and S23.
Note: Any relay closure can be used to start and stop this
generator. As long as the contact stays closed the engine
generator set will continue to run. Once the relay is opened
the unit will shut down and remain in the standby mode
until the remote start relay is closed again.
B - ESTOP- & ESTOP+. Remote Emergency Stop terminals.
These two terminals are shipped with a jumper installed.
If your application requires the installation of a Remote
Emergency Stop switch, remove the jumper and wire your
switch to these terminals. This unit will not start and run
without either the jumper installed or a remote N/C switch
installed..
C - Battery Charger Failure. Battery charger failure relay
input from remote battery charger to DSE7310 MKII
controller.
D - Remote Display Panel Interface Terminals. These
interface terminals are pre-wired to allow for the connection
of a remote display. This display allows for the remote
annunciation of alarms at a location such as a nurses station
or a control room.
E - Battery Positive and Ground ( battery negative). These
terminals are dedicated for any accessory that will be
installed. There is a maximum of 7 Amps combined.
DC ELECTRICAL INTERCONNECTION
D
C
B
A
E
DC INTERCONNECTIONS TO ATS
Two control wires are required between the ATS panel
and the generator control terminal box. Depending on the
distance, 14 and 16 gauge stranded wire should be used.
These wires should be labeled S1 and S23.
WARNING
Be sure engine generator is in the OFF position before
you make any DC interconnections.
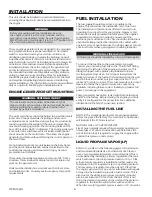
ASCO 185 UL SWITCH
Your DC connection points in the ASCO 185 UL ATS are on
the terminal block on the bottom of the controller in the
lower left hand corner of the ATS panel. The terminal block
(TB7) is numbered 1 through 9. These terminals will accept
# 22 - # 14 AWG stranded wire. It is recommended that you
use # 16 AWG for distances up to 200 feet. You need to run
two (2) wires from the engine generator set to the transfer
switch. You will be using terminals 4 and 5, wire Start # 23
will connect to terminal # 5 and wire Battery Negative #
1 will connect to terminal # 4. See the following table and
illustration.
Your DC connection points in the ASCO 185 ATS are
terminals “4” and “5” on the interface terminal block. As this
is a “DRY” unpowered contract set it set, it makes difference
which lead (battery negative #1 or start #23) connect to
which terminal.
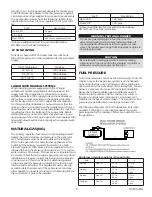
ASCO 300 UL SWITCH
When Normal
Source Fails
Terminals On
Transfer Switch
Contact Closes
TB1 and TB2
Contact Opens
TB1 and TB3
Engine start and
auxiliary circuit
terminal block TB
located on 3ATS
&3NTS transfer
switch.


