16
OPM-160/A
STARTING PROCEDURE
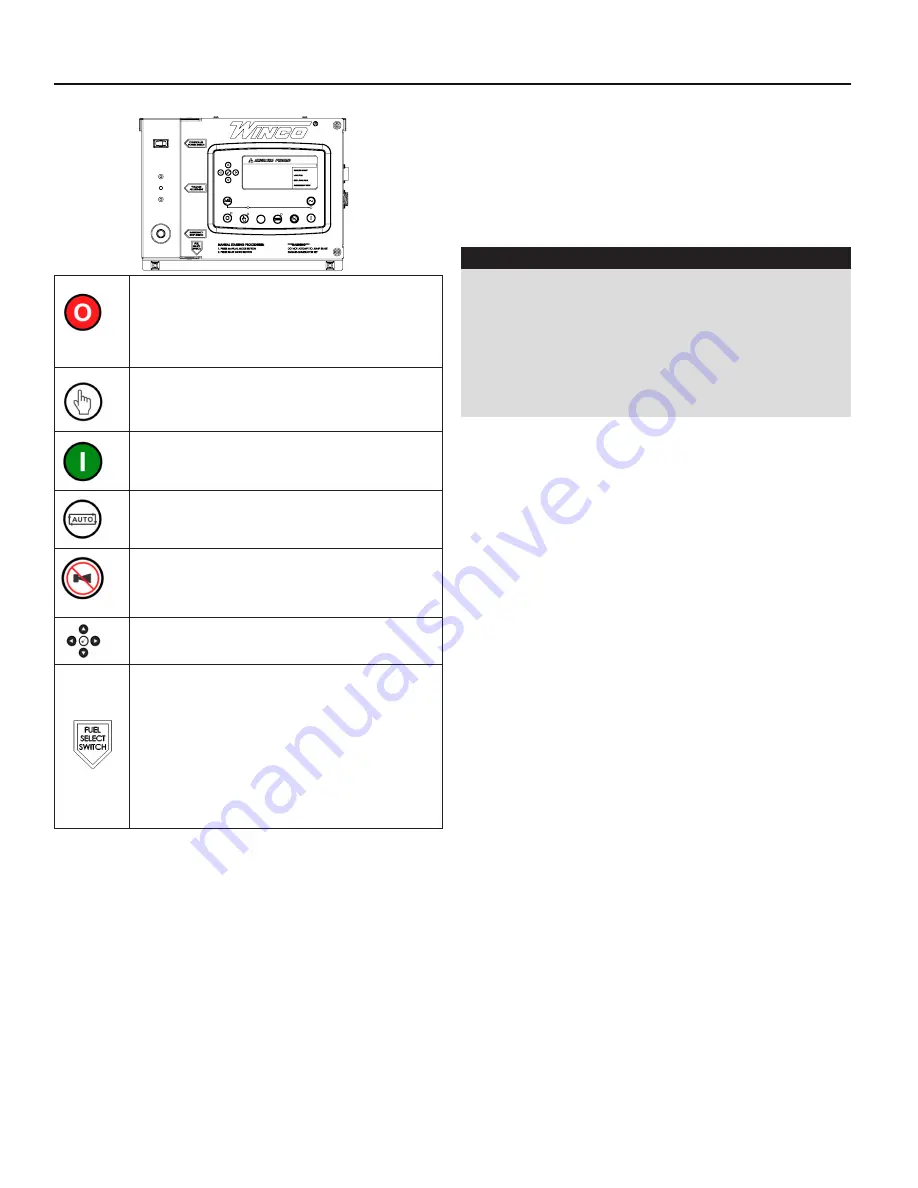
CONTROL LAYOUT
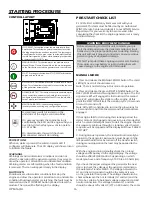
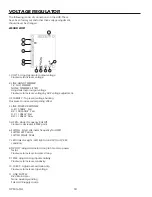
STOP/RESET - This button places the module into its Stop/
Reset mode. This will clear any alarm conditions for which
the triggering criteria have been removed. The fuel supply
de-energizes and the engine comes to a standstill. Should a
remote start signal be present while operating in this mode,
a remote start WILL NOT occur.
MANUAL MODE - This button places the module into its
Manual Mode. Once in Manual Mode, the model responds
to the Start button to start the generator and run it off load.
START - Pressing this button from STOP/RESET will start the
engine and run the load.
AUTO MODE - This button places the module into its Auto
Mode. This mode allows the module to control the function
of the generator automatically.
ALARM/LAMP TEST - This button silences the audible alarm
in the controller, deactivates the Audible Alarm output (if
configured) and illuminates all of the LEDs on the module’s
face as a lamp test function.
MENU NAVIGATION - Used for navigating the
instrumentation, event log, and configuration screens.
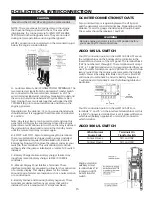
A small rocker switch is located on the
underside of the engine control cabinet.
On gaseous models, the engine timing is
controlled by the ECU on the engine and you
need to tell it what fuel you want to operate
on; LP or NG.
On diesel models, this switch has been
disconnected and will do nothing.
PROTECTIONS
When an alarm is present, the common alarm LED if
configures will illuminate. The LCD display will show an icon
to indicate the failure.
WARNINGS
Warnings are non-critical alarm conditions and do not
affect the operation of the generator system, they serve to
draw the operator’s attention to an undesirable condition.
Warning alarms are self-resetting when the fault condition
is removed. The icon will appear steady in the display.
SHUTDOWN
Shutdowns are critical alarm conditions that stop the
engine and draw the operator’s attention to an undesirable
condition. Shutdown alarms are latching. The fault must be
removed and the STOP/RESET button pressed to reset the
module. The icon will be flashing in the display.
PRE-START CHECK LIST
F-153 Pre-Start & Warranty Form was sent with your
generator. This form must be filled out by an Authorized
WINCO Service Center and submit it to our WINCO Service
Department for your warranty to become valid. After
completing the checklist, the engine-generator set is ready
for initial start-up.
WARNING: EQUIPMENT DAMAGE:
Before attempting to start this unit, complete your pre-
start checklist and ensure the generator mainline circuit
breaker is in the proper position prior to starting. Starting
this unit without it properly connected can cause serious
personal injury or equipment damage.
DO NOT jump start these engine-generator sets. Starting
these units on a low battery or jump starting them will
cause damage to the engine control module.
MANUAL MODE
1. Press and release the MANUAL MODE button. The small
LED light next to it should come on.
Note: There is no start delay in this mode of operation.
2. Press and release the green START ENGINE button. The
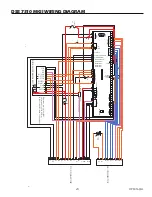
DSE 7310 MKII will send two signals to the engine. The first
signal wire #21 will engage the fuel solenoid, the second
wire, #22, will engage the starter on the engine. At this
point the DSE7310 will start the cranking cycle (10 seconds
on and 10 seconds off).
Note: Wire #93 is energized to turn on the glow plugs for
15 seconds first and then the starter and fuel solenoid are
engaged.
If the engine fails to start during this cranking period, the
starter motor is disengaged and goes into a rest mode after
which a second attempt is made to start the engine. Should
this sequence continue through 3 cranking cycles the start
sequence will be stopped and the display will show ‘FAILED
TO START”.
3. During manual operation, the load will not normally be
applied to the generator. But caution must be used, if the
line power should fail or be turned off the transfer switch
during manual operation the load may be applied to the
generator.
With the engine running smoothly check the no load
voltage and frequency on the digital display. The voltage
should be 208/240/480/600 AC depending on which
model you have and a frequency of 59.5 to 60.5 hertz (Hz).
If you have the proper voltage at the generator the next
step is to check the voltage at the generator terminals in
the Automatic Transfer Switch. The voltage between the
G1 and the G3 terminals should be the same as it was
on the generator front panel. The voltage should also be
checked between the hot terminals (G1 and G3) and the
G-N to be certain of a balanced voltage output and a solid
neutral connection. The voltage between G1 and G-N
should be about 120 volts AC (277 on 480 units). The same

