© Wikora GmbH
Page 5
Status: 27.04.2015
Errors excepted.
3 Installation
3.1 In general
Prior to installation:
•
Check the content of the delivery with the delivery note!
•
Read the installation instructions carefully and pay attention to the different steps!
•
Respect the safety instructions!
This mounting material is structurally approved for assembly with collectors 2010 / 2510 up to a maximum building
height of eight metres. If the collectors are installed on roofs with high wind or snow loads (> 1.0 kN/m²), the load must
be distributed across additional mounts (see chart 2).
3.1.1 Snow/wind load
For structural analysis purposes, we recommend calculations according to DIN 1055. Calculations of the pressure
coefficients (wind) and shape coefficients (snow) are carried out with reference to DIN 1055 -100, DIN 1055-4 and DIN
1055-5. Determine the values of local snow loads according to country-specific data.
Determine the values of local wind loads according to country-specific data. The loads that exist locally (in kN/m²)
must be determined according to the nationally applicable norms. In the case of intermediate values, no interpolation
should be done; instead, the next higher value should be selected.
The values for weighting down the flat roof mounting systems to cope with the wind load can be found on page 8
(chart 8).
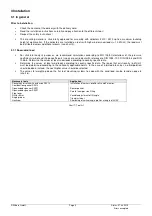
Necessary tools
Application
Socket key or ratch with extension SW 13
Combination spanner SW 13
Open-ended spanner SW 21
Open-ended spanner SW 27
Pipe tongs
Drill d=9mm
Angle grinder
Hacksaw
Installation of carriers, profile rails and Z-clamps
Sensor pocket
Parallel compression fitting
Variable adjustment of tilt angle
Tile adjustment
Shortening of vertical angle profiles at angle of 30/45°
Chart 7: Tool list


