background image

2

REMOVE OLD THERMOSTAT

1.  Shut off electricity at the main fuse box until installation is 

complete. Ensure that electrical power is disconnected.

2.  Remove the front cover of the old thermostat. 

With wires 

still attached, 

remove wall plate from the wall. If the 

old thermostat has a wall mounting plate, remove the 
thermostat and the wall mounting plate as an assembly.

3. 

Identify each wire attached to the old thermostat using 
the labels enclosed with the new thermostat.

4.  Disconnect the wires from old thermostat one at a time. 

DO 

NOT LET WIRES FALL BACK INTO THE WALL.

5.  Install new thermostat using the following procedures. 

ATTENTION!

This product does not contain mercury. However, this product 
may replace a unit which contains mercury.

Do not open mercury cells. If a cell becomes damaged, do 
not touch any spilled mercury. Wearing nonabsorbent gloves, 
take up the spilled mercury and place into a container which 
can be sealed. If a cell becomes damaged, the unit should be 
discarded.

Mercury must not be discarded in household trash. When the 
unit this product is replacing is to be discarded, place in a 
suitable container. Refer to www.white-rodgers.com for location 
to send the product containing mercury.   

ATTACH THERMOSTAT  BASE TO WALL

1.  Remove the packing material from the thermostat. Gently 

pull the cover straight off the base. Forcing or prying on the 
thermostat will cause damage to the unit.

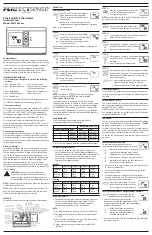
2.  Place base over hole in wall and mark mounting hole 

locations on wall using base as a template (see Fig.1).

3.  Move base out of the way. Drill mounting holes.
4.  Push wires through opening in thermostat base.
5.  Fasten base loosely to wall using two mounting screws. 

Place a level against bottom of base, adjust until level, 
and then tighten screws. (Leveling is for appearance only 
and will not affect thermostat operation.) If you are using 
existing mounting holes, or if holes drilled are too large and 
do not allow you to tighten base snugly, use plastic screw 
anchors to secure subbase.

6.  Connect wires to terminals on base using appropriate 

wiring schematic (see fi gs. 2 through 4).

7.  Push excess wire into wall and plug hole with a fi re-resistant 

material (such as fi berglass insulation) to prevent drafts 
from affecting thermostat operation.

O/B TERMINAL SWITCH SELECTION

The O/B switch on this thermostat is factory set to the “O” 
position. This will accommodate the majority of heat pump 
applications, which require the changeover relay to be 
energized in COOL. If the thermostat you are replacing or the 
heat pump being installed with this thermostat requires a “B” 
terminal, to energize the changeover relay in HEAT, the O/B 
switch must be moved to the “B” position.

HP-SS SWITCH AND FAN SWITCH

HP-SS Switch

 - If your system is a heat pump, the HP-SS 

Switch must be set to HP (see Fig. 1). If your system is a single 
stage, the switch must be set to SS. 

INSTALLATION 

Figure 1. Thermostat Base

Fan Switch


- For Electric Heat, heat pump or any system that 

requires the thermostat to turn on the blower on a call for heat 
- place the FAN switch (Fig. 1) in the 

ON

 position. For Gas 

Furnaces or Emergency Heat systems that have a fan control 
to turn on the blower (independent of the thermostat) place 
switch in the 

OFF

 position.

BATTERY LOCATION

Two “AA” alkaline batteries are installed in your thermostat 
with a battery tag to prevent power drainage. Prior to use, 
open the battery door and remove the battery tag. To open, 
pull the battery door as shown by the arrow and lift open. The 
two “AA” batteries will operate all functions or maintain time 
and continuously display the temperature during a loss of AC 
power. Installed batteries will also allow programming prior to 
installation. To replace batteries, pull the battery door shown 
by the arrow and lift open. Using the polarity indicated inside 
the battery door, insert the batteries. To close the battery door, 
swing the door down while pulling in the direction of arrow. 
Once fully down, snap the door back into position.

Thermostat can be powered by system AC power or Battery. If 

 is displayed, the thermostat is battery powered. If 

 is not 

displayed, thermostat is system powered with optional battery 
back-up. When battery power remaining is approximately half, 
the 

 will be displayed. When 

“Change


 is displayed, 

install fresh “AA” alkaline batteries immediately. For best 
results, use new premium brand alkaline batteries such as 
Duracell® or Energizer®. We recommend replacing batteries 
every 2 years. If the home is going to be unoccupied for an 
extended period (over 3 months) and 

 is displayed, the 

batteries should be replaced before leaving. When less than 
two months of battery life remain, the setpoint temperature will 
offset by 10 degrees (10 degrees cooler in Heat mode / 10 
degrees warmer in Cool mode). If offset occurs, the normal 
setpoint can be manually reset with 

 or 

. Another offset 

will occur within two days if batteries are not replaced. To 
replace the batteries, set system to OFF. 

“AA” Alkaline Batteries

Mounting

Hole

Mounting

Hole

Opening

for wires

O/B

Switch

Battery

Door

Fan

Switch

HP-SS

Switch

Summary of Contents for BLUE 1F89-0211

Page 1: ...prevent electrical shock and or equipment damage disconnect electric power to system at main fuse or circuit breaker box until installation is complete CAUTION Do not use on circuits exceeding specified voltage Higher voltage will damage control and could cause shock or fire hazard Thermostat installation and all components of the system shall conform to Class II current limited circuits per the N...

Page 2: ...the changeover relay to be energized in COOL If the thermostat you are replacing or the heat pump being installed with this thermostat requires a B terminal to energize the changeover relay in HEAT the O B switch must be moved to the B position HP SS SWITCH AND FAN SWITCH HP SS Switch If your system is a heat pump the HP SS Switch must be set to HP see Fig 1 If your system is a single stage the sw...

Page 3: ...C 24 VAC CUT AND TAPE OFF If safety circuits are in only one of the systems remove the transformer of the system with NO safety circuits NOTE L R C SYSTEM MONITOR SWITCH G W2 Figure 4 Typical wiring diagram for two transformer systems with safety circuits in BOTH systems Changeover Relay Y O B Compressor Contactor Changeover Relay is energized in COOL when O B switch is in the O position Changeove...

Page 4: ...ics to your system or personal requirements To enter the menu Set your thermostat switch to OFF Press and hold the and buttons simultaneously for approximately 5 seconds The display will change to show the first item in the configuration menu Press the or button to change the setting Press the and buttons simultaneously again to change to the next menu item Continue through all steps to accept you...

Page 5: ...tage will energize immediately With FH OFF the thermostat will determine the optimum time approximately 0 to 30 minutes to use Auxiliary Second stage heat in addition to the Heat Pump 9 Select Filter Replacement Reminder and Set Run Time Select the Change Filter reminder On or OFF If selected On press and to select the time period from 25 to 1975 hours in 25 hour increments In a typical applicatio...

Page 6: ...ng system CAUTION CHECK THERMOSTAT OPERATION If at any time during testing your system does not operate properly contact a qualified service person Turn on power to the system Fan Operation If your system does not have a G terminal connection skip to Heating System 1 Move fan switch to ON position The blower should begin to operate 2 Move fan switch to AUTO position The blower should stop immediat...

Page 7: ...tem Switch to Cool and lower setpoint below room temperature Verify thermostat and system wires are securely attached Same procedure as diagnostic for No Heat condition except set the thermostat to Cool and lower the setpoint below the room temperature There may be up to a five minute delay before the thermostat clicks in Cooling if the compressor lock out option is selected in the configuration m...

Page 8: ...built in function that computes the optimum time approximately 0 30 minutes to use Auxiliary Second Stage heat in addition to the Heat Pump heat Typical operation In moderate weather with a low temperature setting low demand the thermostat may use only the heat pump to maintain temperature In colder weather or higher temperature settings higher demand Auxiliary Heat is used occasionally to supplem...

Page 9: ...da que calcula el tiempo óptimo aproximadamente 0 a 30 minutos para usar el calor auxiliar segunda etapa además del calor generado por la bomba de calor Funcionamiento típico En tiempo moderado con un valor de temperatura bajo baja demanda el termostato puede usar sólo la bomba de calor para mantener la temperatura En tiempo más frío o con valores de temperatura más altos mayor demanda ocasionalme...

Page 10: ...ma de enfriamiento requiere servicio técnico o debe cambiarse el termostato Ajuste el interruptor System en Cool y baje la temperatura de referencia por debajo de la temperatura ambiente Verifique que los cables del termostato y del sistema estén bien conectados Siga el mismo procedimiento de diagnóstico que cuando El sistema no calienta pero coloque el termostato en Cool y coloque la tem peratura...

Page 11: ...ECAUCIÓN VERIFIQUE EL FUNCIONAMIENTO DEL TERMOSTATO Si en algún momento durante la prueba su sistema no funciona correctamente póngase en contacto con un servicio técnico calificado Encienda la alimentación del sistema Funcionamiento del ventilador Si su sistema no tiene una conexión terminal G pase directamente a la sección Sistema de calefacción 1 Mueva el interruptor FAN a la posición ON El sop...

Page 12: ...temperatura real con el botón la segunda etapa se energizará inmediatamente Con FH en OFF el termostato determinará el tiempo óptimo aproximadamente de 0 a 30 minutos para utilizar calor auxiliar o de segunda etapa además de la bomba de calor 9 Selección de aviso de cambio de filtro y ajuste de tiempo de funcionamiento Coloque Change Filter en On activado u OFF desactivado Si selecciona On presion...

Page 13: ...tivas del termostato según el sistema o sus necesidades particulares Para ingresar en el menú Ajuste el interruptor del termostato en OFF Presione y mantenga presionando los botones y al mismo tiempo durante 5 segundos aproximadamente La pantalla cambiará y mostrará la primera opción del menú de configuración Presione el botón o para cambiar el ajuste Presione el botón y al mismo tiempo otra vez p...

Page 14: ...NTA Si los circuitos de seguridad sólo se encuentran en uno de los sistemas retire el transformador del sistema SIN circuitos de seguridad NOTA L R C INTERRUPTOR MONITOR DEL SISTEMA G W2 Figura 4 Diagrama de conexiones típico para sistemas de dos transformadores con circuitos de seguridad en AMBOS sistemas Relé de conmutación Y O B Contactor del compresor El relé de conmutación está energizado en ...

Page 15: ...a de calor que está instalando con este termostato requiere una terminal B para energizar el relé de conmutación en HEAT el interruptor O B debe colocarse en la posición B INTERRUPTOR HP SS E INTERRUPTOR FAN Interruptor HP SS Si su sistema es una bomba de calor el interruptor HP SS debe colocarse en interruptor HP vea la figura 1 Si su sistema es de una sola etapa el interruptor debe colocarse en ...

Page 16: ...trica al sistema en la caja de fusibles o disyuntores principal hasta que haya finalizado la instalación No utilizar en circuitos que excedan el voltaje especificado ya que los voltajes más altos dañarán el control y pueden causar riesgos de electrocución o incendio La instalación del termostato y de todos los componentes del sistema de control debe ajustarse a las normas del código NEC para los c...

Reviews: