28
Editing Photos
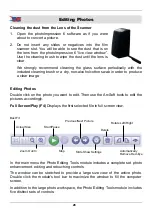
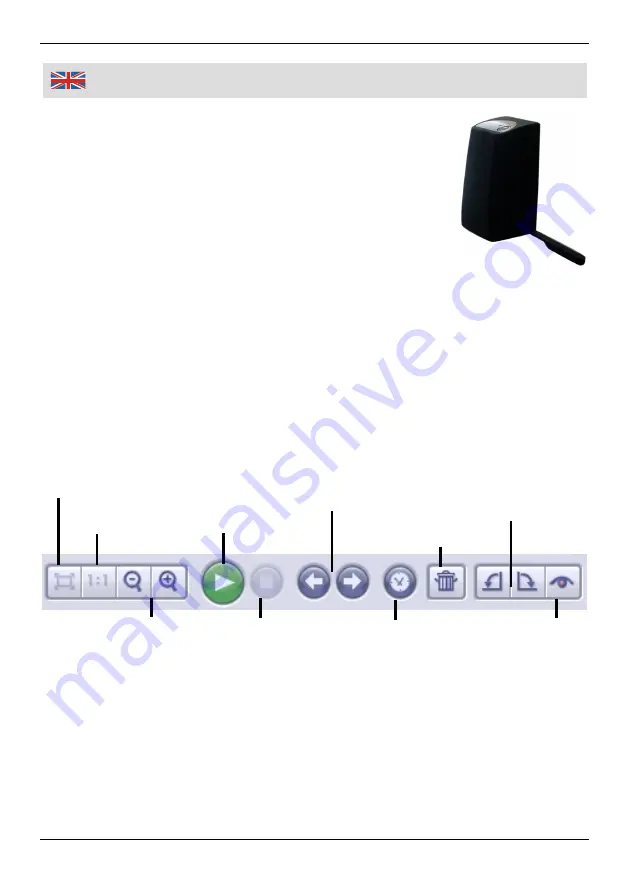
Best Fit
Actual Size
Zoom Out/In
Start/Pause
Stop
Previous/Next Picture
Slide Show Settings
Delete
Rotate Left/Right
Automatically
Remove Red-Eye
Cleaning the dust from the Lens of the Scanner
1. Open the photoImpression 6 software as if you were
about to convert a picture.
2. Do not insert any slides or negatives into the film
scanner slot. You will be able to see the dust that is on
the lens from the photoImpression 6 “live view window”.
Use the cleaning brush to wipe the dust until the lens is
clear.
We strongly recommend cleaning the glass surface periodically with the
included cleaning brush or a dry, non-alcohol cotton swab in order to produce
a clear image.
Editing Photos
Double click on the photo you want to edit. Then use the ArcSoft tools to edit the
pictures accordingly.
Full Screen/Play (F4)
Displays the first selected file in full screen view.
In the main menu the Photo Editing Tools module includes a complete set photo
enhancement, editing and retouching controls.
The window can be stretched to provide a large size view of the active photo.
Double click the module's tool bar to maximize the window to fill the computer
screen.
In addition to the large photo workspace, the Photo Editing Tools module includes
five distinct sets of controls:

