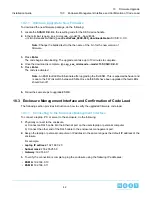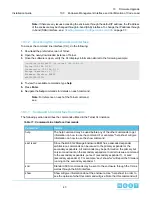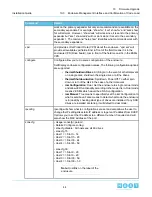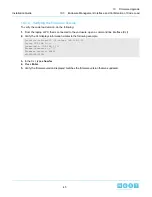
The code is activated.
Note: An ESM fault LED will illuminate after upgrading the first ESM. This is expected behavior and
is due to the FW mismatch between ESMs. Once both ESMs have been upgraded the fault LEDs
should turn off.
6. Verify the installation is correct by repeating the sg_scan again.
Note: The firmware update is downloaded to both ESMs at the same
time.
[root@testhost1 fw]# sg_scan -i | grep -i enc -B 1
/dev/sg7: scsi14 channel=0 id=118 lun=0
HGST
4U60G2_STOR_ENCL
0061
[rmb=0 cmdq=1 pqual=0 pdev=0xd]
--
/dev/sg124: scsi14 channel=0 id=177 lun=0
HGST
4U60G2_STOR_ENCL
0061
[rmb=0 cmdq=1 pqual=0 pdev=0xd]
10.2
Windows Upgrade Preparation
To upgrade firmware using a windows server, do the following:
1. Make sure that sg3_utils is installed on the system and that the MPIO software is configured and enabled
on the host to be able to handle an online upgrade.
2. Connect the 4U60 G2 Storage Enclosure to a standard SAS HBA or a RAID SAS HBA hosted on the
Windows Server that presents the Enclosure Services Processor to the operating system. The Enclosure
Services Processor in the 4U60 JBOD will be referred to as an ESM.
3. Log on to the Windows server.
4. Input the sg_scan -s command to find the ESM devices to ensure that they can be accessed. For example:
Note: If the 4U60 G2 Storage Enclosure is connected to an HBA that does not present the Enclosure
Services Processor to the host for management purposes, HGST recommends attaching the 4U60
G2 Storage Enclosure to a host that does expose the Enclosure Services Processor so that the
upgrade may be performed.
C:\Users\Administrator> sg_scan -s | findstr 4U60G2
The following output should be displayed by the system:
SCSI2:2,104,0
claimed=0 pdt=dh
HGST
4U60G2_STOR_ENCL
0061
SCSI2:3,37,0
claimed=0 pdt=dh
HGST
4U60G2_STOR_ENCL
0061
5. To determine which ESM is which, use the SCSIX: X.X.X string with the sg_ses command.
41
10
Firmware Upgrade
Installation Guide
10.2
Windows Upgrade Preparation


