


Confidential
Page 6
Power On
Power on the MX-400 using the switch at the rear of the unit near the power receptacle. The blue LED
located at the center of the front panel will light immediately. Soon after this the two quarter VGA
screens will be illuminated. These screens will provide system status, real time video monitoring, and
basic system configuration.
Configuring the system
The MX-400 basic system
configuration is performed
using the front panel.
Software features are
configured using the MX-400
Web UI.
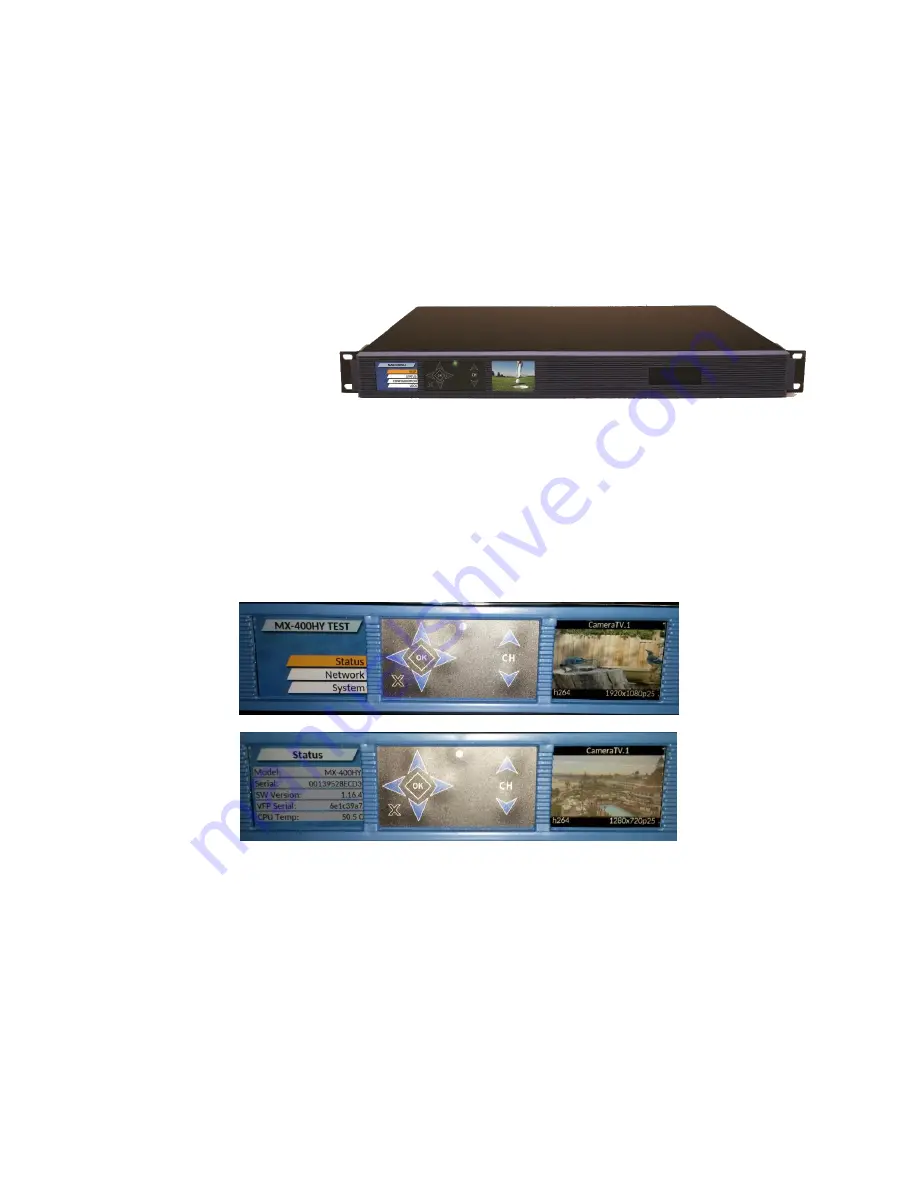
Front panel
Use the front panel of the MX-400 to check system status, configure each of the MX-400 network ports,
and reset the WebUI admin password. The main menu shows the System Name as configured in the
Web UI System/Settings page. Use the navigation pad to the right of the left screen to navigate the
menus. The Status screen provides information about the system including serial numbers, software
version, etc.
Navigate to the Network menu to configure each of the Network ports. Once the network port has been
correctly configured, and connected to the network, the network icon on the front screen should be
outlined in green. If not, check the connections at the rear of the device and the configuration screen
for errors. A black outline indicates the port is enabled but not functioning, a white outline indicates the
port is not enabled. When configuring the ports, one common error is mistaking N1 for N4, i.e. mentally
reversing the logical order of the network ports. These ports can also be configured using the Web UI.


