West Pond Enterprises MX-400TS User Manual Download Page 15

Confidential 


Page 14 

with the MX-400HY before it can receive commands.  Select the “Displays” tab and click on 

 to start.  Type in the Serial number located on the bottom of the RX device or via the 

on screen display.  Give the unit a friendly Name such as “Suite 202 hall”.   Assign the device to a group, 
or leave this for later if the group has not been created.  Select the receiver Type and the Control 
mechanism.  Add notes if more information is necessary to identify the device.  Click Register to 
complete the registration.  If a group was not assigned, select the Groups tab, create a group, and then 

use the “Edit Device” 

 icon to include the receiver in a group.  Install the device at the display and 

return to this menu item to exercise control.   

Devices are typically controlled in groups.  To control a device click on the “device state” 

icon.  The 

controls you see may vary depending upon the control capabilities of the connected device.  When 
controlling a group of devices, only the control states that are common to all devices in the group are 
displayed in the control group dialog.  As shown to the right, the power, channel, and volume can be 
changed in this group.  Select the new values and click save.  The changes take immediate effect.  

Monitor 

The monitor page is used during 
installation to detect unused 
frequencies that the modulator 
output can be configured to 
use, and post install to visualize 
the coax network usage and 
health.  The only configuration 
setting is the channel map 
chosen.  The default is US Cable 
TV.  The monitor will tune to 
each of the frequencies in the 
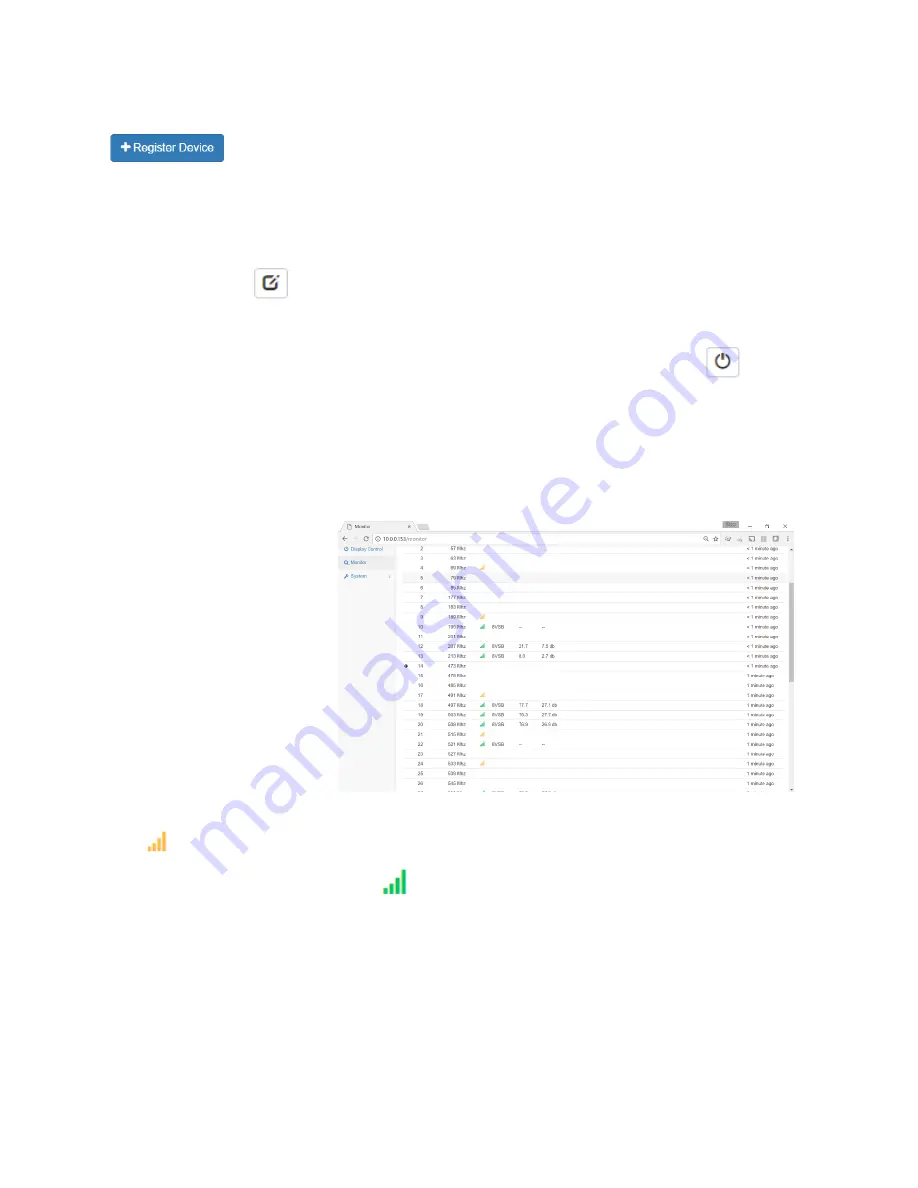
chosen channel map and report the status.  An empty row indicates an unused frequency.  The caution 

icon 

indicates the presence of some signal, perhaps noise or an unknown modulation.  A used 

frequency band will have a green signal 

icon.  Frequency bands that are in use may also have 

additional information if such information is available on the frequency.  When selecting a frequency 
band for the output modulator you will achieve the best results if you choose one that has no signal at 
all.  If none are available, one of the caution bands may be acceptable.    

Summary of Contents for MX-400TS

Page 1: ...MX 400TS User Guide Software revision 1 17 3 West Pond Enterprises LLC 6 28 2018...

Page 2: ...unit 5 Installing in the rack 5 Making the connections 5 Power On 6 Configuring the system 6 Front panel 6 Accessing the WebUI 7 Getting familiar with the MX 400 8 Overview 8 Sources 9 Network Source...

Page 3: ...Confidential Page 2 Info 16 Tools 16 Appendix A Quick Start Help 17 Appendix B FAQs 18 How do I create a TV channel from a video file 18...

Page 4: ...gram Transport Stream Sources Devices or software that generate MX 400 multiplexor Inputs Inputs TS traffic entering the multiplexor Outputs TS traffic exiting the multiplexor Targets Output devices r...

Page 5: ...ort MX 400TS Option Modules The MX 400TS multiplexor accepts TS sources from ASI and IP inputs and will output a TS to ASI IP and Modulator target devices The standard configuration is IP to IP ASI in...

Page 6: ...el screws connect the power to the rear of the unit Making the connections There are four Gigabit Ethernet ports on the back of the MX 400 These are independently configured to support four unique LAN...

Page 7: ...n menu shows the System Name as configured in the Web UI System Settings page Use the navigation pad to the right of the left screen to navigate the menus The Status screen provides information about...

Page 8: ...through the video This can be done at any time and has no impact on the state of the system Accessing the WebUI Using a computer that shares a LAN with the MX 400 point a web browser to the IP addres...

Page 9: ...streams from a variety of sources into groups and transmits them with the correct signaling and timing to the appropriate output Outputs may have constraints such as bitrate and signaling that must be...

Page 10: ...RTSP such as an RTSP security camera click on the RTSP tab and enter the name and URL of the camera i e rtsp username password 192 168 X XXX stream1 Make sure the source is enabled before saving ASI A...

Page 11: ...rt such as a modulator ASI port or Ethernet port As this is a software multiplexor there is no specified limit to the number of outputs From a practical perspective it s best to limit the bandwidth co...

Page 12: ...ill be shown on the Overview page Nul stripping reduces the network traffic and is recommended for non CBR applications MPEG transport streams require signaling that is compatible with the transport a...

Page 13: ...ibution network Use this field post install to make minor power level adjustments if required Program Mapping Program Mapping is the heart of the multiplexor Clicking on the icon for a specific output...

Page 14: ...return to this dialog later and modify these fields at any time All changes will take effect immediately You may need to retune the TV to see the results Oversubscribing the Transport If the sum total...

Page 15: ...es only the control states that are common to all devices in the group are displayed in the control group dialog As shown to the right the power channel and volume can be changed in this group Select...

Page 16: ...webUI Timezone Use the icon to set the timezone in which the server is being used This is very important when scheduling playback and other time critical WebUI features FlexDM remote management West...

Page 17: ...These are tools that are used to maintain the system state System Config You may export or import the system configuration at any time This includes account information the output configuration and ne...

Page 18: ...264 video d If enabling the Video Server source try one of the preloaded MPEG2 or h 264 files before loading your own e All of the enabled multiplexer inputs can be viewed on the front panel and Over...

Page 19: ...rs The FlexDM net web service allows you to manage devices and upload videos that will be transcoded and downloaded to the device directly Log in to FlexDM net to create an account and start managing...

Page 20: ...ers were all 10 Mb s and the Output bitrate cannot support an additional 20 Mb s Doing so will oversubscribe the transport and show an error in the Overview Output screen Add files to the play list by...

Page 21: ...Mb s transport that is 50 utilized has 19 Mb s unused and available for new programming content Back to the Outputs page Select and then click on the icon for the Source you wish to include in the ou...

Page 22: ...Confidential Page 21 document Be sure to click OK and then click Save to save the changes to your Output...

Reviews: