9
IOM-A-Deringer 40/40X/50/50X_6-8
2005
EDP#2916006
© 2020 Watts
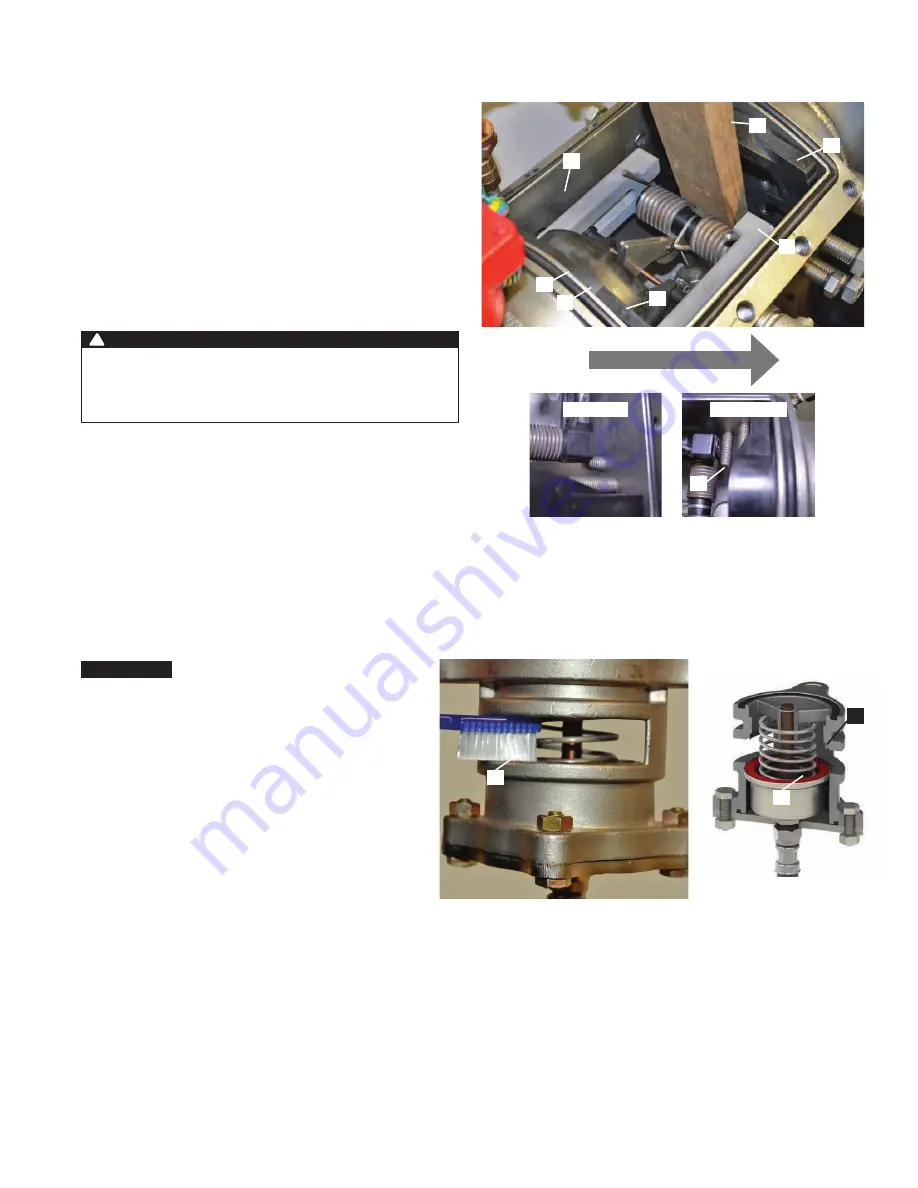
Installing First Dual-action Check Module
1. Insert first check module (A) into access port (B) with first check
towers (C) pointing downstream. Push first check module (A)
upstream into valve sealing ring (D) until check O-ring (E) is
resting against valve sealing ring (D). Push first check module
(A) into its fully seated position by hand.
2. Alternatively, using a piece of 1"x4" wood cut to 16" length
(F) as a lever between the second check seat (G) and the first
check towers (C), push the first check module (A) into its fully
seated position.
3. Be certain first check module (A) is fully seated and check
O-ring (E) is NOT “fish mouthed” or damaged.
4. Now fully tighten the first and second check retaining screws (I).
The first check module must be fully seated to ensure
retainer screws do not bind against check towers. Binding
retainer screws against check towers will result in permanent
damage to first check modules.
WARNING
!
FLOW
Not Binding
Binding
C
A
B
E
F
G
D
I
NOTICE
Typically, when a RP device is leaking from the relief valve, a fouled
or damaged first check valve is the cause. Make sure the first check
valve is functioning properly before assuming there is a problem with
the relief valve. If the first check is found to be functioning properly,
we recommend cleaning the relief valve piston (B) and seat (C). Use
a toothbrush (A) to gently brush away any debris on the relief valve
piston (B) or seat (C) that may be preventing the piston (B) from seal-
ing properly against the seat (C). This should return the relief valve to
proper working order without disassembly or the use of a repair kit.
Maintenance of Relief Valve
A
B
C


