6
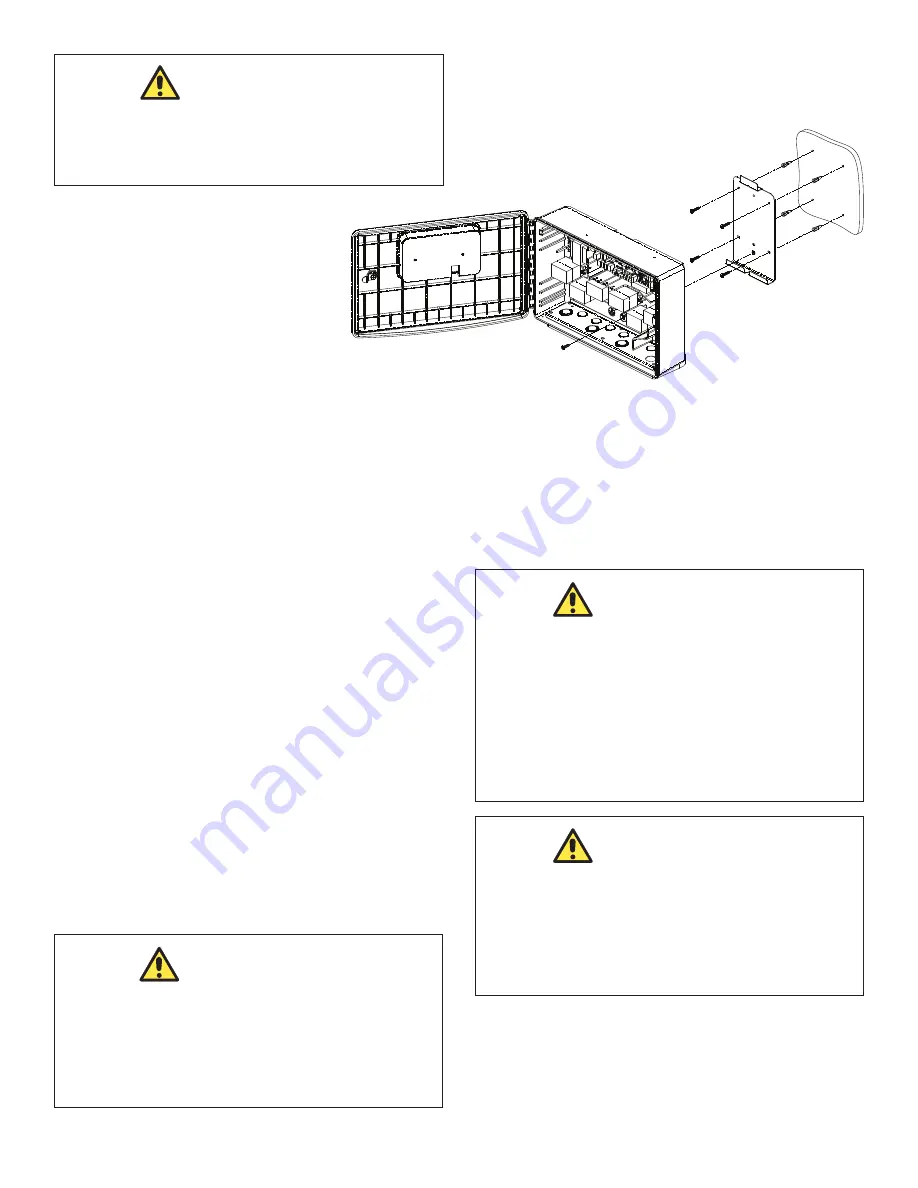
7. Open the front cover of the controller and
locate the fastening hole under the
ground bar. Drill a 3/16” hole through
the plastic enclosure.
8. Line up the slot in the controller enclosure
with the guide in the mounting bracket and
hook on to mount.
9. Secure the controller enclosure to the
mounting bracket with the single fine thread
Phillips screw provided.
1. Using the holes in the plastic bracket as a guide, drill two (2)
holes on the surface where the UI will be mounted.
2. Screw the bracket to the surface using two (2) screws.
3. Remove the UI from the front of the controller enclosure and
attach to the mounting plastic bracket. Secure with set
screws on the sides.
4. Use the blank plastic face plate provided to cover the UI
housing when UI is removed. Attach face plate to enclosure
door with the two screws originally used to fasten the UI to
the door.
3.2
Mount the User Interface for
Remote
Access
The user interface (UI) may be installed in a more convenient
location away from the equipment pad.
To set up the UI remotely, you will need to purchase a CAT 5
cable the length of the remote distance to connect the UI to the
controller unit.
NOTE:
The UI MUST be mounted OUTDOORS where a pool
service technician may conveniently access it.
All high voltage wiring must be done by a licensed electrical
contractor.
NOTE:
See Figure 10.4 OASIS Electrical Wiring Diagram on page
10 for specific wire locations and connections.
Section 4. High Voltage Wiring
Figure 1. Mounting the Controller Enclosure
CAUTION
Make sure to perform the following step BEFORE mounting the
enclosure onto the mounting bracket, otherwise, damage to the
threaded hole of the mounting bracket may occur.
WARNING
The controller is not to be considered as suitable for use as service
equipment. Therefore it is required to have the appropriate
means of disconnection, circuit isolation, and/or branch circuit
protection installed upstream of the power/control center.
WARNING
Potentially high voltages in the OASIS controller can create
dangerous electrical hazards, possibly causing death, serious
injury or property damage. Turn off power at the main circuit
feeding the OASIS controller to disconnect the power center
from the system.
WARNING
Waterway Plastics recommends that any procedure requir-
ing potential contact with live electrical wiring and/or parts
other than cords and plugs connected to electrical outlets,
be completed by a contractor who is licensed and qualified
in pool equipment as described on the front cover of this
manual. Failure to follow warning notices and instructions
may result in property damage, serious injury, or death.


