Eclipse™ Compressed Air System
Installation, Operation, and Maintenance
Form Number: F-3013
Issue Date: May 17, 2023
Waterous Company • 125 Hardman Avenue South • South Saint Paul, MN 55075 • (651) 450-5000
www.waterousco.com
Page 1: ...se Compressed Air System Installation Operation and Maintenance Form Number F 3013 Issue Date May 17 2023 Waterous Company 125 Hardman Avenue South South Saint Paul MN 55075 651 450 5000 www waterousc...
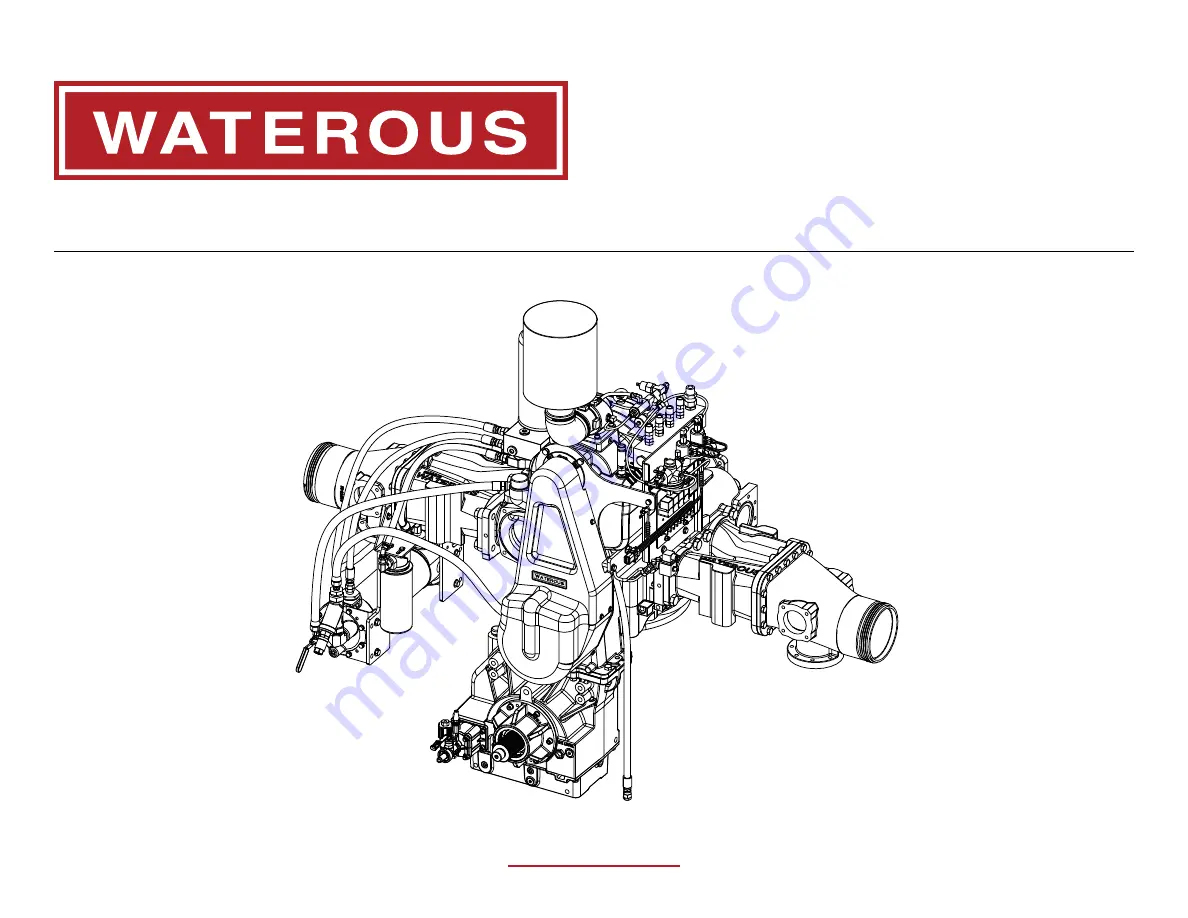
Page 2: ...ction Plate 48 Mounting the Throttle Ready Panel 49 Connecting the Throttle Ready Panel and Interlock 50 Installing the Air Clutch Hose 51 Installing the Pressure Gauge 52 Installing the Temperature G...
Page 3: ......
Page 4: ...y perform the required procedures proper installation is the responsibility of the purchaser Do not operate the equipment when safety guards are removed Do not modify the equipment Regularly check for...
Page 5: ...l ground wire connections before applying high current Drain the pump after use and before servicing Liquid ejected at high pressure can cause serious injury High Pressure Do not touch the surface dur...
Page 6: ...bleshooting Maintenance Rotating parts can cause severe injury or death Moving Parts Do not enter or reach into the compartment when equipment is operating Do not operate beyond recommended pressure L...
Page 7: ...rious system configurations Installation This section describes the installation and initial setup procedures Operation This section describes equipment operation Maintenance This section describes re...
Page 8: ...ilable in 12 V or 24 V Some components are assembled at the factory while other components are shipped loose and require installation The components that require installation depend on the configurati...
Page 9: ...f operation 3 Auto sync extension harness This is an extension for the auto sync switch wire harness 4 Hose length plate This details the recommended minimum hose length for a given diameter 5 Compres...
Page 10: ...on Product Overview Installation Operation Troubleshooting Maintenance System Components The CAFSystem includes the additional illustrated components The components are color coded for troubleshooting...
Page 11: ...g This 3 8 inch tube connects various components in the system 3 Red tubing This 1 4 inch tube connects various components in the system 4 Orange tubing This 1 4 inch tube connects various components...
Page 12: ...12 90 Safety Introduction Product Overview Installation Operation Troubleshooting Maintenance Operation Overview...
Page 13: ...air and water pressure in auto mode 3 Cooling The cooling portion of the system includes the oil cooler oil filter supporting hoses fire pump and water source After leaving the sump the oil passes th...
Page 14: ...14 90 Safety Introduction Product Overview Installation Operation Troubleshooting Maintenance Compressor Components 1 2 7 8 14 6 5 3 13 9 16 11 12 4 15 10...
Page 15: ...and number of air injection points depends on your application 6 Balance valve This regulates the air circuit when the system is in auto mode 7 3 way solenoid valve This controls the air flow to the a...
Page 16: ...16 90 Safety Introduction Product Overview Installation Operation Troubleshooting Maintenance Air Filtration Components 4 5 1 2 3 7 6...
Page 17: ...the air inlet tube 3 Air inlet tube This routes filtered air to the compressor Note If the air filter is unstable after installation provide additional support at the air inlet tube 4 90 rubber elbow...
Page 18: ...18 90 Safety Introduction Product Overview Installation Operation Troubleshooting Maintenance Pressure Modulation Control PMC Assembly 1 3 2 4 5...
Page 19: ...ressure switch when the PMC reaches a predetermined pressure 2 Blowdown valve This bleeds off any remaining air in the system when it shuts down 3 Pressure regulator This regulates the air circuit in...
Page 20: ...20 90 Safety Introduction Product Overview Installation Operation Troubleshooting Maintenance Air Oil Separation Components 1 5 4 2 3 6 9 10 11 8 7...
Page 21: ...air outlet This connects to the PMC 5 Compressed air outlet This connects to the air discharge manifold 6 Oil cooler inlet This connects to the oil cooler 7 Oil cooler outlet This connects to the oil...
Page 22: ...22 90 Safety Introduction Product Overview Installation Operation Troubleshooting Maintenance Oil Filter 3 4 5 2 1...
Page 23: ...cription Description 1 Mounting bracket This is used to mount the oil filter on the apparatus 2 Direction of flow indicator This indicates the direction of flow through the oil filter 3 Oil inlet This...
Page 24: ...24 90 Safety Introduction Product Overview Installation Operation Troubleshooting Maintenance Oil Cooler 5 3 9 8 4 6 2 7 1 3...
Page 25: ...hat cools the oil 5 Wye strainer clean out valve This allows you to quickly remove accumulated debris from the wye strainer 6 Direction of flow indicator This indicates the direction of water flowing...
Page 26: ...26 90 Safety Introduction Product Overview Installation Operation Troubleshooting Maintenance Balance Valve 6 5 4 7 1 2 3...
Page 27: ...t This connects to the black solenoid on the auto sync assembly 3 Direction of flow indicator This indicates the direction the air flows through the balance valve 4 Balance trim valve This calibrates...
Page 28: ...28 90 Safety Introduction Product Overview Installation Operation Troubleshooting Maintenance Auto Sync Mode Switch 1 2 4 5 6 7 3...
Page 29: ...ompressor at approximately 40 psi 2 8 bar The compressor generates a minimum pressure of 40 psi to circulate the compressor oil and cool the system Always start the compressor in this mode or auto mod...
Page 30: ...30 90 Safety Introduction Product Overview Installation Operation Troubleshooting Maintenance Auto Sync Solenoid Assembly 1 3 4 6 5 2...
Page 31: ...ntified by the black or yellow tubing that feeds into them Feature Feature Description Description 1 Wire harness This connects to the auto sync switch 2 Pressure gauge adapter This connects to the su...
Page 32: ...32 90 Safety Introduction Product Overview Installation Operation Troubleshooting Maintenance Throttle Ready Panel 4 2 3 1...
Page 33: ...e Description Description 1 Mounting holes These secure the panel to the apparatus 2 Throttle Ready LED This illuminates when the throttle ready interlock is engaged 3 OK to Pump LED This illuminates...
Page 34: ...34 90 Safety Introduction Product Overview Installation Operation Troubleshooting Maintenance Relay Panel Assembly 6b 4 2 3 5 1 6a...
Page 35: ...ous system components 3 Relay connector These provide a way to connect the system wiring to the relays 4 Terminal block This provides a way to connect various system components to the relay panel 5 Gr...
Page 36: ...repare a suitable well lit area and gather all the necessary tools before you begin the installation Make sure that you remove any shipping plugs or caps before installing components Make sure that yo...
Page 37: ...on and maintenance Install instruction plates near their applicable operator panels Determining Hose Routing Use the following guidelines when routing the hoses Route hoses in a straight line whenever...
Page 38: ...38 90 Safety Introduction Product Overview Installation Operation Troubleshooting Maintenance Pneumatic Connections Overview 1 2 3 5 9 10 4 6 7 8...
Page 39: ...nced air line This is a yellow tube that routes balanced air from the balance valve to the auto sync solenoid assembly 5 Regulated air line This is a red tube that routes regulated air from the auto s...
Page 40: ...view Installation Operation Troubleshooting Maintenance Hose Connections Overview Use the illustration to plan the hose routing for the apparatus Contact Waterous for more information about available...
Page 41: ...compressor to the oil filter 1 2 inch hydraulic hose 3 Oil cooler hose This routes oil from the compressor to the oil cooler 1 2 inch hydraulic hose 4 Oil cooler hose This routes oil from the oil coo...
Page 42: ...stallation Operation Troubleshooting Maintenance Fittings Overview Use the illustration to plan the hose routing for the apparatus Contact Waterous for more information about available hose and fittin...
Page 43: ...ch hose 8 FJIC 4 Reducing bushing This is a 1 MNPT x 1 2 FNPT 5 Straight adapter This is a 6 MSAE x 1 2 MNPT 6 90 elbow adapter This is a 6 MSAE x 1 2 MNPT 7 Swivel hose fitting This is for a 3 8 inch...
Page 44: ...all the oil cooler drain line Fluid that is susceptible to freezing must be drained from the cooler to prevent damage NOTICE Do not allow fluid in the lines to freeze Remove all freezable fluid from t...
Page 45: ...Notes...
Page 46: ...Use the illustration and instructions to mount the auto sync switch on the operator panel Note Make sure to install the auto sync switch so that it is easy to access 1 Create the cutout and drill the...
Page 47: ...nstructions to connect the auto sync switch wires and components 1 Secure the power wire from the auto sync switch to terminal 4 on the relay panel 2 Secure the ground wire to the grounding screws on...
Page 48: ...on Plate Use the illustration and instructions to mount the warning and instruction plates on the apparatus Note Make sure to install the plates near the auto sync switch 1 Drill the mounting holes fo...
Page 49: ...Throttle Ready Panel Use the illustration and instructions to mount the throttle ready panel on the apparatus Note Make sure to install the panel so that the LEDs are easily visible 1 Drill the mounti...
Page 50: ...nd Interlock 1 2 Use the illustration and instructions to connect the throttle ready panel wires and components 1 Connect the panel connector to the interlock connector 2 Secure one of the interlock c...
Page 51: ...llation Operation Troubleshooting Maintenance Installing the Air Clutch Hose Use the illustration and instructions to install the air clutch hose 1 Use a portion of the yellow tubing to connect the ve...
Page 52: ...o install the pressure gauge on the control panel The pressure gauge is required by NFPA standards and must be locally sourced by the installer 1 Create the cutout for the pressure gauge For dimension...
Page 53: ...roubleshooting Maintenance Installing the Temperature Gauge Use the illustration and instructions to install the temperature gauge on the control panel 1 Create the cutout for the temperature gauge th...
Page 54: ...on the temperature sender 2 Secure the power wire between the positive terminal on the gauge and terminal 4 on the relay panel 3 Secure the neutral wire between the smaller spade on the temperature s...
Page 55: ...er Use the illustration and instructions to connect the power source and ignition to the relay panel Note The wire is supplied by the installer 1 Secure the power wire to terminal 1 on the relay panel...
Page 56: ...necting the Air Clutch Switch Use the illustration and instructions to connect the air clutch switch to the relay panel Note The switch and wire are supplied by the installer 1 Secure the wire to term...
Page 57: ...ir Clutch Use the illustration and instructions to connect the air clutch solenoid to the relay panel Note The indicator light and wire are supplied by the installer 1 Secure the wire to terminal 7 on...
Page 58: ...ischarge solenoids to the relay panel Note The indicator light and wire are supplied by the installer 1 Secure the wire to terminal 7 on the relay panel 2 Install a switch between the relay panel and...
Page 59: ...nd instructions to connect the overheat indicator light and optional audible alarm to the relay panel Note The indicator light audible alarm and wire are supplied by the installer 1 Secure the wire to...
Page 60: ...removed from the apparatus and the equipment is clear of debris Make sure that all hardware and connections are properly tightened Make sure that the drain valves are closed Make sure to flow water th...
Page 61: ...o 10 seconds Note Do not operate the compressor for more than 10 seconds during this procedure Doing so will damage the compressor and void your warranty 4 Allow time for the pressure to be completely...
Page 62: ...er operate the system with the compressor oil temperature above 250 F 121 C 1 Toggle the auto sync switch to the Unload position 2 Close all air discharges before calibration 3 a Locate the AITV then...
Page 63: ...ter to regulate the compressor oil temperature during operation Never operate the system with the compressor oil temperature above 250 F 121 C 1 Loosen the locknut on the PMC manual adjustment screw 2...
Page 64: ...r to regulate the compressor oil temperature during operation Never operate the system with the compressor oil temperature above 250 F 121 C 1 Toggle the auto sync switch to the Unload position to mak...
Page 65: ...auto mode When operating the system Always start the system in auto or unload mode Always circulate enough cool water to regulate the compressor oil temperature during operation Never operate the syst...
Page 66: ...pressure 4 If the air pressure remains 10 higher than the water pressure and the balance trim valve is fully open turn the AITV 1 2 turn clockwise After the adjustment takes effect compare the air an...
Page 67: ...hronizes the air pressure with the water pressure The air pressure rises and falls automatically as you raise and lower the static water pressure Auto mode operates between approximately 50 to 150 psi...
Page 68: ...valve the shuttle returns to its resting position and bleeds off any remaining air in the system to atmosphere Note The white dots illustrate the main air pressure route described in the instructions...
Page 69: ...ain air pressure route described in the instructions 1 The compressor builds the air pressure in the system to 40 psi 2 8 bar To adjust the set point refer to Calibrating the System Unload Mode on pag...
Page 70: ...nd interacts with the regulator components 3 Both solenoids are closed which allows the air pressure to operate independently from the water pressure 4 Pressure builds until it reaches the set point w...
Page 71: ...re surpasses 40 psi 2 8 bar the minimum pressure valve opens allowing air to move into the manifold 3 Inside the balance valve The water side of the balance valve closes the path for air to move to th...
Page 72: ...nd instructions to create a shutdown procedure for your application 1 Close the air valves if they are open 2 Disengage the foam proportioner then flow water though the discharge hoses to clean them 3...
Page 73: ...Months 24 Months Comment Comment Check the oil level X X Note that the oil level drops temporarily during system operation Inspect the hoses and fittings X X Service operation X Operate the system in...
Page 74: ...e amount of oil Refer to Draining the Compressor Oil on page 75 Note If the oil level is too high it is important to determine the cause Check for water entering the compressor from the pump then repa...
Page 75: ...l Purge all pressure before servicing Liquid ejected at high pressure can cause serious injury High Pressure 1 Place a suitable container under the compressor to collect the drained oil 2 Uncoil the o...
Page 76: ...from the system before draining the oil Purge all pressure before servicing Liquid ejected at high pressure can cause serious injury High Pressure 1 Place a suitable container under the cooler to coll...
Page 77: ...c oil Purge all pressure before servicing Liquid ejected at high pressure can cause serious injury High Pressure 1 When all pressure has been purged from the system remove the oil fill cap 2 Add oil t...
Page 78: ...to change the air filter 1 Locate the T bolt clamp that secures the air filter to the air tube 2 Loosen the T bolt clamp 3 Remove and discard the air filter 4 Position the new air filter over the air...
Page 79: ...nstructions to change the separator filter Purge the pressure from the system before changing the separator filter Purge all pressure before servicing Liquid ejected at high pressure can cause serious...
Page 80: ...ustrations and instructions to change the oil filter Purge the pressure from the system before changing the oil filter Purge all pressure before servicing Liquid ejected at high pressure can cause ser...
Page 81: ...d at high pressure can cause serious injury High Pressure 1 Open the clean out valve and allow the system drain 2 Remove the clean out valve and adapting components Note Replace any worn or deteriorat...
Page 82: ...eath Moving Parts Do not enter or reach into the compartment when equipment is operating 1 Remove the top half of the belt guard 2 Loosen the screw on the back of the idler plate 3 Turn the adjustment...
Page 83: ...When performing this procedure Always start the system in auto or unload mode Always circulate enough cool water to regulate the compressor oil temperature during operation Never operate the system w...
Page 84: ...is open and properly adjusted The system is functional but the pressure gauge is not indicating the correct pressure The gauge is malfunctioning The air line has detached or is leaking The air line is...
Page 85: ...ool water to the tank or stop operation until the system is no longer overheating The cooler is partially restricted Check the cooler for debris clear any debris hindering the flow and determine where...
Page 86: ...the compressor is flooded Remove the appropriate amount of oil the proper oil level is halfway up the sight window when the apparatus is on level ground There was a sump fire Check the system and repa...
Page 87: ...ing in high humidity The system was exposed to cold temperatures without the oil cooler being drained Test the oil cooler for internal leaks from the water side to the oil side replace the cooler The...
Page 88: ...a lower engine speed The clutch is engaging the system when the compressor has not had adequate bleed down time Allow the air pressure in the compressor to bleed off before engaging the compressor Th...
Page 89: ...ure that the air pressure produced in auto mode is 50 psi or more and changes with the water pressure Make sure that the pressure produced in fixed mode is between 145 to 150 psi The compressor is pro...
Page 90: ...Waterous Company 125 Hardman Avenue South South Saint Paul MN 55075 651 450 5000 www waterousco com...