Safety
Introduction
Product Overview
Installation
Operation
Maintenance
Troubleshooting
Warranty
27 | 44
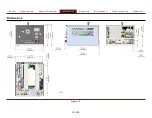
Locating and Drilling the Mounting Holes
Determine a location that allows you to secure the system to the apparatus.
Use the appropriate hardware for your specific application. Contact Waterous
for more information.
1. Use the dimensions in
to locate the mounting holes.
2. Drill the mounting holes.
Note:
Be aware when you drill though the mounting surface. Do not drill
into items behind the mounting surface.
Installing the Module
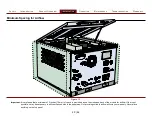
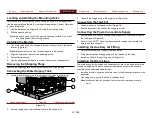
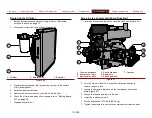
1. Use a fork lift and fork lift openings to position the system into the install
location (
).
Note:
Make sure that you do not shear the bolts in the channel.
2. Align the hold down tabs over the mounting holes.
3. Route the drain hoses.
4. Use the appropriate hardware to secure the system to the apparatus.
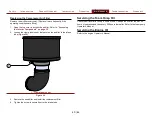
Removing the Shipping Plugs
Remove the shipping plugs as you install that portion of the module.
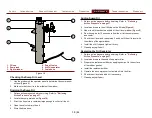
Connecting the Water Supply Tank
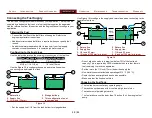
1. Locate the water supply intake at the rear of the module (
3
2
1
1. Concentrate input
2.
Tank fill
3. Water supply intake
Figure 14
2. Route a supply hose from the supply tank to the supply inlet.
3. Connect the supply hose to the supply inlet (
Connecting the Tank Fill
1.
Connect a hose to the tank fill outlet (
).
2. Route and connect the hose to the supply tank inlet.
Connecting the Foam Concentrate Supply
1. Route a hose from the concentrate supply tank to the concentrate input on
the foam pump (
).
2. Refer to the
AQUIS™ Foam System
manual for supply hose installation
details and requirements.
Installing the Auxiliary Air Fitting
1.
Determine the required fitting for your application.
2.
Wrap plumbing tape or apply sealant to the threads on the fitting.
3.
Install the fitting to the auxiliary air port (
Installing the Drain Lines
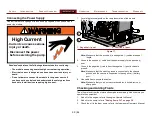
The drain hoses for the engine and compressor oil are coiled and stored in the
module for shipping. However, hoses for the water and foam drain lines are
supplied by the apparatus manufacturer.
1. Install and route a hose to each drain valve to the discharge location on the
apparatus.
2. Use cable ties to secure the hose to the apparatus.
Note:
Make sure that the hose does not contact hot, abrasive, or sharp
parts.
Summary of Contents for ECLIPSE CAFSystem 2.0
Page 2: ......


