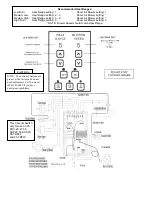
THE CONTROL BOARD
The control board (PART #PU-CB98) is a digital read-out board. This board offers a wide
variety of settings to operate the unit. Again, the bottom controls are
preset
at the factory
and should not require any alteration on start-up of the unit (see “Unit Preparation” section
for information on setting the Heat Range). This part can be removed from the unit by
loosening the two screws on the outside of the stove, and then pulling it back to the inside of
the stove. The rear access panel should be removed prior to removing the control board.
THERMOSTATS
REMOTE:
There is now a Remote Thermostat (Part # AC-3001) available for your pellet
stove. It comes with everything necessary for quick installation, and has many features to
allow remote control of your unit.
WALL:
Also, an external wall thermostat (such as our Part # PU-DTSTAT) can be used on
our pellet units as long as it is a 24-volt that works with millivolt systems. After unplugging the
unit, locate the jumper wire (J-18) on the bottom of the control panel. The two screws should
then be loosened and the jumper wire removed from the board. Next, the two thermostat
lead wires should be slipped into these openings and the screws tightened; the jumper wire
should be saved for future operation without a thermostat.
The unit will operate differently once the wall thermostat is connected -- we recommend
the stove control board be set at a minimum of “5” on the Heat Range while using the
thermostat. This will allow the stove to run around a medium setting and drop back to a lower
setting when the thermostat is not calling for heat. Refer to the section on “Start-up
Procedure” for information on cold starts.
Call (800) 516-3636 or log onto www.englandsstoveworks.com to inquire or order these.
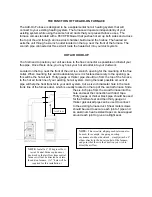
Important: Hopper Lid Latches must be checked periodically
and kept tight so the top is sealed to prevent back-burn.
Hopper Lid Latch (2 per unit)
Summary of Contents for 25-PAF
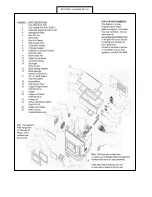
Page 16: ...Pellet Stove Exploded View...
Page 18: ......


