


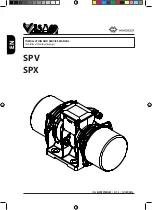


SPV - SPX
P. 28
REV.0 | 09/2015
(Fig. 07-01).
If the Vibrator is installed after a storage period longer than 12 (twelve) months, make sure the
rotor shaft is able to rotate freely and that the prescribed axial clearance is present (from 0.5 to
2.0mm). To perform this operation, remove one of the weight covers and carry out the check
manually. 07-02), then put the cover back over the weights, making sure the O-Ring is fitted
properly into place (Fig. 06-02).
By using an “Ohmmeter”, check the isolation resistance between ground and phases. If the value
is lower than 1 MOhm, do not proceed with the installation and contact the supplier (Fig. 07-03).
Check that the surface of the machine on which the Vibrator is to be installed is free of paint, rust
and grease and make sure it is perfectly level /- 0.1mm (milling), with roughness degree
no greater than 25µm (Fig. 07-04).
7.2
Installation
NOTE
During installation of the Vibrator on the machine, the surrounding space necessary for complying
with the instructions contained in this manual must be kept in mind (Fig. 07-05).
Position the Vibrator onto the surface of the machine on which it is to be installed by using
appropriate lifting devices (where needed) (Fig. 07-06).
NOTE
When positioning the Vibrator, special attention must be made to prevent heavy bumps or ac-
cidental falling of the machine, which could cause damage to the special bearings and impair
their life span. Should any of these situations occur, do not proceed with the installation and
contact the supplier immediately.
In the case of an inclined surface, the Vibrator must be orientated in such a way so that the entry
of the feeding cable on the terminal box is always facing downwards, in order to prevent the entry
of liquids and /or dust in case the cable gland is not properly tightened. (Fig. 07-07).
Install the Vibrator by means of screws class 8.8 (UNI 5737, DIN 931, ISO 4014), steel flat washers
300-370 HV (UNI 6592, DIN 125-A, ISO 7089) and nuts type 8 (UNI 5588, DIN 934, ISO 4032),
and also with counter nuts class 8 (UNI 5589, DIN 936, ISO 4035). Self-locking nuts class 8 (UNI
7473, DIN 8 982 7040ISO) may be used instead of nuts and counter nuts.
WARNING
The vibrator must be installed on the machine by utilizing all the fastening holes present on the
basement, as indicated in the IST tables at chapter 13.3.
WARNING
Make sure the entire Vibrator basement adheres perfectly to the surface upon which the machine
is to be installed. If any splits or cracks are present, the surface must be smoothed to prevent
severe breakage or damage (Fig. 07-09).
Tighten all the fastening screws thoroughly according to the torque values indicated in the table
TTT, chapter 13.5 by using a torque wrench. In case such tool not available, the screws can be
EN
Summary of Contents for Visam SPV Series
Page 111: ...P 111 ...
Page 129: ...P 129 ...
Page 130: ...P 130 ...
Page 131: ...IT NOTE EN NOTES FR NOTE DE HINWEIS RU ДЛЯ ЗАМЕТОК ...


