


7
Schedule charging sessions
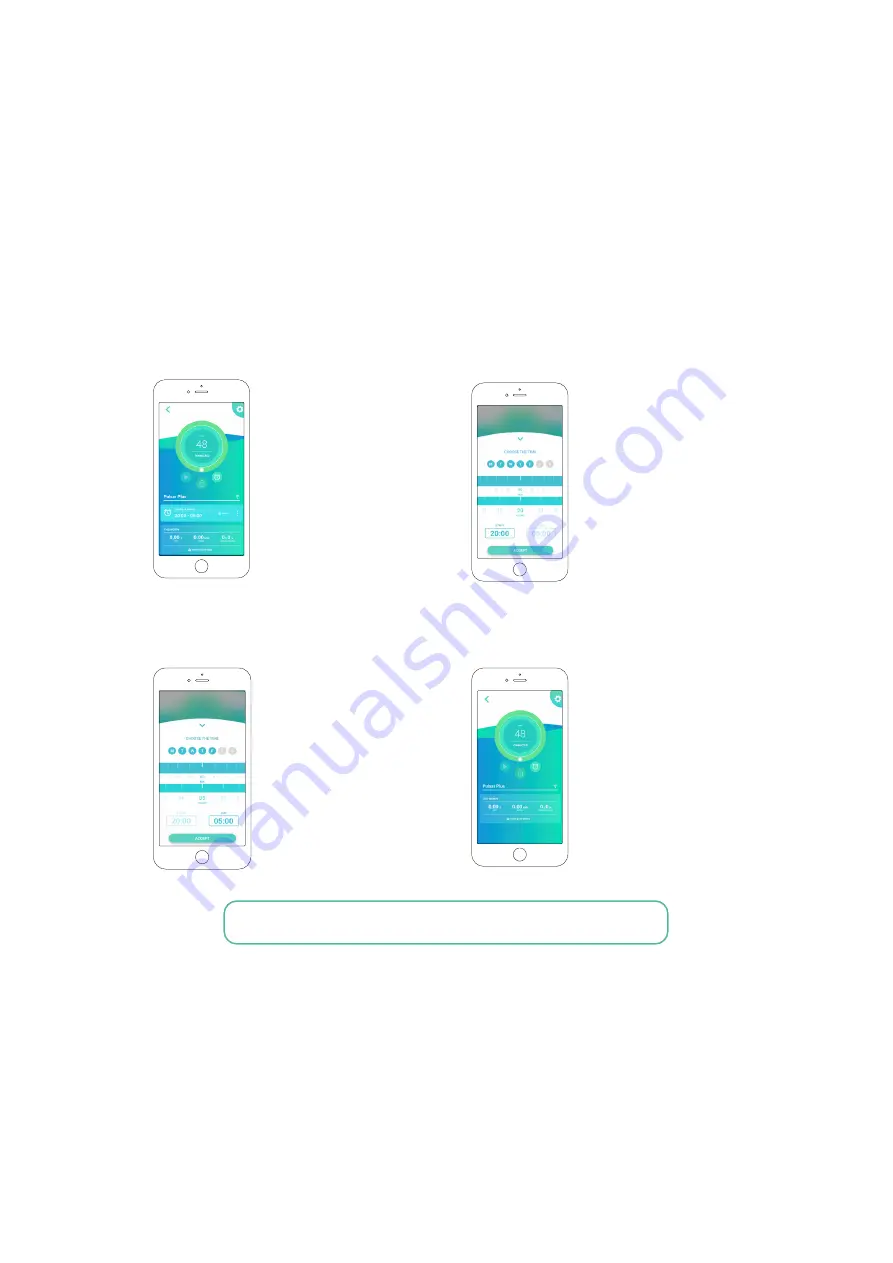
To set a charging schedule, launch and log into the myWallbox app on your mobile device and select your
connected charger.
On the charger app screen, below the charger controls and charger name, is the charger schedule.
1.
Tap the clock icon on the charger app screen.
2.
The weekly calendar and time selection
wheels will appear.
Note: You can set different schedules for different days, just be sure to tap
“Accept” to save your current schedule before creating a new schedule.
Schedule #1: Select the days you want to set with this schedule, choose the start/stop times, and then tap Accept.
Schedule #2: select the days you want to set with this alternate schedule, choose the start/stop times, and tap Accept.
Basics - Usage
QUICK REFERENCE GUIDE
2.
Select the days you want to charge by clicking the
day buttons.
3.
Select the start time box. Use the time selection wheels
to set the time you want to start your charging.
4.
Select the end time box. Use the time selection
wheels to set the time you want to end your
charging.
5.
Tap “Accept” to send the schedule to the
charger.
To schedule one or more charging sessions


