


5
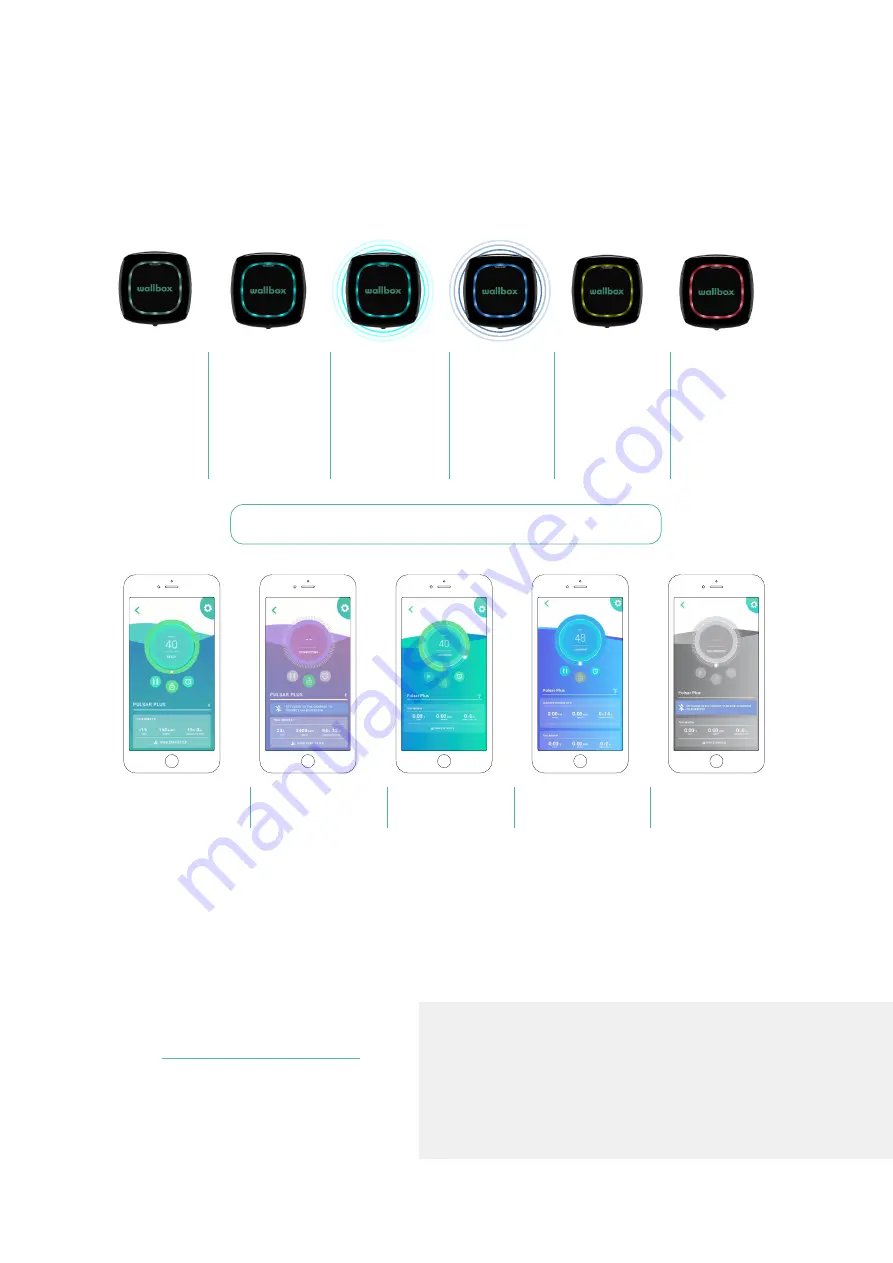
Understanding the Pulsar Plus Status Colors
Green
Light blue
Light blue
(pulsing)
Dark blue
(pulsing)
Yellow
Red
When powered on, you can check the status of your Pulsar Plus charger quickly and easily by the color of the LED
halo on the front of the charger and from the colors displayed in the myWallbox app when your charger is selected:
Note: The current status colors will also be visible on the charger screen in
your myWallbox app.
No EV is
connected to
the charger.
Charger is
ready to use.
EV is connected to the
charger. Charger is
connecting.
No EV is connected to
the charger. Charger
is ready to use.
Charger is connected.
Charging is in
progress.
Disconnected.
Waiting for the EV to
start charging or the
car is fully charged.
Note, it can take
several seconds in
waiting mode before
charging starts.
Scheduled charge. A
schedule has been
set by the user.
Charging is in
process.
The charger is
locked and will not
charge.
An error has
been detected
on the EV, grid or
the charger. See
“Troubleshooting”.
Basics - Usage
QUICK REFERENCE GUIDE
Adjust the charging current
There are two ways to manage the charging current of your charger:
1.
During hardwire installation, your installer will have set the physical current selector switch inside the charger
to the appropriate amperage suitable for the connected circuit. This is to ensure that neither the charger nor
your vehicle draws more than 80% of the connected circuit’s maximum rating (per the National Electrical Code).
2.
Using the myWallbox app.
Circuit Breaker
Rating
Amps
16A
20A
32A
40A
20A
25A
40A
50A
24A
30A
48A
60A
When would I adjust the amperage?
Shared circuit.
If your charger shares a high voltage
circuit with other appliances, you may want to temporarily
reduce the amperage available to charge your vehicle
when operating those other appliances to ensure you do
not overload the circuit.


