


3
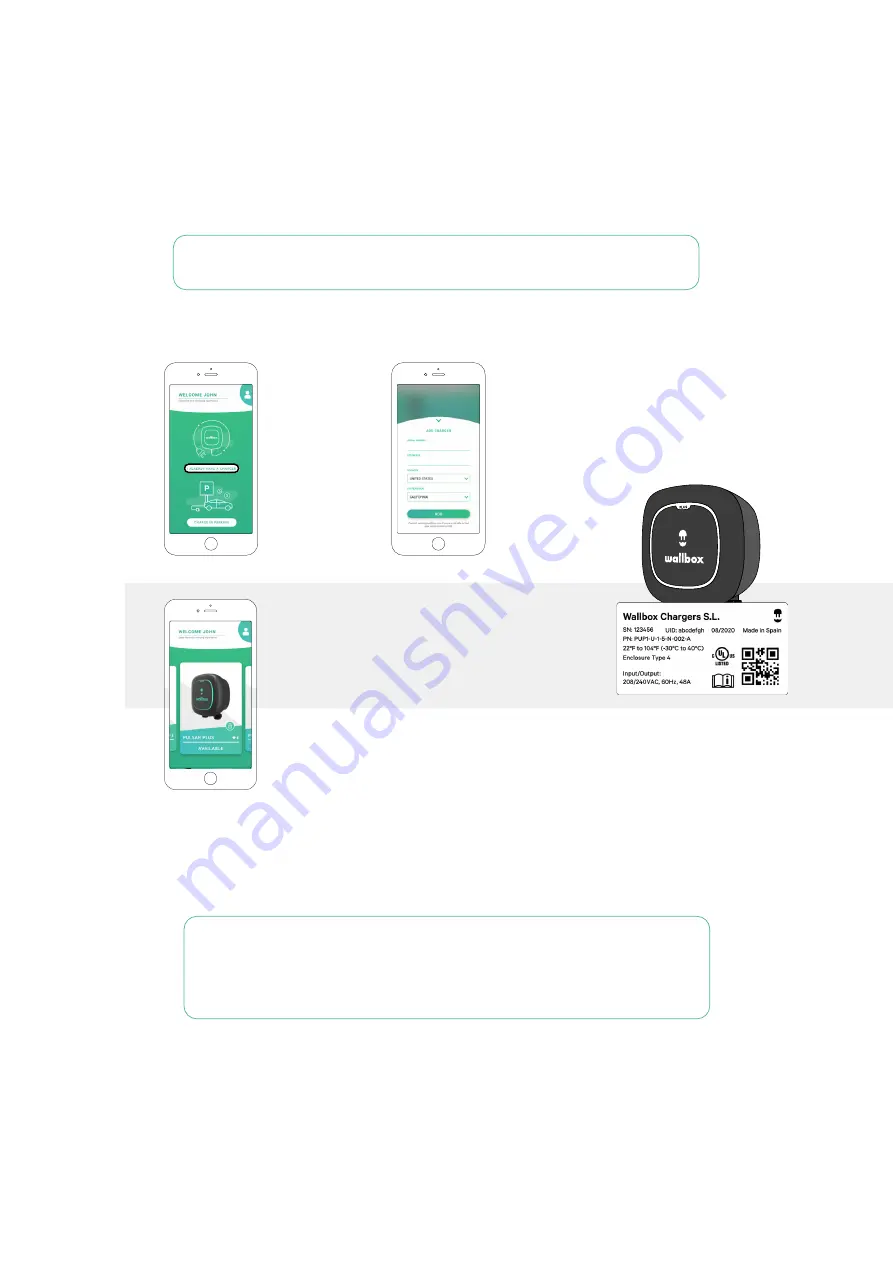
Locating your serial number and UID
Your charger serial number and UID are
located on the product label placed on the
side of your charger.
The charger will now appear
in your charger list.
Basics - Setup
QUICK REFERENCE GUIDE
3.
On the “Add Charger” screen, add the serial number and UID
number for the charger you are registering.
2.
On the app home screen, tap
“I already have a charger”.
4.
Ensure that the location setting
is correct for your state/province.
5.
Tap
ADD.
Connecting via Bluetooth
After you have linked to and registered your charger via the myWallbox app, you are ready to connect to your
charger for the first time with your mobile device.
Note: In order to configure a Wi-Fi connection you first need to connect to your charger via
Bluetooth following these instructions. Once connected via Bluetooth, go to Connecting your
charger to a Wi-Fi network.
You do not need a Wi-Fi connection to manage and control your charger--you can perform these
functions via Bluetooth alone. Please note, however, that you will require a Wi-Fi connection in order
to access additional smart home features like voice control.
1.
Ensure that Bluetooth is enabled on your mobile device. For the best Bluetooth connection, stand near to the
charger with your mobile device without any wall or obstruction in between.
2.
Launch the myWallbox app on your mobile device and login.
3.
Select your charger from the charger list.
Adding/linking your charger to your myWallbox account
1.
Launch the myWallbox app and login.
Note: Your login username and password are the same that were generated when you created your
myWallbox account. In case you have forgotten your login information, tap the Forgot Password
option to generate a new password.


