background image

English   

- 18 -

When set, this option gets the maturity information 
from the broadcast and if this maturity level is disabled, 
the TV will not display the related video-audio.

Menu Lock

Use “ ” or “ ” buttons to set Menu Lock. Here, you 
can set/reset locking function for the main menu or 
the installation menu to restrict access. If the menu 
lock is disabled, there will be free access to the menu 
system. 

Disabled: 

All menus are unlocked.

All Menus:

 All menus are accessible only with the 

correct lock key. So the user cannot add, delete, 
rename or move the channels and cannot set the 
timers.

Installation Menu:

 Installation menu is locked, so the 

user cannot add channels. Changes will be updated 
after exiting Con

fi

 guration Menu.

Set PIN

Use “ ” or “ ” buttons to go to “Set PIN”  option. 
Press 

OK

 to display the “Set PIN” window. Use 

numeric buttons to enter new pin number you will need 
to input your new pin a second time for veri

fi

 cation 

purposes. The factory default pin number is 0000, if 
you change the pin number make sure you write it 
down and keep it safe.

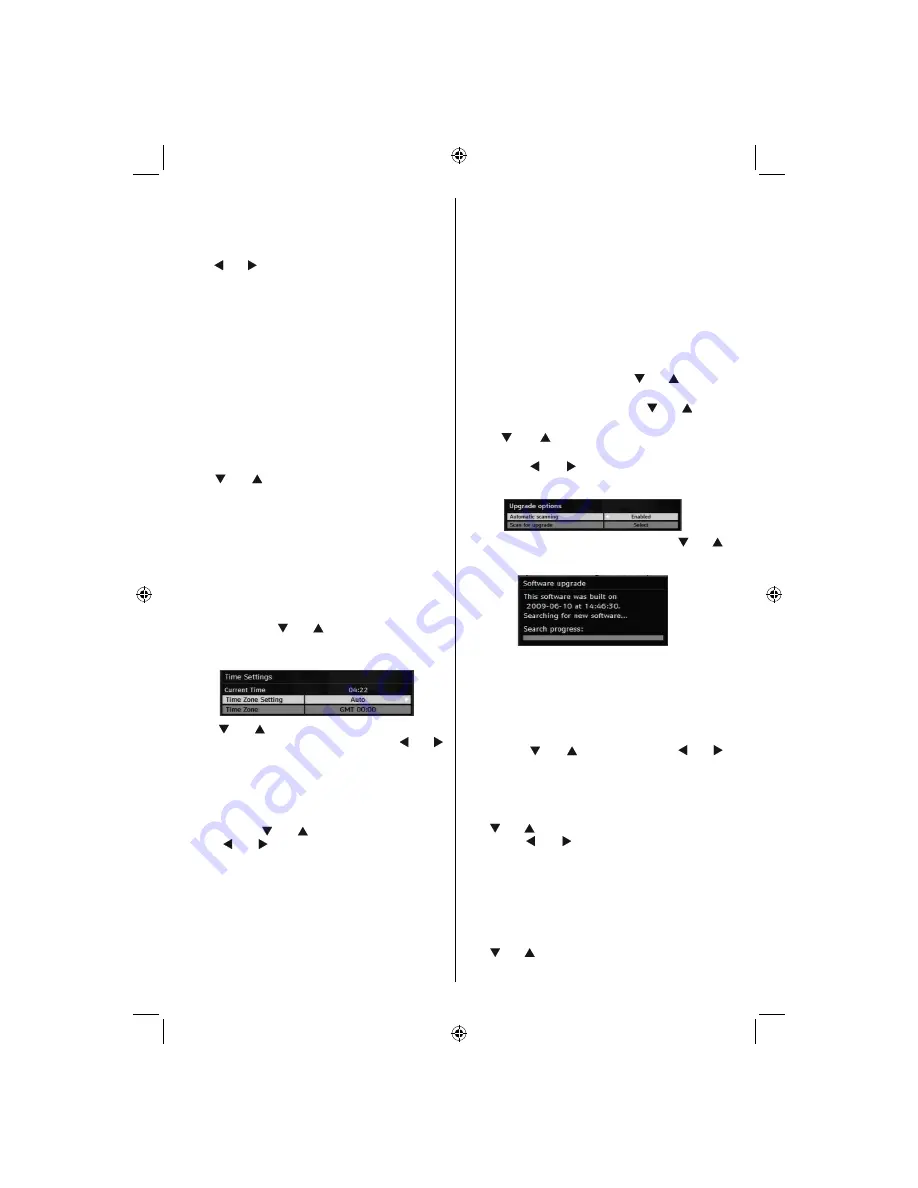
Time Settings(**)

(**): Time setting will not be available for UK.

In the con

fi

 guration menu, highlight the Time Settings 

item by pressing “ ” or “ ” buttons. Press 

OK 

and 

Time Settings sub menu will be displayed on the 
screen:

Use  “ ” or “ ” buttons to highlight the Time Zone 
Setting. Time Zone Setting  is set using  “ ” or “ ” 
buttons. It can be set to AUTO or MANUAL. When 
AUTO is selected, Current Time and Time Zone 
options will not be available to be set. 
If MANUAL option is selected as the Time Zone 
Setting, Time Zone can be altered: 
• By pressing “ ” or “ ” buttons select Time Zone. 

Use “ ” or “ ” buttons to change the Time Zone 
between GMT-12 or GMT+12. Current Time on the 
top of the menu list will then change according to 
the selected Time Zone.

Receiver Upgrade
Over Air Download (OAD)

To ensure that your TV always has the most up to date 
information, use this setting. Please ensure that the TV 
is set to    standby mode. The  TV automatically 
powers up at 3.00 A.M. each day and searches for 
any new information which may be broadcast and 
will download this to your receiver automatically. This 
operation will normally take approximately 30 minutes. 
If you have an important recording to be carried out at 
3.00 A.M. and you do not want to interrupt it, disable 
auto OAD search by performing the following:
• Press 

“M”

 button and using the “ ” or “ ” buttons 

to choose 

Setup

 and press 

OK

 button.

• Highlight Con

fi

 guration menu with “ ” or “ ” keys 

and press 

OK

.

• Use “ ” or “ ” buttons to choose “

RECEIVER 

UPGRADE

” and press 

OK

 button.

• Using the “ ” or “ ” button change “

Automatic 

scanning

” from Enabled to Disabled.

• Highlight “

Scan for upgrade

” menu with “ ” or “

”keys and pres 

OK

 to commence upgrade.

• After the search progress is completed, the message 

“ Completed searching for upgrade. No new software 
was found” appears on the screen if no new software 
is found.

Dolby Digital (*) (Optional)

In the Con

fi

guration Menu, highlight the Dolby D item 

by pressing “ ” or “ ” buttons. Use the “ ” or “
”buttons to set the Dolby Digital as On or Off. If the 
channel that you are watching supports Dolby Digital, 
you can turn this setting on.

Hard of Hearing (*)

Use “ ” or “ ” button to select Hard of Hearing and 
then press “ ” or “ ” button to set this setting as 
On or Off.
If the broadcaster enables any special signal 
concerning the audio, you can set this setting as On 
to receive such signals.

(*) Hard of Hearing function will not be available for UK.

Channel List

Use “ ” or “ ” buttons to go to Channel List option. 
Use  or  buttons to toggle Channel List Mode. If you 

[GB]_MB36_MASQUE_HDIDTV-MPEG4_BRONZE8_32843W_1205UK_10069999_50176032.indd   18

[GB]_MB36_MASQUE_HDIDTV-MPEG4_BRONZE8_32843W_1205UK_10069999_50176032.indd   18

06.09.2010   09:12:12

06.09.2010   09:12:12

Summary of Contents for WP3211LCD

Page 1: ...COLOUR TELEVISION WITH REMOTE CONTROL OPERATING INSTRUCTIONS WP3211LCD BE WALKER WISE logon to www walker ie...

Page 2: ...List 15 Navigating the Entire Channel List 15 Moving the channels in the channel list 15 Deleting the Channels in the Channel List 15 Renaming channels 15 Adding Locks to Channels 16 Setting Favourite...

Page 3: ...oduction Thank you for choosing this product This manual will guide you for the proper operation of your TV Before operating the TV please read this manual thoroughly Please do keep this manual in a s...

Page 4: ...one Unauthorized substitutions may result in fire electrical shock or other hazards Servicing Please refer all servicing to qualified personnel Do not remove the cover yourself as this may result in...

Page 5: ...dset when it is not to be used for a long period Otherwise it can be damaged due to any leakage of batteries Remote range is approximately 7m 23ft Switching the TV On Off To Switch the TV On Connect t...

Page 6: ...ill also reduce energy consumption Disconnect power when going away for longer time Note that annually using the TV set in Power Save Mode has more power efficiency than disconnecting the TV from the...

Page 7: ...nd menu Page up Channel list 18 in DTV mode Menu on off 19 Ok Confirm 20 Cursor Left 21 AV Source 22 Info 23 Volume up down 24 Mute 25 Picture mode selection 26 Time Subpage in TXT mode Subtitle on of...

Page 8: ...a subwoofer unit Audio Line Outs 2 output audio signals to an external device such as an optional sound system To connect the external speakers to your TV use AUDIO LINE OUTS of the TV with an audio...

Page 9: ...tly watched source Use an SPDIF coaxial cable to transfer audio signals to a device that has S PDIF input 8 S PDIF Digital Out outputs digital audio signals of the currently watched source Use a digit...

Page 10: ...nals of external devices Connect 5 the audio cable between the AUDIO INPUTS on the TV and the AUDIO OUTPUT jacks on your device Note If you connect a device to the TV via the VIDEO INPUT you should al...

Page 11: ...EW USB MEMORY USB Memory Connection Plug your USB device to the USB input of the TV IMPORTANT The TV supports only FAT32 disk formatting NTFS format is not supported If the plugged USB disk is not rec...

Page 12: ...uts Scart sockets Component video inputs Component audio inputs DVD Player Using Side AV Connectors You can connect a range of optional equipment to your LCD TV Possible connections are shown below No...

Page 13: ...are described in the following sections Volume Setting Press V button to increase the volume Press V button to decrease the volume Avolume level scale slider will be displayed on the screen Programme...

Page 14: ...tton To cancel press the BLUE button When finished press OK or RED button to continue and the following OSD will be displayed After automatic tuning is finalized a programme list will appear on the sc...

Page 15: ...es by pressing the SUBTITLE button Digital Teletext For UK only Press the TELETEXT button The digital teletext information appears Operate it with the coloured buttons buttons and OK button The operat...

Page 16: ...ced Do you want to continue OSD will be displayed Press OK to confirm or select No to cancel Note The following screen will be displayed when want to move or delete channels that are sorted by LCN log...

Page 17: ...ram Guide This section is same with the instructions given in the General Operations page Please see Electronic Programme Guide EPG section in the General Operations part Timers To display timers wind...

Page 18: ...ntrol to exit Favourite Mode Use this function to enable or disable favourite mode Press or button to set this function as on or off Scan Encrypted Scan Encrypted Channel feature will always be ON aft...

Page 19: ...lected Time Zone Receiver Upgrade Over Air Download OAD To ensure that your TV always has the most up to date information use this setting Please ensure that the TV is set to standby mode The TV autom...

Page 20: ...Use or buttons to highlight Active Antenna option When antenna power option is set as On by pressing or button 5V will be transmitted to the antenna output This feature enables the use of active ante...

Page 21: ...me table you will see the programme numbers and names assigned to the programmes Manual Search In Manual Search the number of the multiplex is entered manually and only that multiplex is searched for...

Page 22: ...lect Media Browser item from the main menu by using or buttons Press OK to view Media Browser contents You can play audio and photo and video optional files from a USB flash disk Note Some USB complia...

Page 23: ...ts you can set the related mode option Press or button to select Mode Press or button to choose from one of these options Pixellence optional Cinema Dynamic and Natural Pixellence optional By selectin...

Page 24: ...n Use or buttons to change picture zoom to Auto 16 9 4 3 Panoramic 14 9 Cinema Subtitle or Zoom Note Picture mode settings can be set 16 9 or 4 3 only while in Digital Tv mode Reset Press or button to...

Page 25: ...on on your remote control the Audio Out indicaticator will be displayed on the screen If you select to Audio Out as Speaker by using or button you can get audio through the TV s speakers Dolby Virtual...

Page 26: ...elect PIP Position item by using or button Use or button to adjust PIP position Positions available are Bottom Right Bottom Left Top Left and Top Right Source PIP Source setting enables you to select...

Page 27: ...HDMI mode this feature will be visible except for 1080i 1080P resolution Full Mode optional If you connect a device via HDMI or YPbPr connectors and set 1080i 1080P resolutions Full Mode item will be...

Page 28: ...and or button to select the other letters By pressing the RED button you can store the name Move Select the programme which you want to insert by navigation buttons Press the GREEN button By navigatio...

Page 29: ...side or left hand side of the screen Select H Position item by using or button Use or button to adjust the value V Vertical Position This item shifts the image vertically towards the top or bottom of...

Page 30: ...mic Natural Cinema and Pixellence optional Note This function will not be available while in PC mode Freezing Picture You can freeze the picture on the screen by pressing the OK button on the remote c...

Page 31: ...again to enlarge the bottom half of the page Press again to revert back to normal size Reveal Shows hidden information e g solutions of games Hold Holds a text page when convenient Press again to resu...

Page 32: ...e channels The picture quality may degrade when two peripherals are connected to the TV at the same time In such a case disconnect one of the peripherals No Picture Is the aerial connected properly Ar...

Page 33: ...9 VESA 16 9 4 3 14 800 600 85 53 7 VESA 16 9 4 3 15 832 624 75 49 7 MAC 16 9 4 3 16 1024 768 43 35 5 VESA interlace 16 9 4 3 17 1024 768 60 48 4 VESA 16 9 4 3 18 1024 768 70 56 5 VESA 16 9 4 3 19 102...

Page 34: ...50Hz O 576P 50Hz O 720P 50Hz O 720P 60Hz O 1080I 50Hz O 1080I 60Hz O 1080P 50Hz X 1080P 60Hz X 1080P 24 HZ X X Not Available O Available Note In some cases a signal on the LCD TV may not be displayed...

Page 35: ...if Scart 1 has a RGB signal Restrictions Scart 1 source must have RGB signal to perform PIP PAP with sources TV Scart 2 FAV If these sources are set to main window and Scart 1 does not have a RGB sign...

Page 36: ...xternal Subtitles optional srt Only time based subtitle formats are supported Frame based subtitle formats e g MicroDVD are not supported sub except MicroDVD format Appendix E Supported DVI Resolution...

Page 37: ...794 x 520 Weight Kg 11 60 Digital Reception Transmission Standards DVB T MPEG2 DVB T MPEG4 HD i DEMODULATION Symbol rate COFDM with 2K 8K FFT mode Modulation 16 QAM 64 QAM FEC for all DVB modes automa...

Page 38: ...inal which is marked with the letter N or coloured Black The wire which is coloured brown or red must be connected to the terminal which is marked with the letter L or coloured Red For continued prote...

Page 39: ...50176032...

Reviews: